


Use Zapier with EZ File Drop
Zapier connects EZ File Drop to the other apps you use, so a finished submission can start something happening somewhere else. A Zap can post to a Slack channel, add a row to a tracker, create a task, or send a follow-up email, without any code. Zapier is available on the Business and Premium plans.
EZ File Drop works as a trigger only. A submission can start a Zap, and Zapier cannot reach back into EZ File Drop to create or change anything.
Setup happens in two places. You generate an API key in EZ File Drop, then use that key to connect your account in Zapier.
Generate your API key
Your API key is what lets Zapier reach your forms and submissions. It is generated in EZ File Drop, not in Zapier.
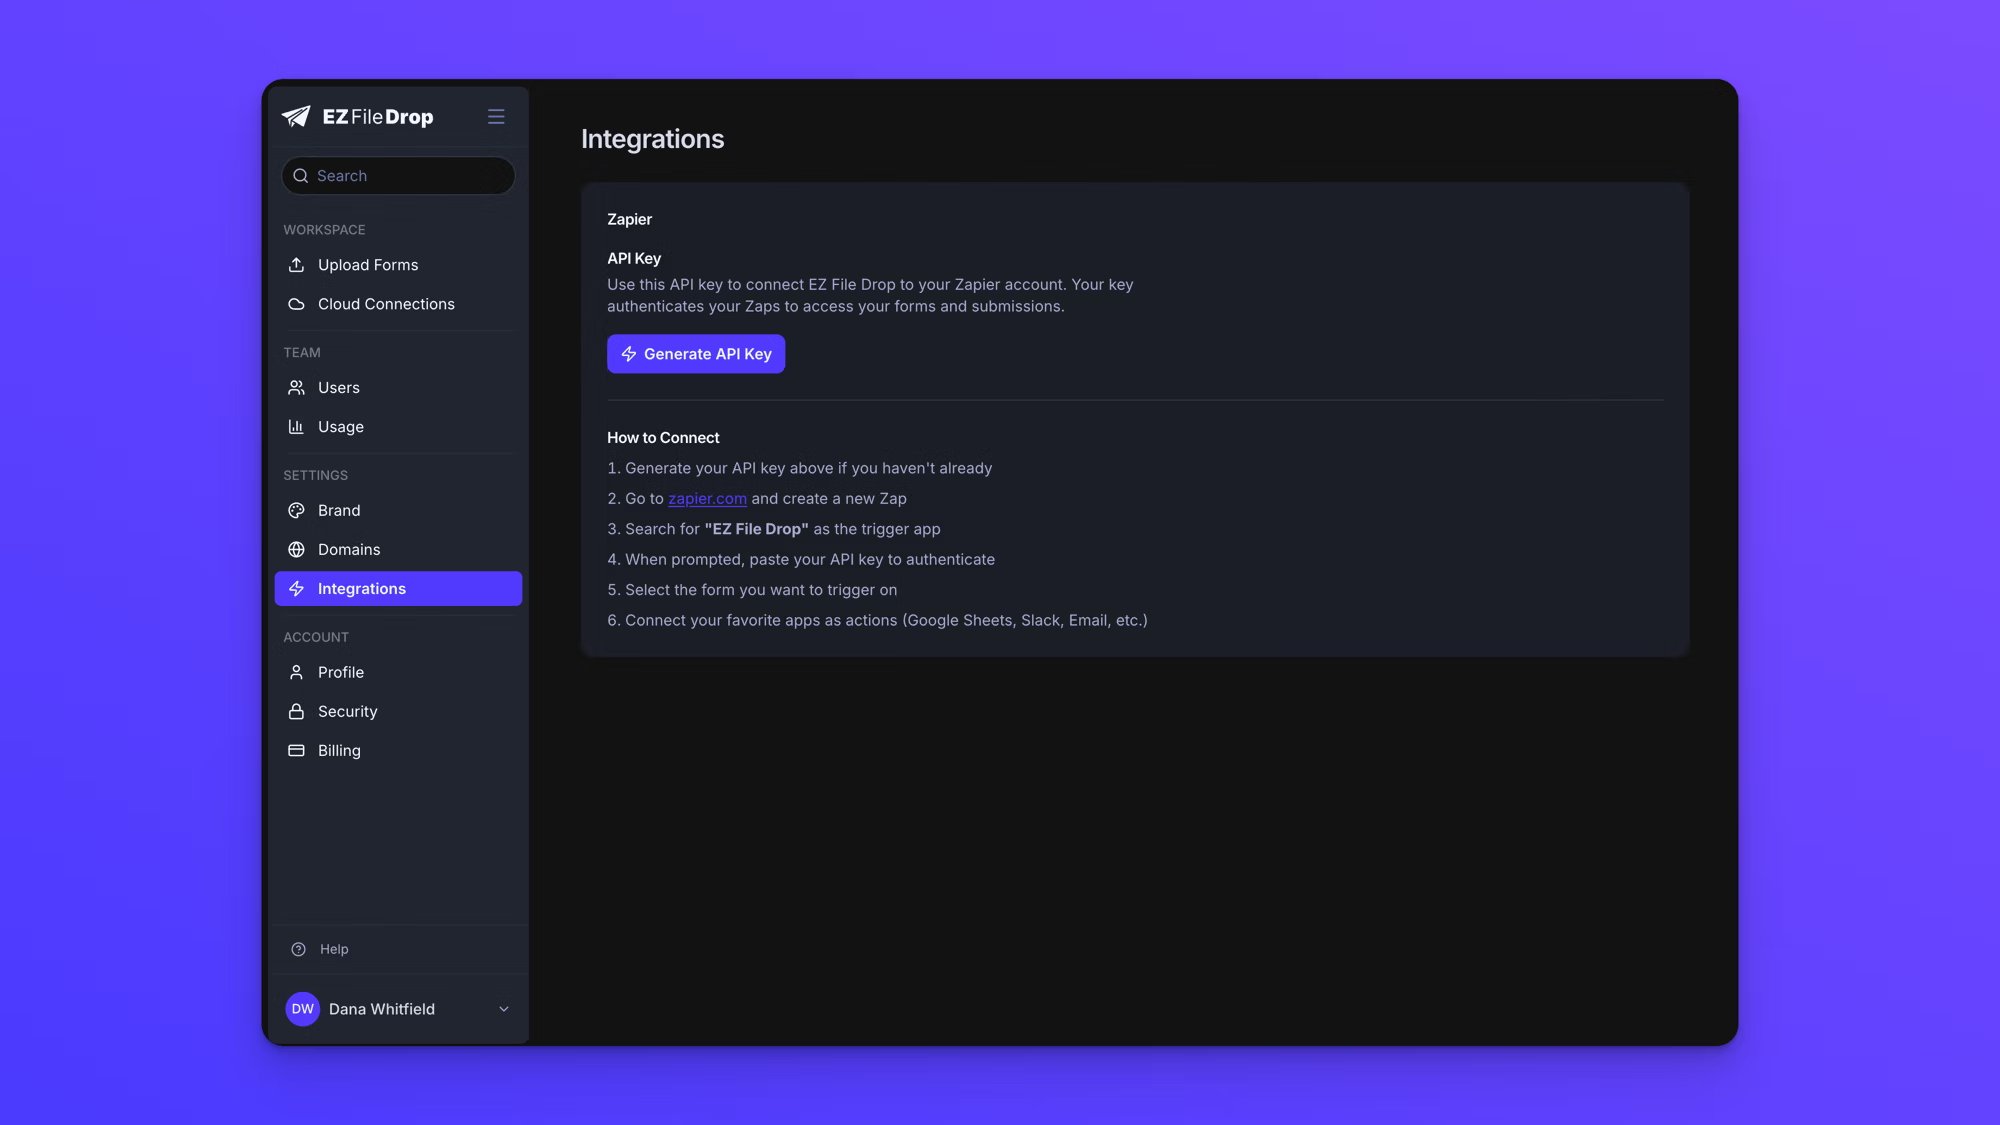
- In the left sidebar, click Integrations.
- Click Generate API Key.
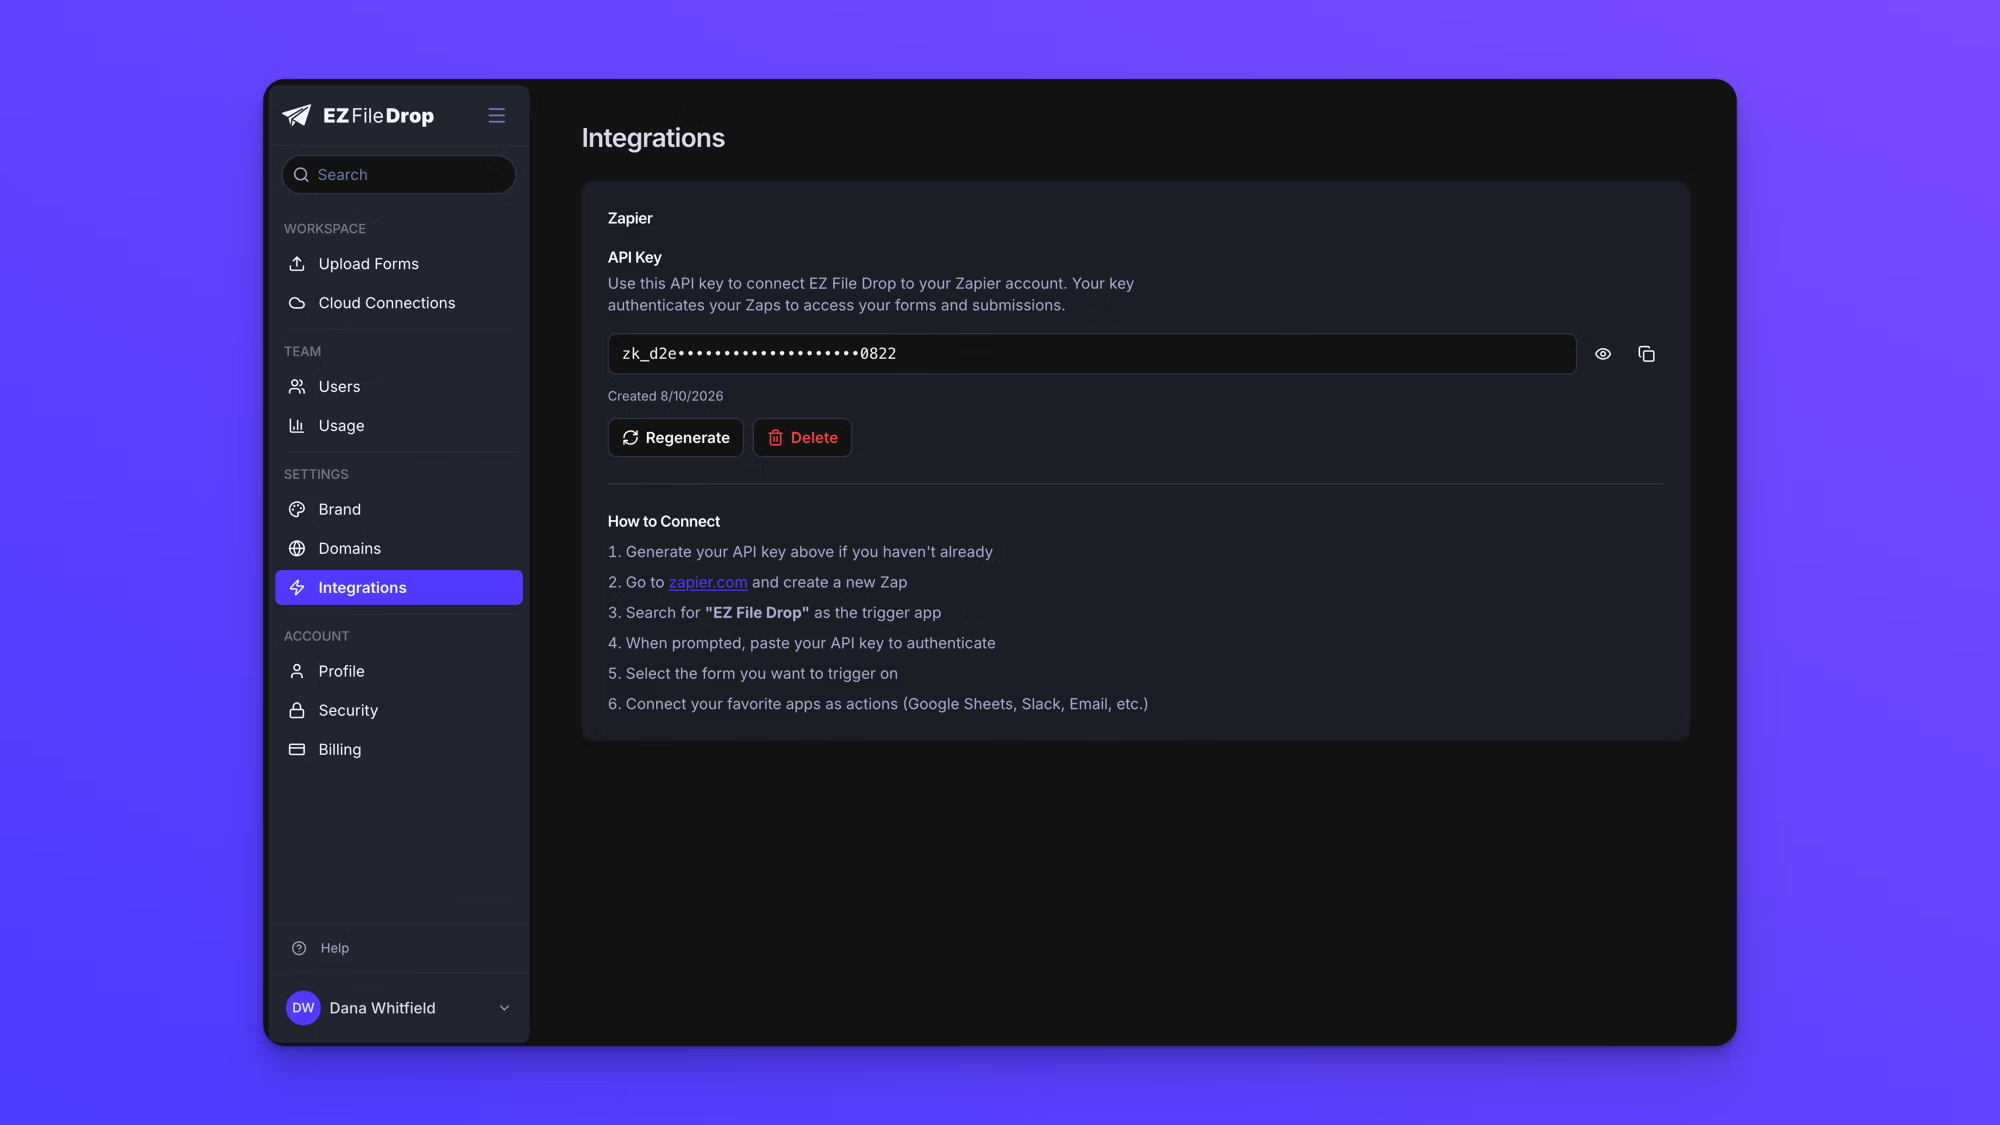
Your key appears below the button with most of it hidden. Click the eye icon to reveal it in full, then the copy icon to copy it. The date it was created shows underneath. The key stays on this page, so you can come back for it rather than storing it somewhere yourself. Every key begins with "zk_".
A key belongs to one person and one team. Everyone on your team generates their own from this page, and a key only sees the forms of the team it was generated in. If you work in more than one team, generate a key in each.
Connect EZ File Drop in Zapier
With your key copied, the rest happens on zapier.com.
- Create a new Zap.
- Search for EZ File Drop and choose it as the trigger app.
- Choose New Form Submission as the trigger event. It is the only trigger EZ File Drop offers.
- When Zapier asks you to sign in, paste your API key.
- Choose the form the Zap should trigger on.
- Add the apps that act on the submission, such as Slack, a CRM, or a project management tool.
The form list holds every form on your team. A form that has not been published yet is listed with "(Draft)" after its name. A Draft form cannot receive submissions, so a Zap built on one stays quiet until the form is published. See Form statuses.
New Form Submission is an instant trigger, so Zapier hears about a submission as soon as it finishes rather than checking for new ones on a schedule.
What the trigger sends
Every submission that finishes sends the same set of details, and you can use any of them in the actions that follow.
- The form's name and the form's ID.
- The submission's own ID.
- Every response given on the form.
- The number of files in the submission, and their combined size in bytes.
- The time the submission was made.
- Whether the delivery succeeded or failed.
Uploaded files themselves are not included. The trigger carries a count and a total size, never file names or links to the files. To reach the files, open the submission in EZ File Drop or go to your upload destination. See View and manage submissions.
Form responses arrive keyed by each field's internal ID rather than by its label, so in Zapier they appear as long strings of letters and numbers instead of Name, Email, and so on. Zapier shows a sample submission while you build the Zap, and that sample is how you tell which ID is which: read the value beside each ID and map the ones you need into your action. Sending a real test submission through the form before you build the Zap makes this much easier, because Zapier then has real values to show.
Putting a known value into every submission is a good way to get a field you can recognize. See Pre-fill forms with URL query parameters.
Tell a successful delivery from a failed one
The trigger fires when a submission reaches its final state. That is after every file has been delivered to your upload destination, or after the delivery has failed for good. Both cases send the same set of details.
The status is what tells them apart, reading "completed" or "failed". The event name reads "submission.completed" in both cases, so build your Zap on the status rather than the event name if it should only act on successful deliveries.
Regenerate or delete your key
Once a key exists, Generate API Key is replaced by Regenerate and Delete.
Regenerate issues a new key and invalidates the old one immediately. Its confirmation reads "This will invalidate your current API key. Any existing Zapier integrations using the old key will stop working and need to be updated." Every Zap using the old key stops until you paste the new one into Zapier.
Delete removes the key altogether. Its confirmation reads "This will permanently delete your Zapier API key. All active Zapier integrations will stop working immediately."
Behavior notes
- Zapier is available on the Business and Premium plans. If your team moves to Starter, submissions stop reaching Zapier, and the Zap itself stays as it is in Zapier.
- EZ File Drop is a trigger only. It offers one trigger, New Form Submission, and no actions or searches, so nothing in Zapier can create a form, edit a form, or add a submission.
- A Zap triggers on one form. A team automating several forms needs a Zap for each of them.
- The trigger fires once per submission, however many files came in.
- A live Zap runs on submissions that arrive after you turn it on. Older submissions are used only as samples while you are building the Zap.
- Setting up a Zap changes nothing on your form, so there is nothing to publish afterward.
- The Integrations panel inside a form, in the Build tab, repeats these setup steps for reference. There is nothing to set there for Zapier, because both the API key and the connection live outside the form.
- To send submission data to an endpoint of your own rather than to a Zap, see Use webhooks.