


Send form data to a Google Sheet
A form can write its submissions to a Google Sheet as they come in. Each submission adds the responses people gave, the time they submitted, and the name, link, and size of each uploaded file to a spreadsheet you can sort, filter, and share without opening EZ File Drop. This is available on the Business and Premium plans.
It does not matter where the form's files are delivered. A form that delivers files to Dropbox can still write its form data to a Google Sheet. What you need is a Google account connected under Cloud Connections. Until one is, the setting is dimmed and shows "Connect a Google account in your Cloud Connections to use this feature." To connect one, see Connect Google Drive.
This is set up per form. Connecting a Google account does not start any syncing on its own.
Turn on the Google Sheet
- On the Upload Forms page, open your form.
- In the Build tab, open Form Setup.
- Scroll to the bottom and find Save form data to a Google Sheet. Turn it on.
Two buttons appear: Create a new Google Sheet and Select an existing Google Sheet.
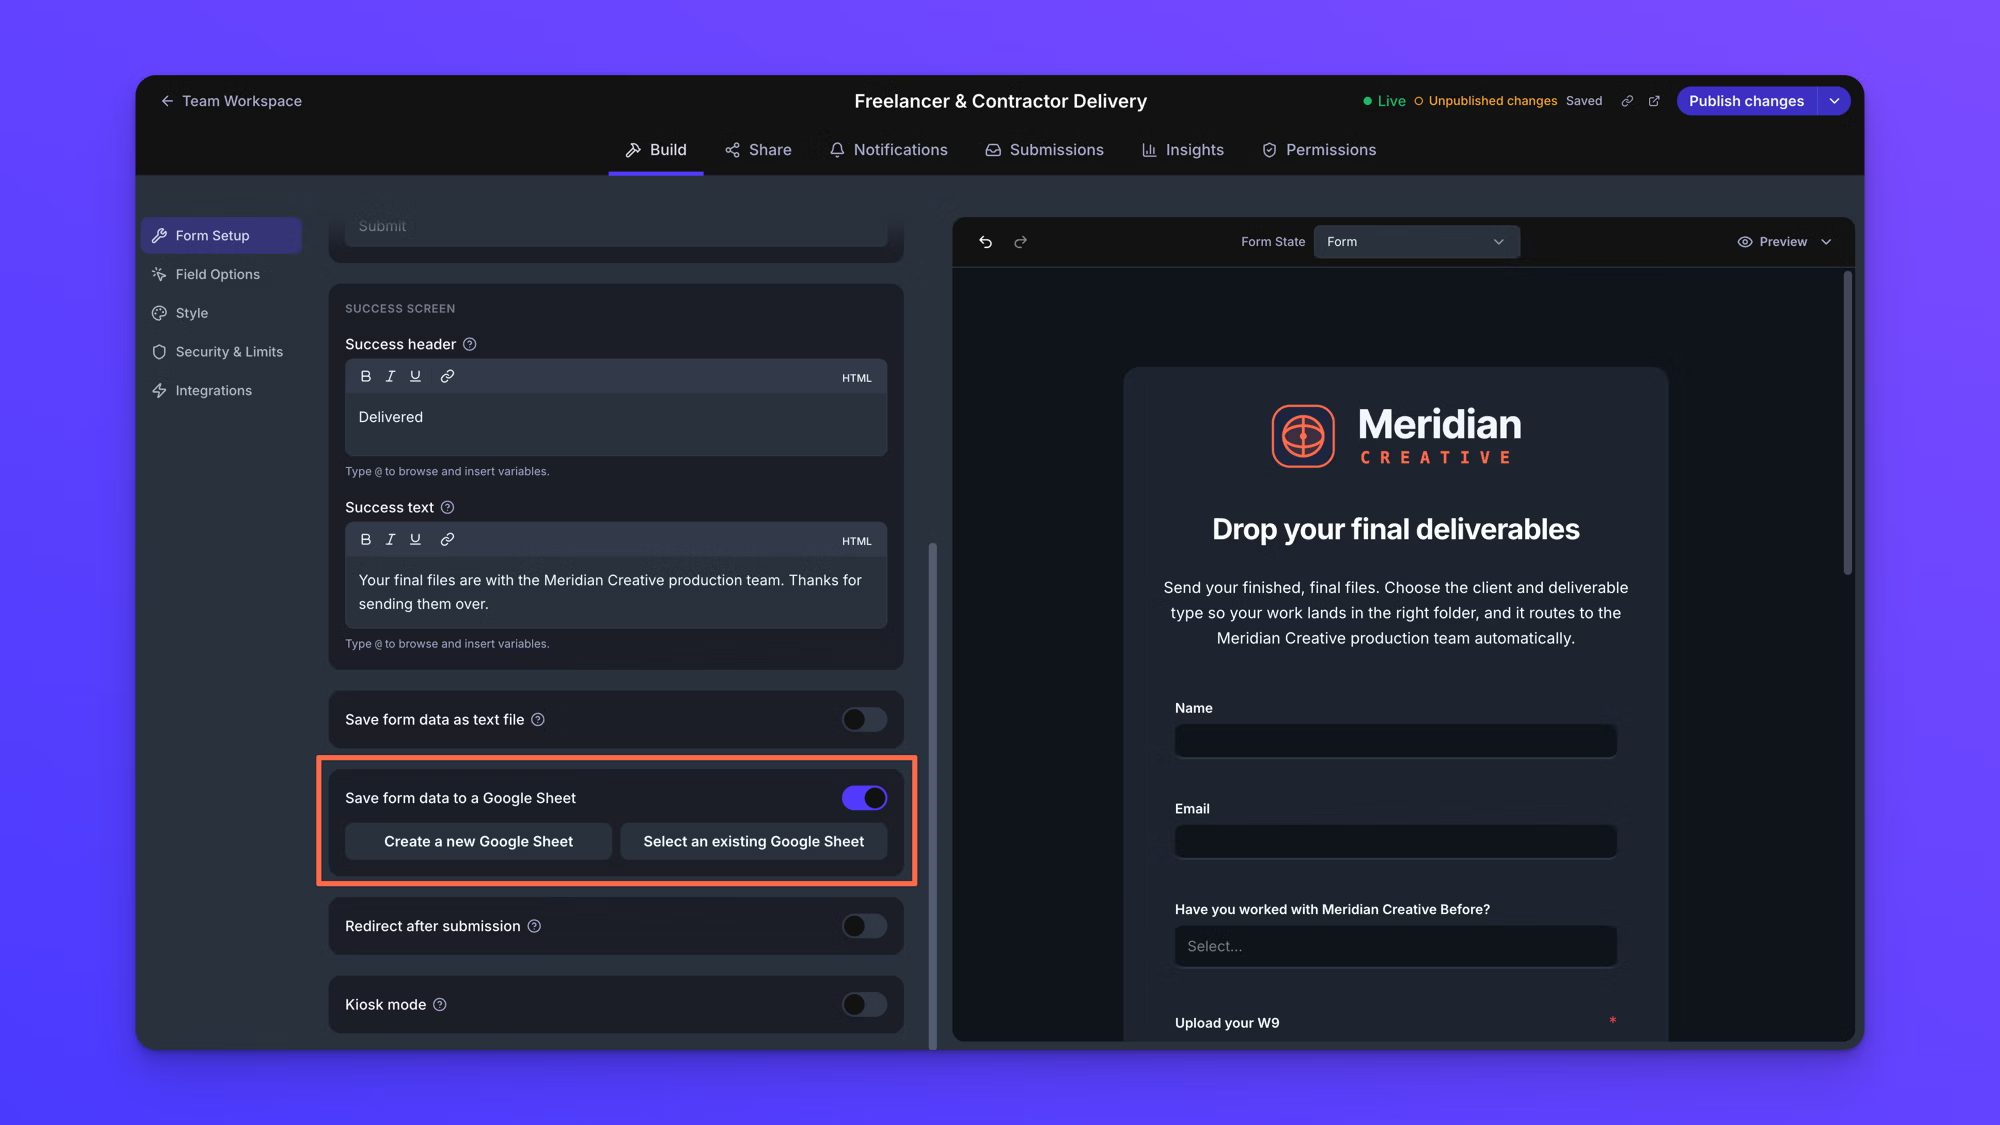
Create a new Google Sheet
This is the shorter path, and it makes a Sheet that is guaranteed to be in the right state.
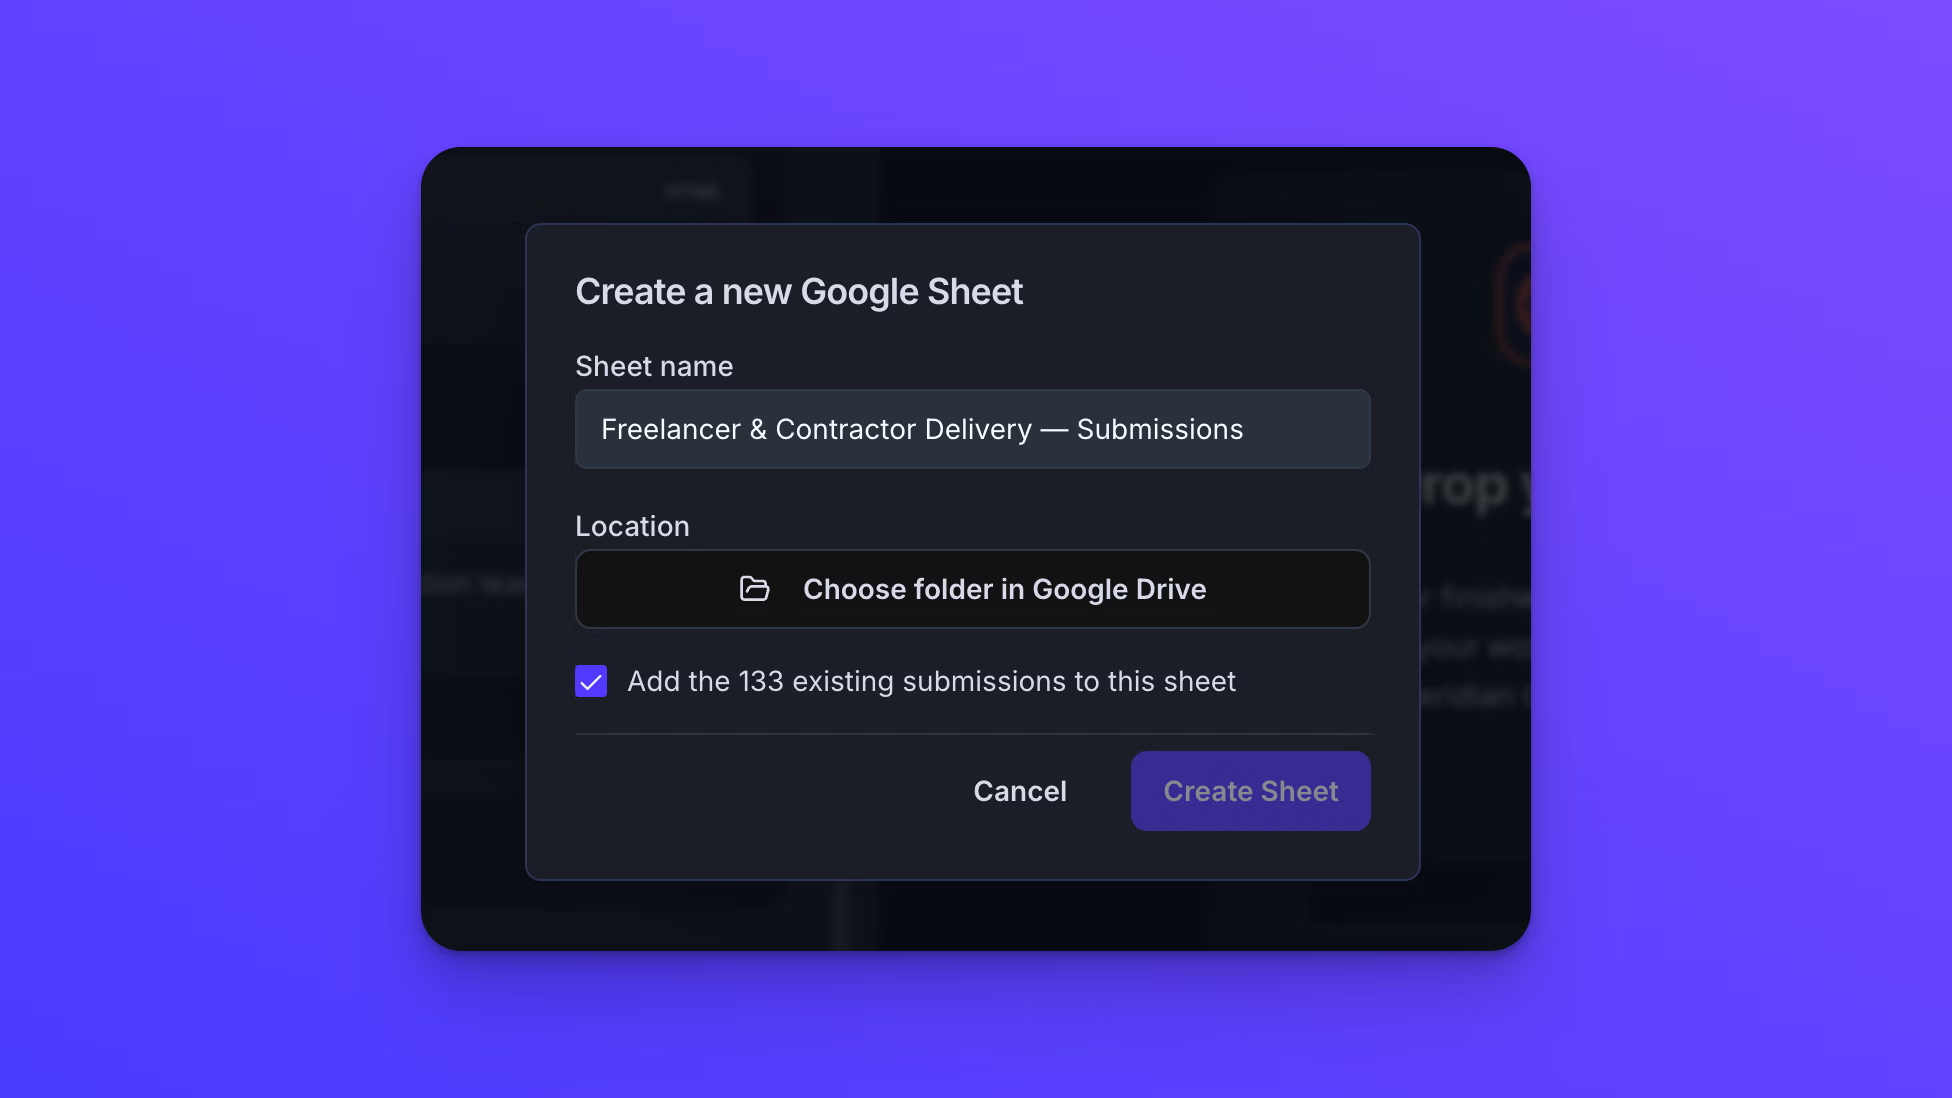
- Click Create a new Google Sheet.
- The Sheet name field is prefilled with your form's name followed by the word Submissions. Change it or keep it.
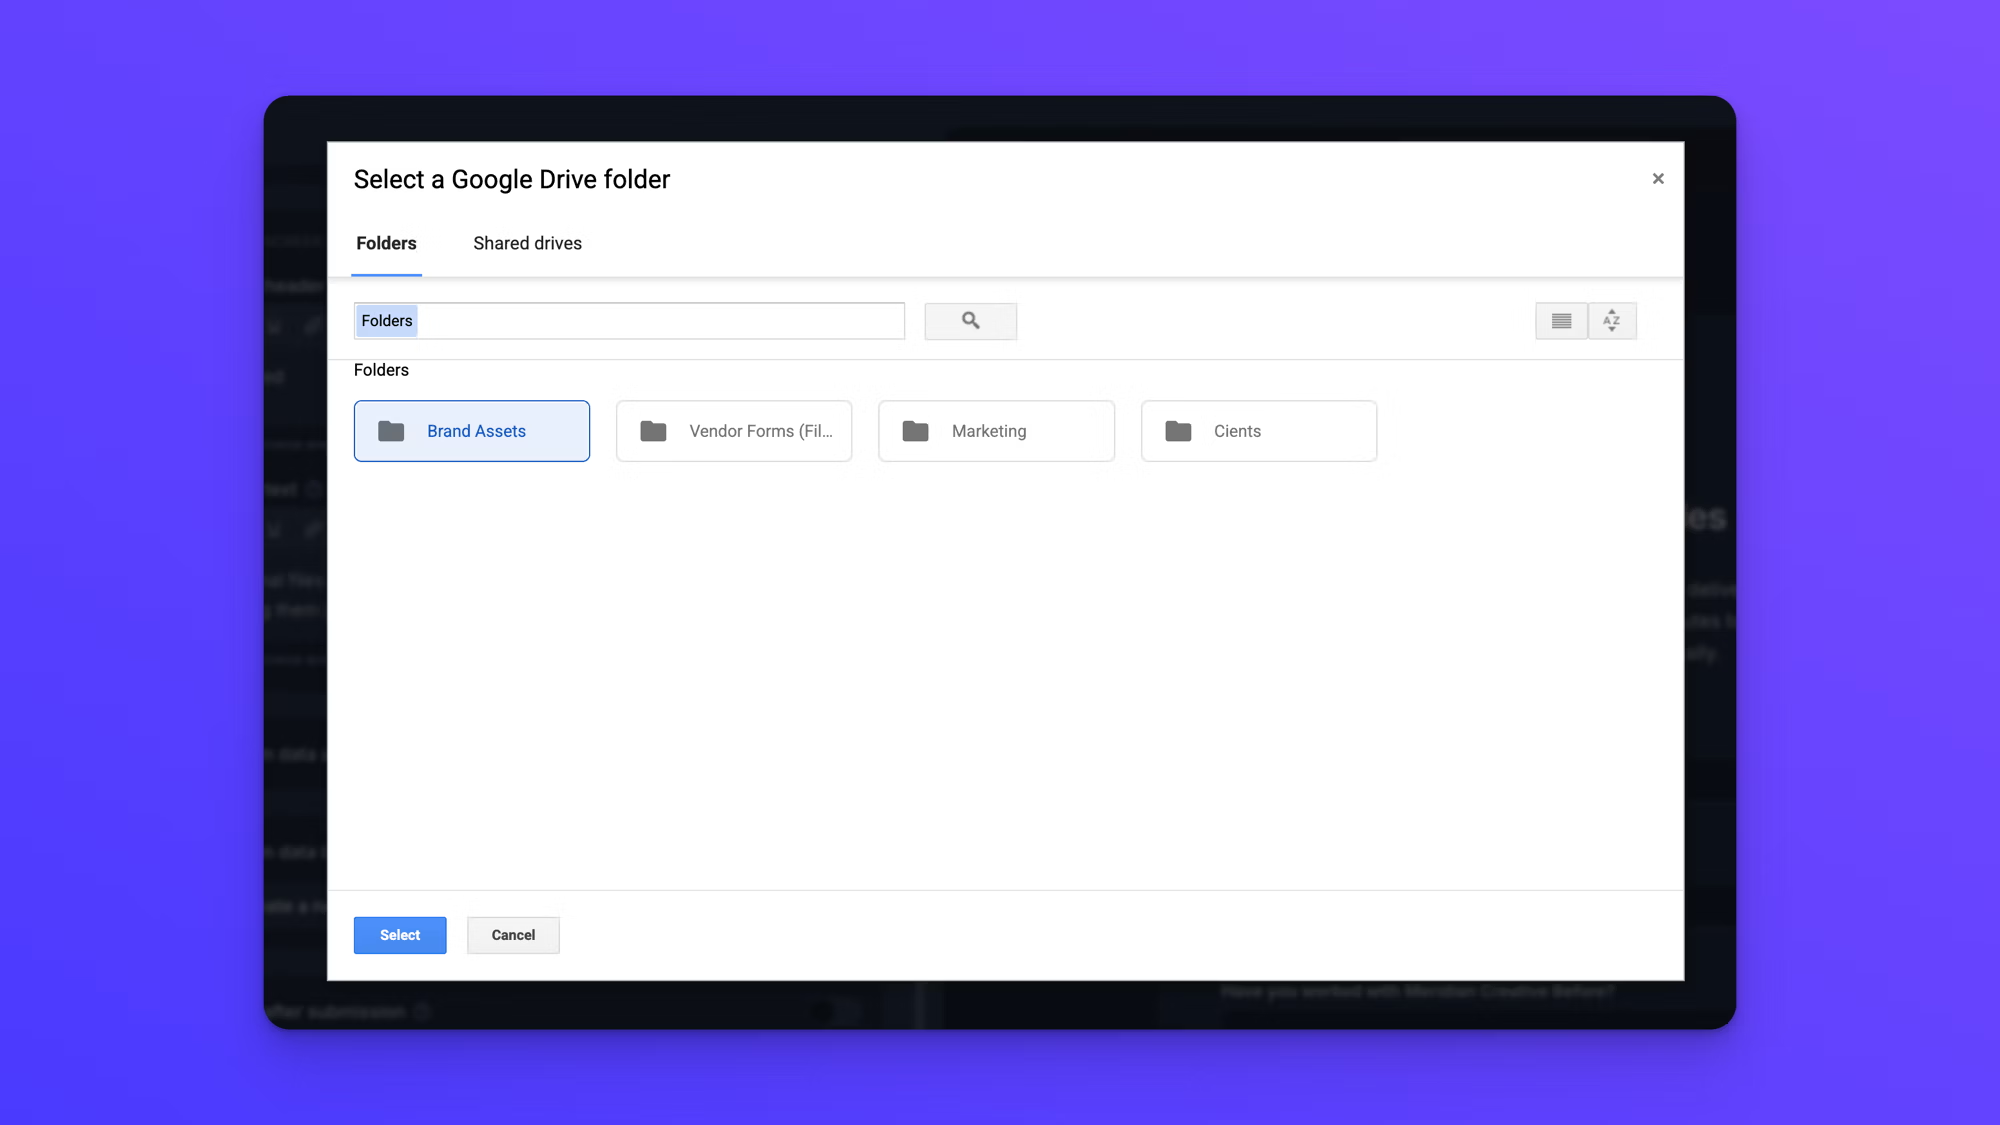
- Click Choose folder in Google Drive and pick where the Sheet should live. Google's own folder picker opens, with tabs for Folders and Shared drives.
- If the form already has submissions, decide whether to include them. See Add the submissions you already have, below.
- Click Create Sheet.
EZ File Drop creates the Sheet in your Drive, adds the column headings, and links it to the form in one step.
Link a Google Sheet you already have
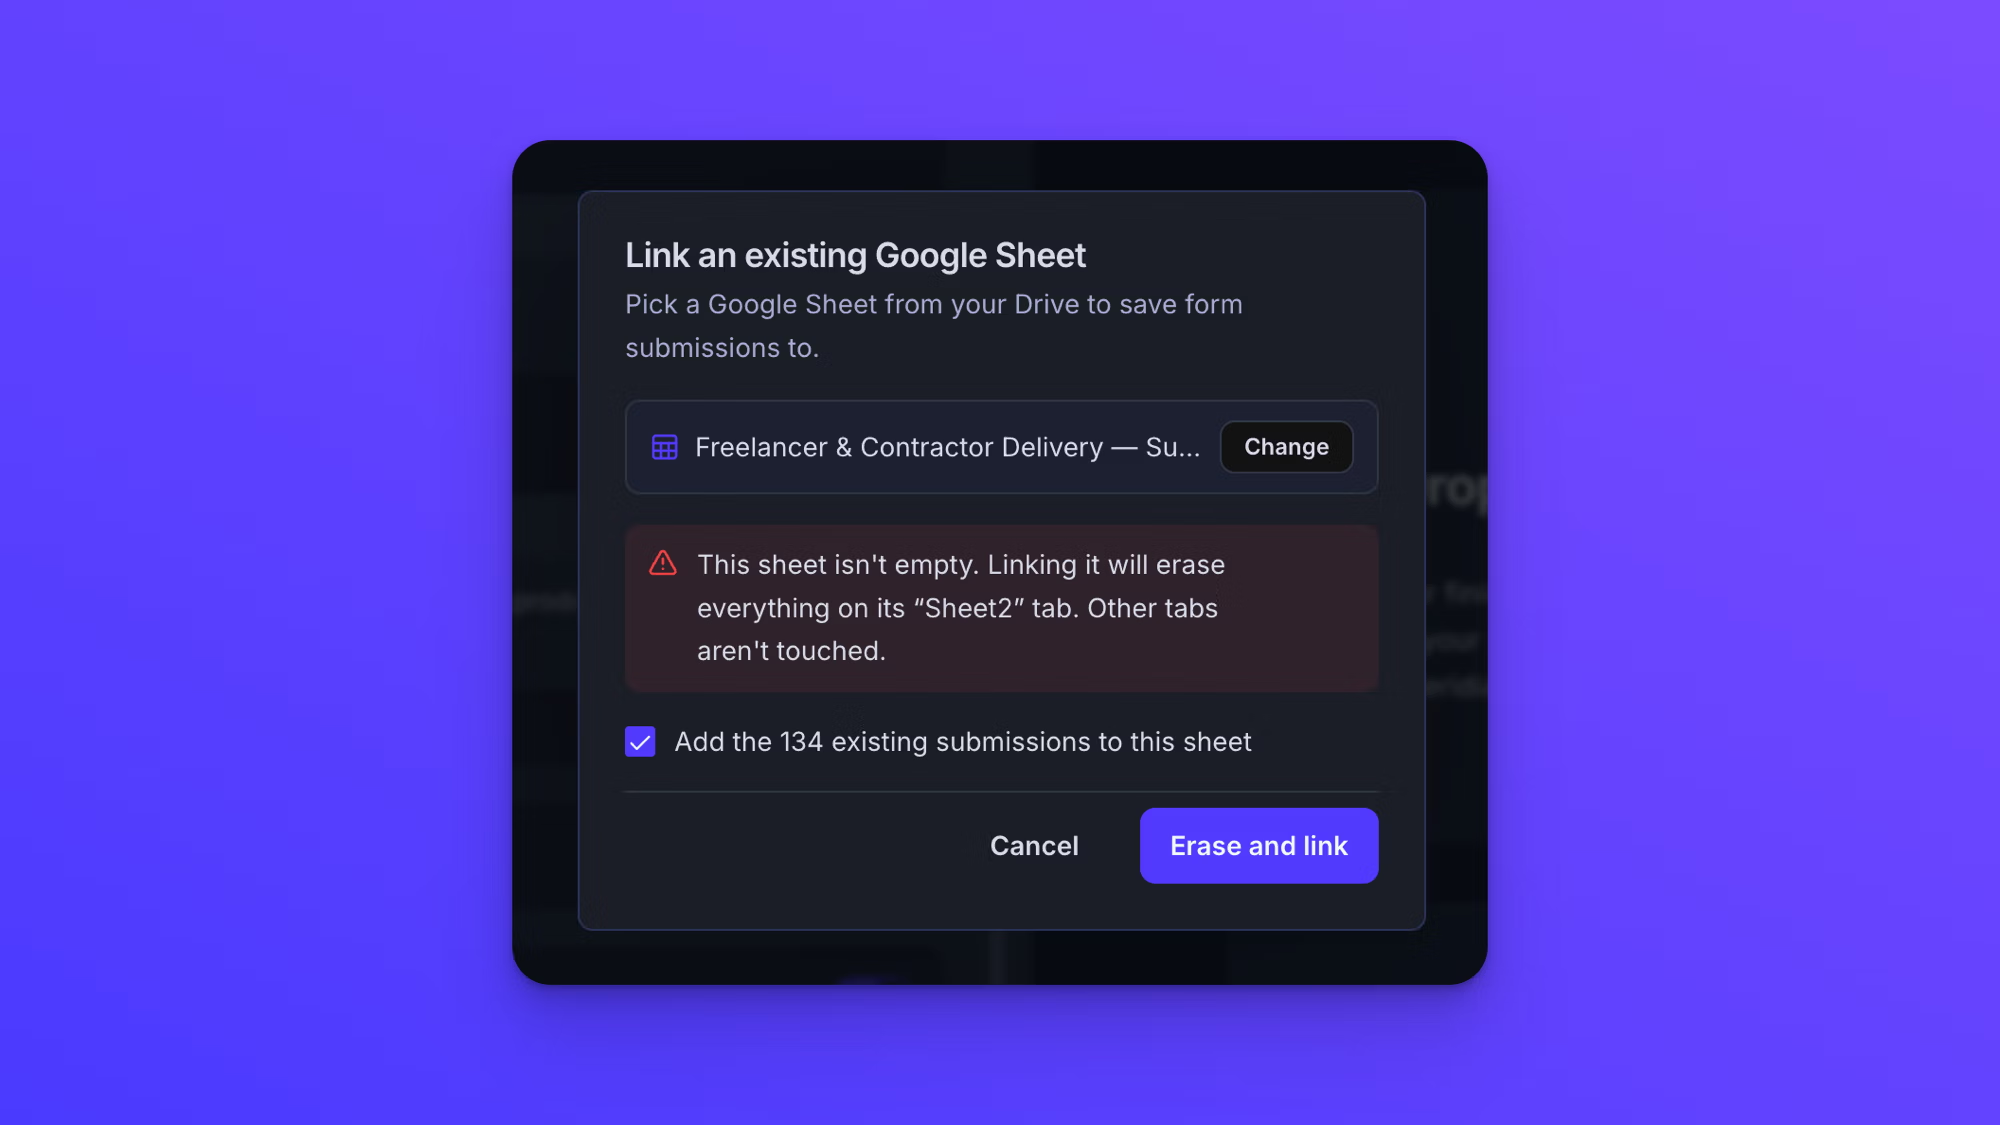
You can point the form at any Google Sheet in your Drive. EZ File Drop always writes to the Sheet's first tab, and linking a Sheet whose first tab has content erases that tab.
- Click Select an existing Google Sheet.
- Click Choose a Google Sheet. Google's spreadsheet picker opens, with tabs for Spreadsheets and Shared drives.
- Pick the Sheet. EZ File Drop checks it for a moment and shows "Checking sheet…".
- If the Sheet's first tab is blank, it links with no warning.
- If the first tab has content, a warning explains that linking will erase everything on that tab and names it, for example "Responses". Other tabs in the Sheet are not touched. Click Erase and link to go ahead.
If EZ File Drop cannot check the Sheet, it shows the same warning. Nothing is erased without one.
After the Sheet is linked, you can rename the tab or move it within the Sheet and syncing keeps working. EZ File Drop tracks the exact tab, not its name.
Add the submissions you already have
If the form already has submissions, both the create and link steps include a checkbox, ticked by default, that reads Add the 12 existing submissions to this sheet with your form's own count in place of 12. With a single submission it says "submission."
Leave it ticked to fill the Sheet with every existing submission right away. Untick it to write only new submissions from now on. Forms with no submissions don't show the checkbox.
The Google Sheet setting once a Sheet is linked
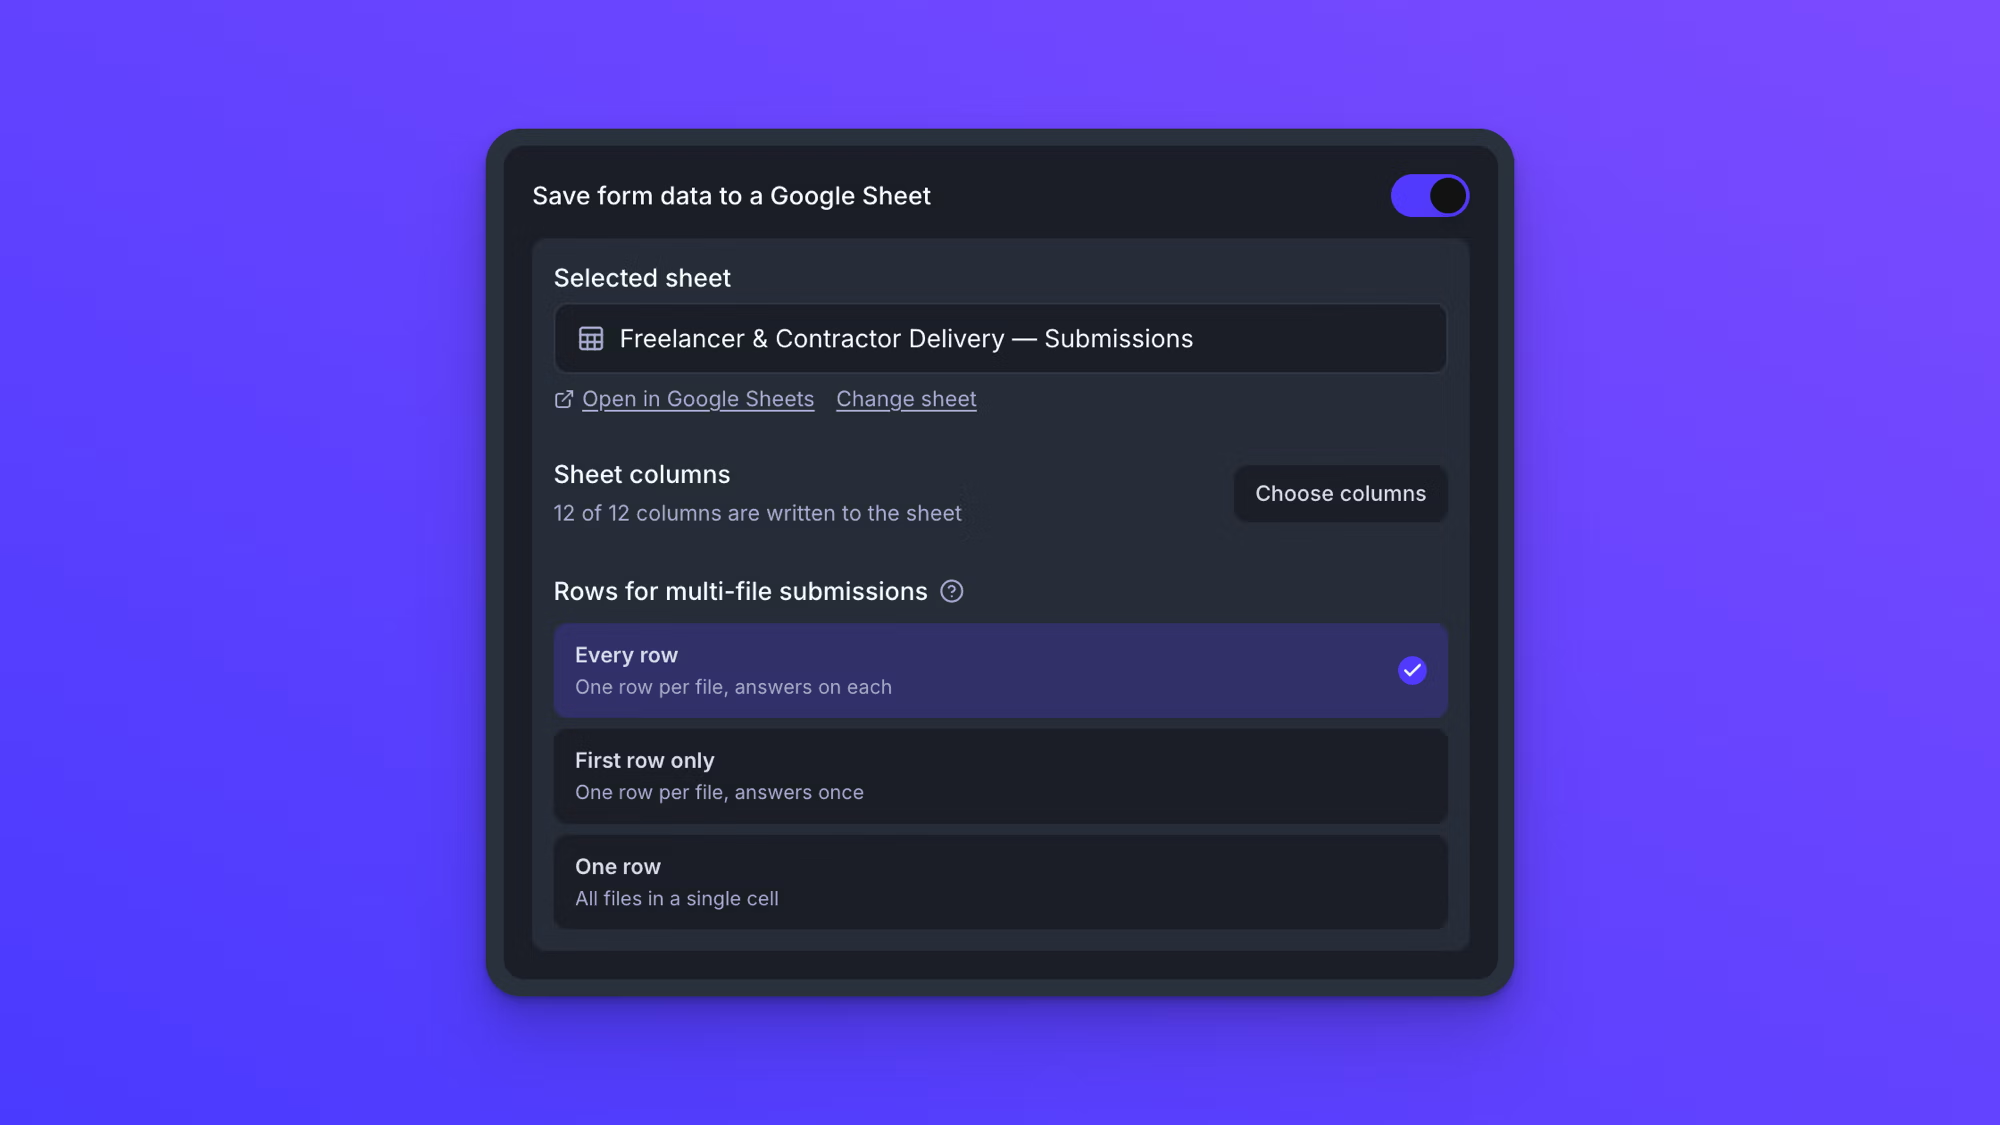
With a Sheet linked, the setting shows:
- "Selected sheet": the Sheet's name, in a read-only field.
- Open in Google Sheets: opens the Sheet in a new tab.
- Change sheet: switches the form to a different Sheet, new or existing.
- "Sheet columns": a summary such as "10 of 14 columns are written to the sheet", with a Choose columns button.
- "Rows for multi-file submissions": the row layout, with three options.
Choose which columns are written
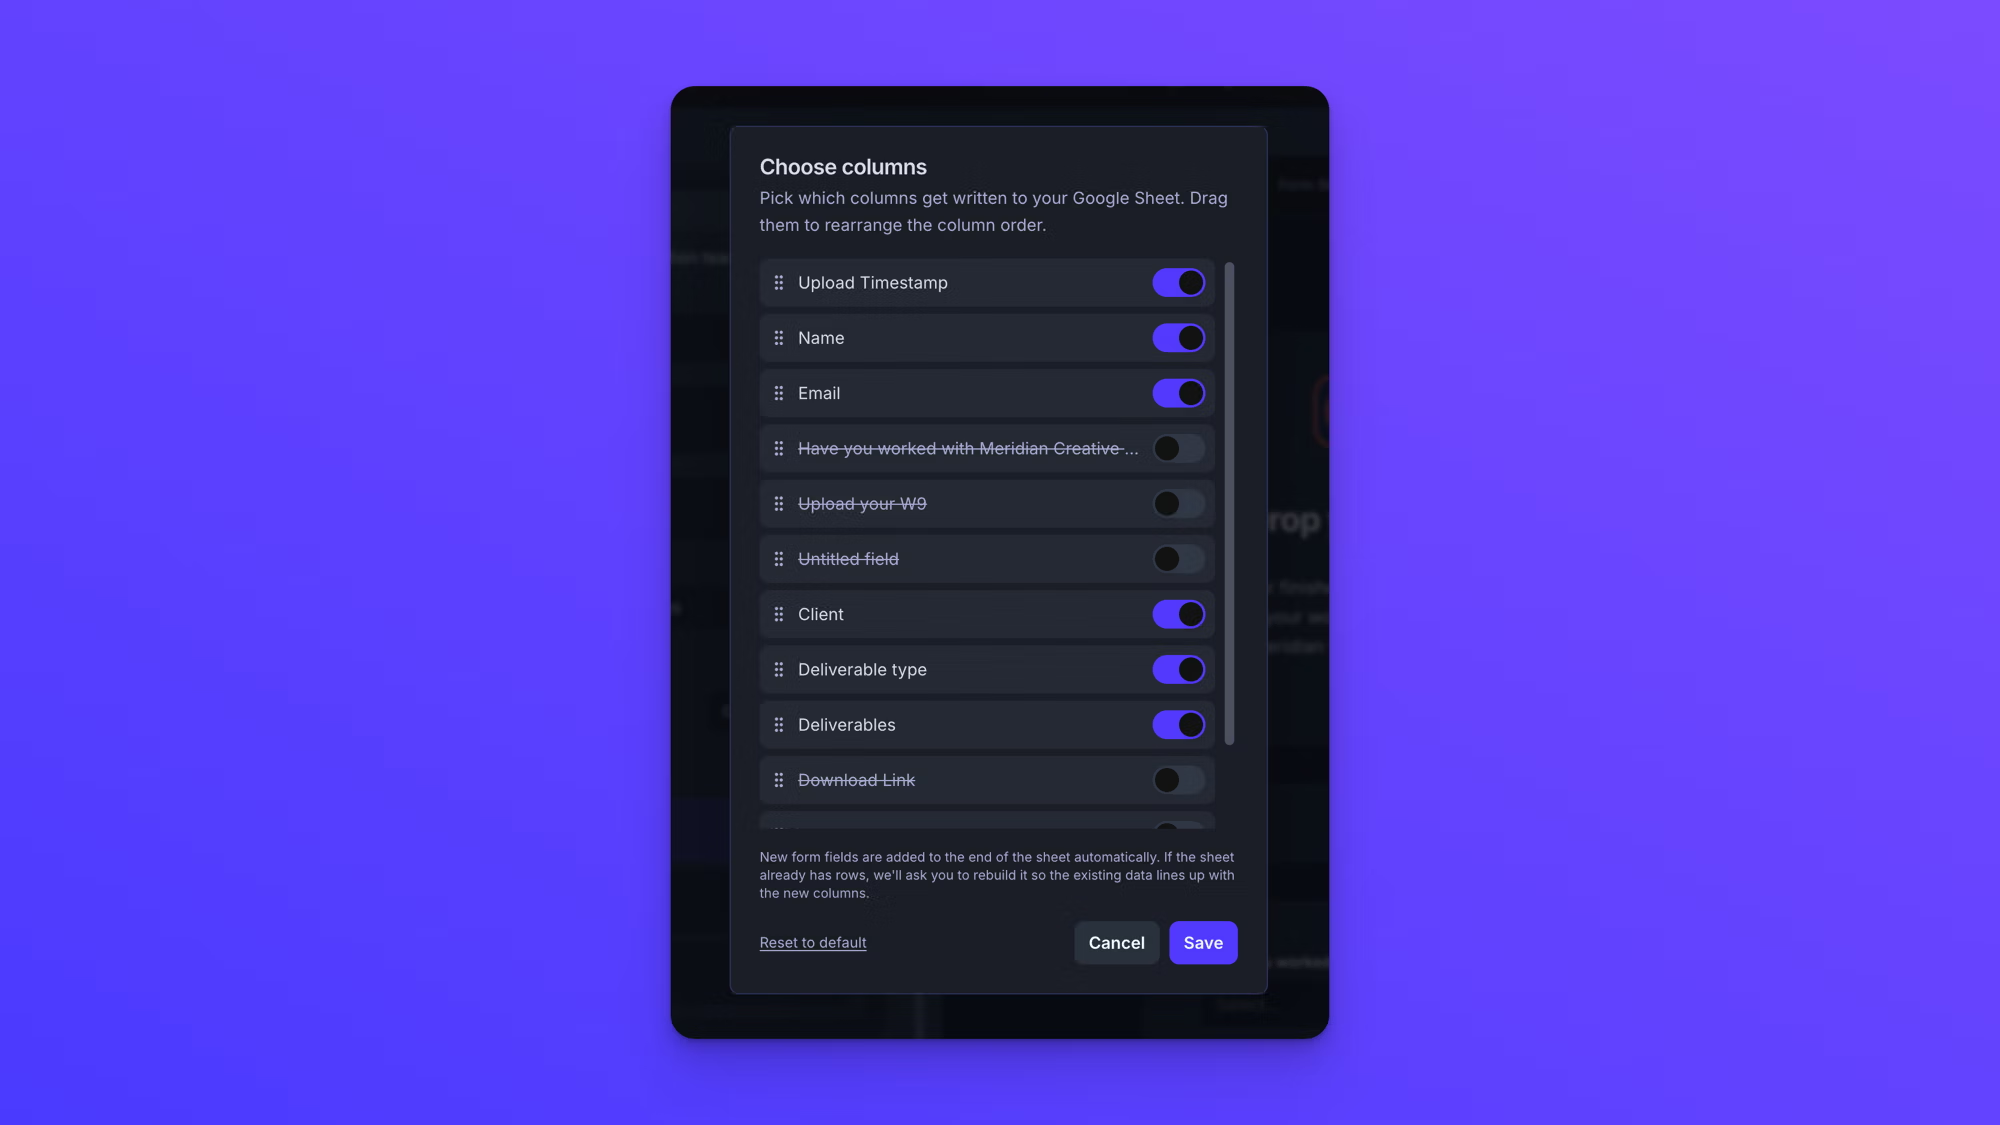
By default every form field is written to a column in the Google Sheet. The Sheet starts with Upload Timestamp, then one column for each of the form's fields in the order they appear on the form, File Upload fields included, then three columns for the file: Download Link, View Link, and File Size. A Name field set to collect a first and last name separately gets two columns rather than one.
Click Choose columns to change this. In the box that opens you can:
- Turn each column on or off with its toggle.
- Drag a column by its handle to change its order in the Sheet.
- Click Reset to default to put every column back to the default.
Click Save to apply your changes, or Cancel to close the box without changing anything. If the Sheet already has rows, saving a change asks you to rebuild the Sheet. See Rebuild the Sheet, below.
New form fields are added to the end of the Sheet automatically. If the Sheet already has rows when you add a field, you're asked to rebuild it so the existing rows line up with the new column.
Choose how multi-file submissions are laid out
"Rows for multi-file submissions" controls what happens when someone uploads more than one file in a single submission:
- Every row (the default): each file gets its own row, and the form responses are repeated on every row.
- First row only: each file gets its own row, but the form responses and submission time appear only on the first row.
- One row: the whole submission goes in a single row, and all the files are listed together in one cell.
With Every row and First row only, counting rows counts files rather than submissions. Keep that in mind before you build a formula or a pivot over the Sheet. With One row, each row is one submission.
The link columns hold clickable links whose text is the file's name. For files delivered to Google Drive you get a download link and a view link. For other destinations both columns hold the same link. In One row layout, a single file's link is clickable, but several files appear as plain web addresses.
A submission with no files still writes one row, with the file cells left blank.
Rebuild the Sheet
Every row in the Sheet always uses the same layout. So if the Sheet already has rows and you change the columns or the row option, a box asks you to confirm:
- Rebuild sheet keeps your new setting, clears the tab, and rewrites every submission in the new layout. Any manual edits or extra columns you added to that tab are lost.
- Undo change puts your previous setting back and leaves the Sheet untouched. Pressing Escape or clicking outside the box does the same.
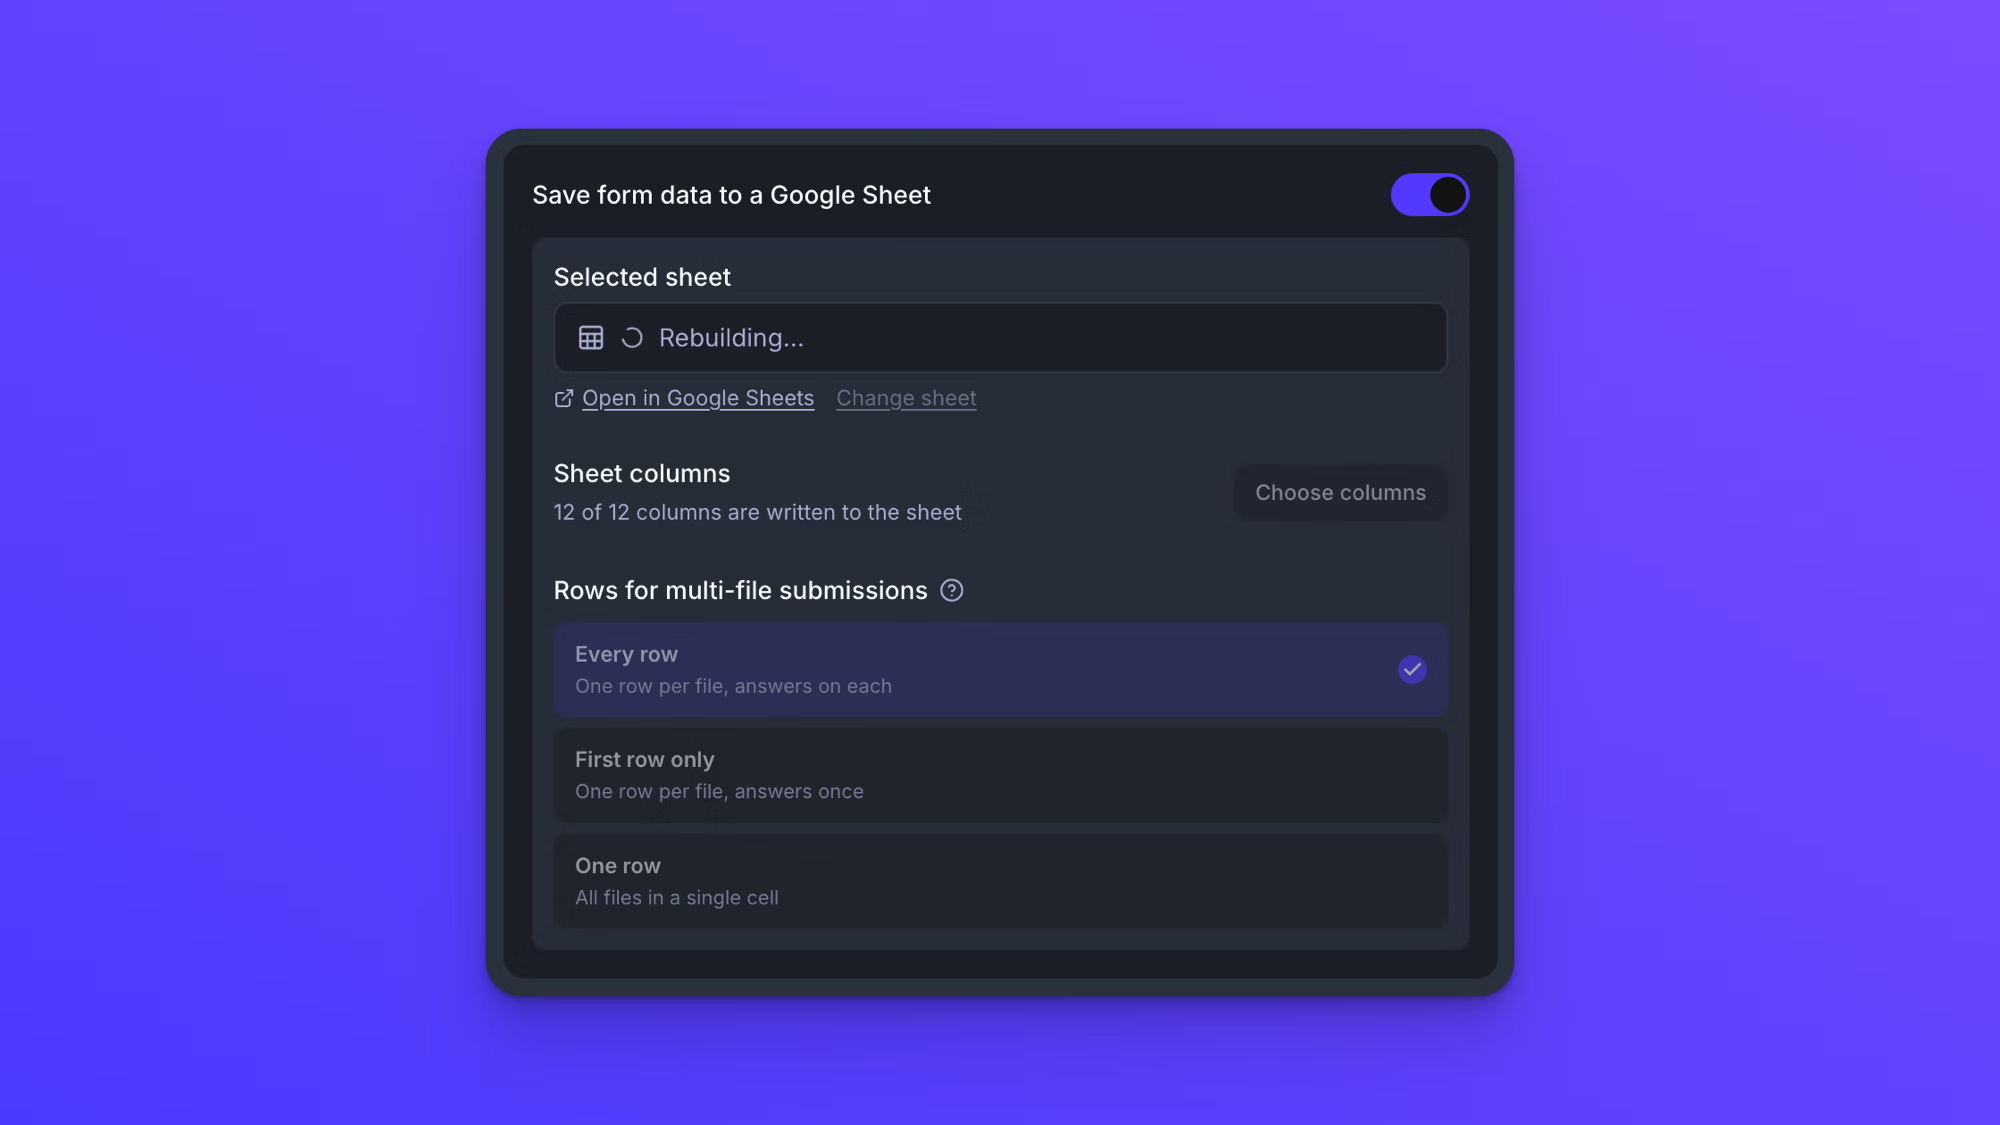
While a rebuild runs, the "Selected sheet" field shows a spinning icon and "Rebuilding…". Change sheet, Choose columns, and the row options are dimmed until it finishes. Open in Google Sheets still works, so you can watch the rows fill in. A confirmation appears when it's done. Small forms take a few seconds, and large ones take longer.
To keep a copy of a Sheet you've edited by hand, use Change sheet to start a new Sheet instead of rebuilding. The old Sheet stays in your Drive as it is.
When syncing stops
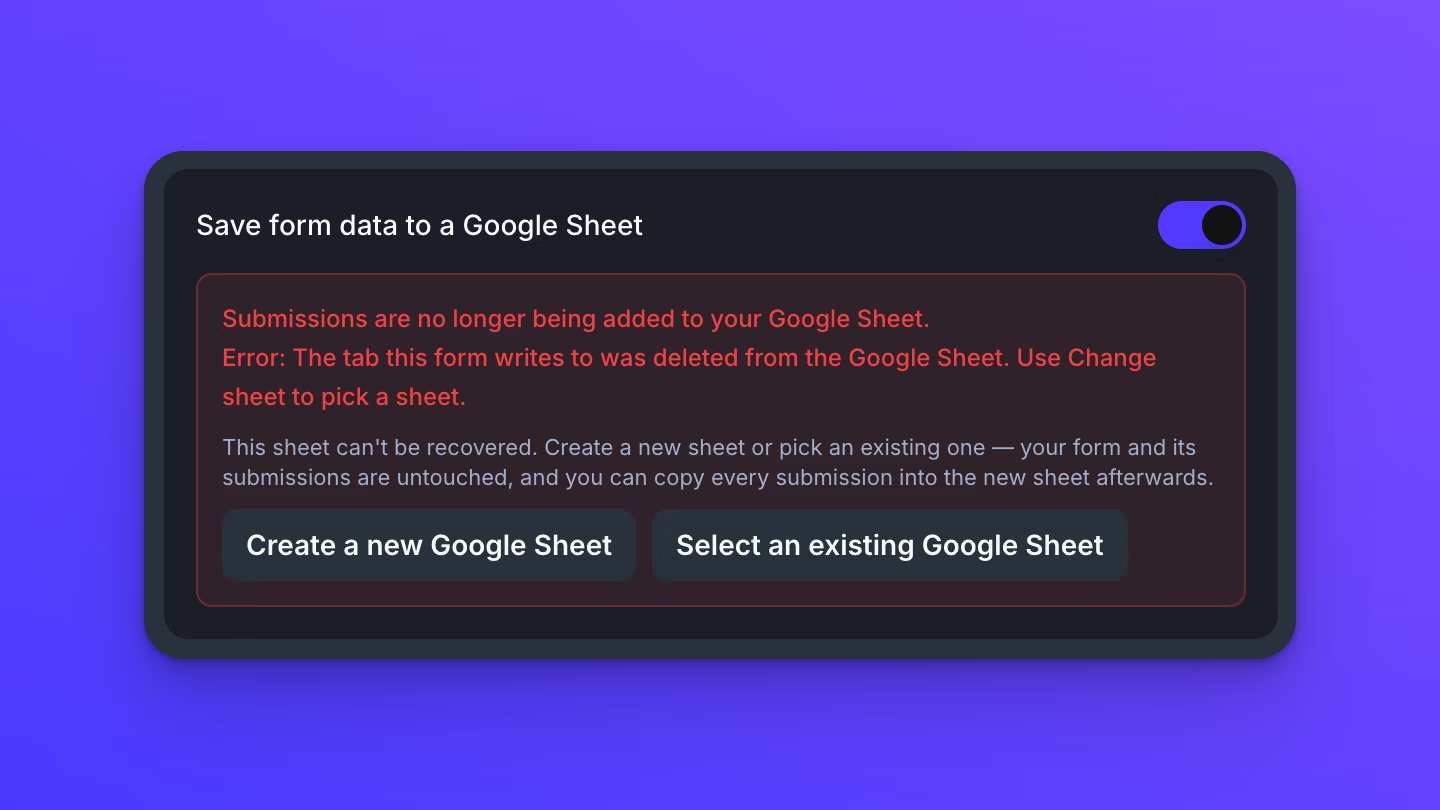
If rows stop being written, the setting shows why, and the form owner gets an alert email. The form keeps working and files keep being delivered either way.
- If the tab was deleted, the setting shows "The tab this form writes to was deleted from the Google Sheet. Use Change sheet to pick a sheet." EZ File Drop won't start writing to a different tab on its own. Use Change sheet to pick one.
- If Google access was lost, for example because access was removed or the connection expired, the setting shows an error asking you to reconnect your Google account on the Cloud Connections page.
Once the problem is fixed, a Rebuild button appears on the setting. Click it to rewrite the Sheet from scratch, including submissions that arrived while syncing was stopped.
Turn off the Google Sheet
Turning Save form data to a Google Sheet off disconnects the Sheet. It is not a pause. The form stops writing rows, and the link between the form and that Sheet is removed. The Sheet itself and every row already written to it stay in your Google Drive untouched.
Behavior notes
- Save form data to a Google Sheet is available on the Business and Premium plans.
- The setting needs a connected Google account, not a Google Drive upload destination. The form's files can be delivered anywhere.
- Nothing is written until a Sheet has been created or linked. Turning the setting on is not enough on its own.
- EZ File Drop writes to the Sheet's first tab. Linking a Sheet whose first tab has content erases that tab after a warning. Other tabs are never touched.
- Renaming or moving the tab doesn't break syncing. Deleting it does.
- Use a Sheet that's only for this form, and don't type into the rows EZ File Drop manages. A rebuild replaces them.
- A row is written once a submission finishes delivering to your upload destination, not at the moment someone clicks submit. Submissions that fail, or that arrive without their files, are never written.
- New form fields are added to the end of the Sheet automatically. If the Sheet already has rows, you're asked to rebuild it so they line up.
- Every row is the default layout. A submission with several files produces several rows carrying the same responses.
- Changing the columns or row layout on a Sheet that has rows rebuilds the whole Sheet. Undo change cancels without touching it.
- Sync problems show on the setting and trigger an alert email to the form owner. Rebuild rewrites the Sheet once the problem is fixed.
- The Sheet carries form data. Uploaded files are still delivered to the form's upload destination, not to the Sheet.
- Changes are saved automatically, but a Live form keeps using its last published setup until you click Publish changes.