

Set up email notifications
EZ File Drop sends email notifications about activity on your upload forms. You set them per form on the Notifications tab, so who gets emailed and what they get emailed about can be different on every form.
There are seven email notifications. Three of them go out when a submission arrives, and you choose who receives each one. The other four report on the form itself: one goes out when a delivery fails, and the rest when the form opens at a scheduled time, reaches its submission limit, or closes at a scheduled time.
Notifications are included on every plan. Replacing the default email with your own HTML, inserting form variables, and changing the sender name and address are available on the Business and Premium plans.
You need an upload form to work in. If you have not made one yet, start with Create your first upload form.
Open the Notifications tab
- On the Upload Forms page, open your form.
- Click Notifications in the row of tabs at the top.
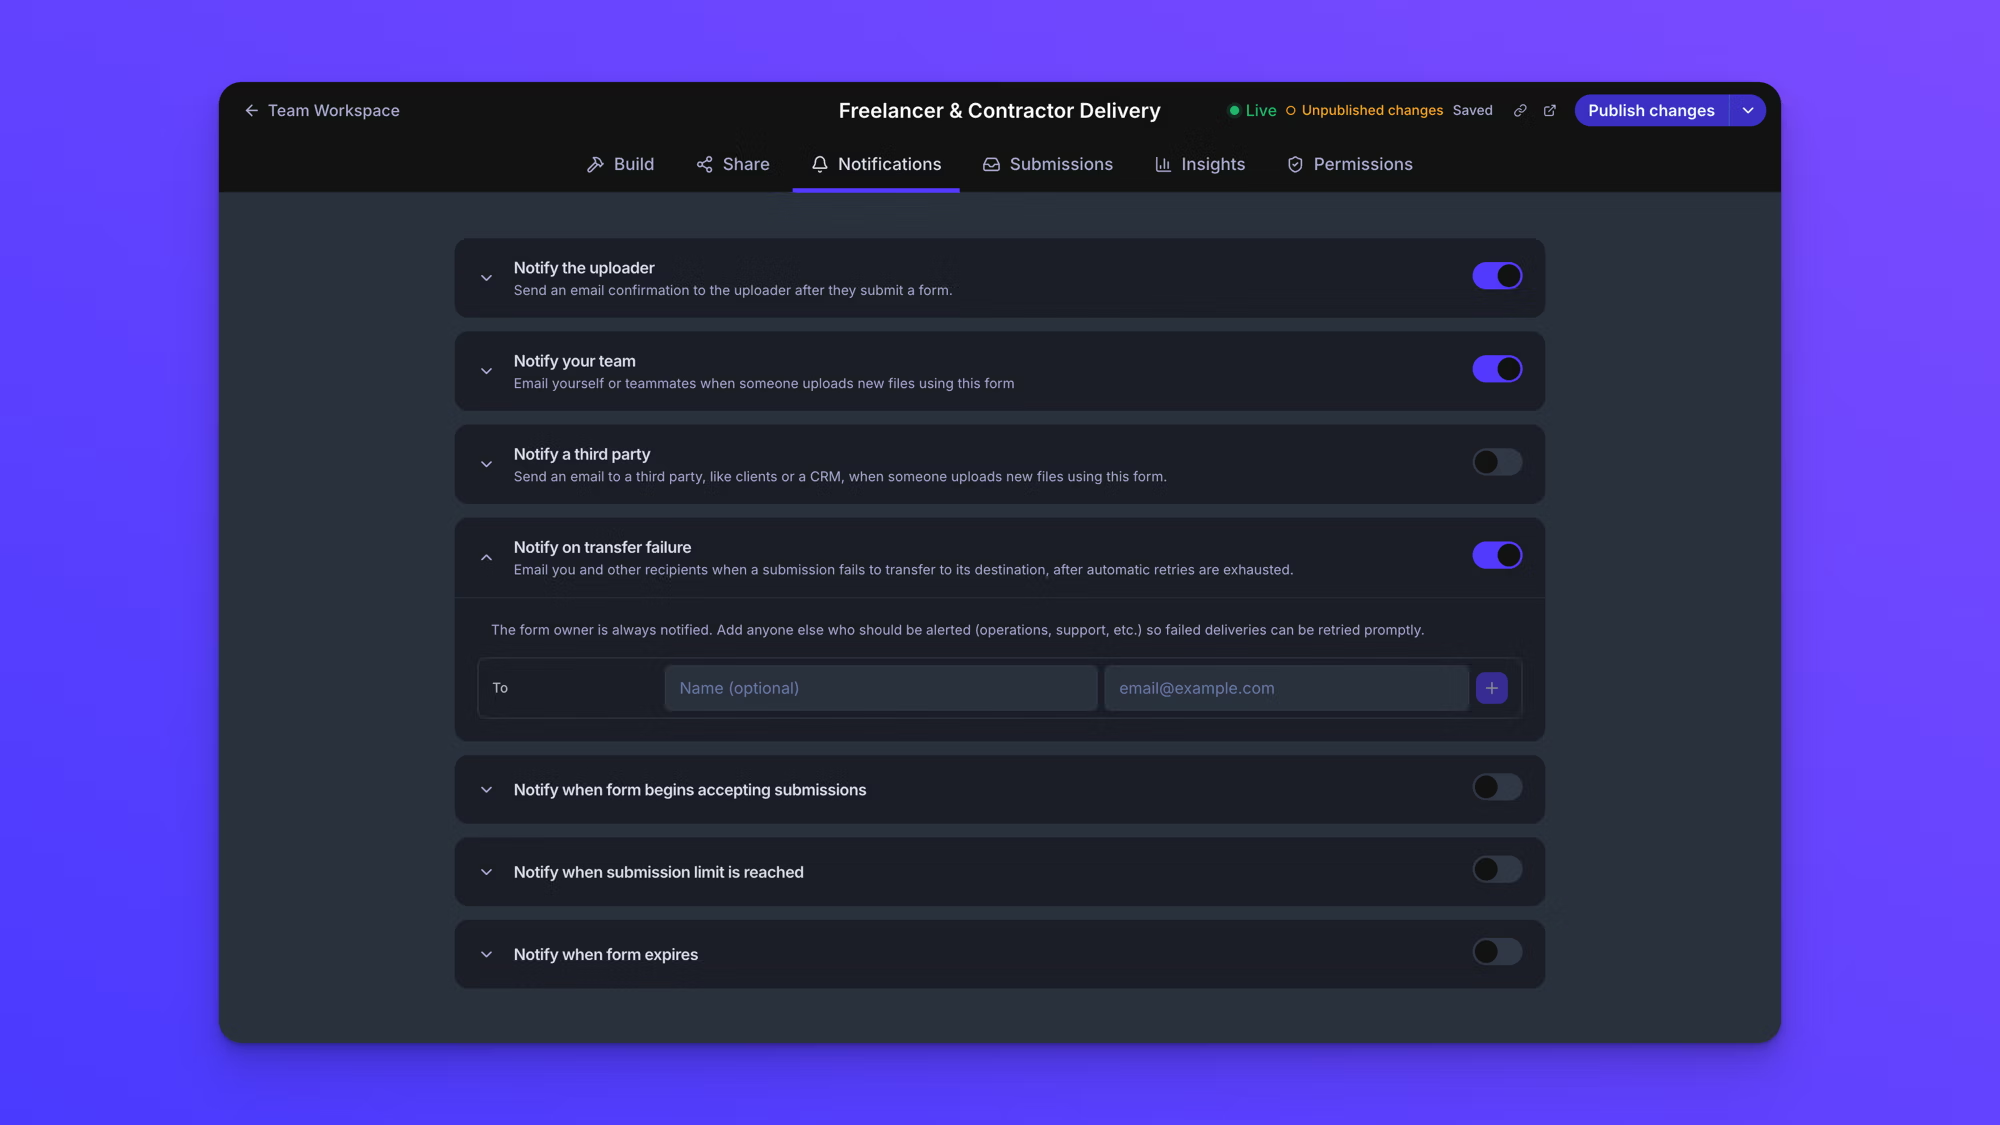
Each notification is a card. Click a card's header to open or close it, and use the switch at the right of the header to turn that notification on or off. Turning a notification on also opens its card.
A dimmed card cannot be switched on. It is waiting on a setting elsewhere in the form, and it names the setting it needs.
Notify the uploader
Notify the uploader sends a confirmation to the person who just uploaded. This notification is on by default.
The form needs an Email field for this to work. Until it has one, the card is dimmed and reads "In order to send an email confirmation to the uploader after they submit a form, you need to add an email field to the form." See Add form fields.
Notify your team
Notify your team emails you and your colleagues when someone uploads files through this form. This notification is on by default, and you, the form owner, are already on the recipient list. Add other team members here if you want them notified too.
Notify a third party
Notify a third party sends the same email to someone outside your team, such as a client waiting on their files or an email address that feeds a CRM. This notification is off by default.
The default email
Most forms use the default email exactly as it is. It needs no setup, and it lays out the submission for you.
Each of the three notifications sends its own version. All three carry the same submission, but they are written for different readers.
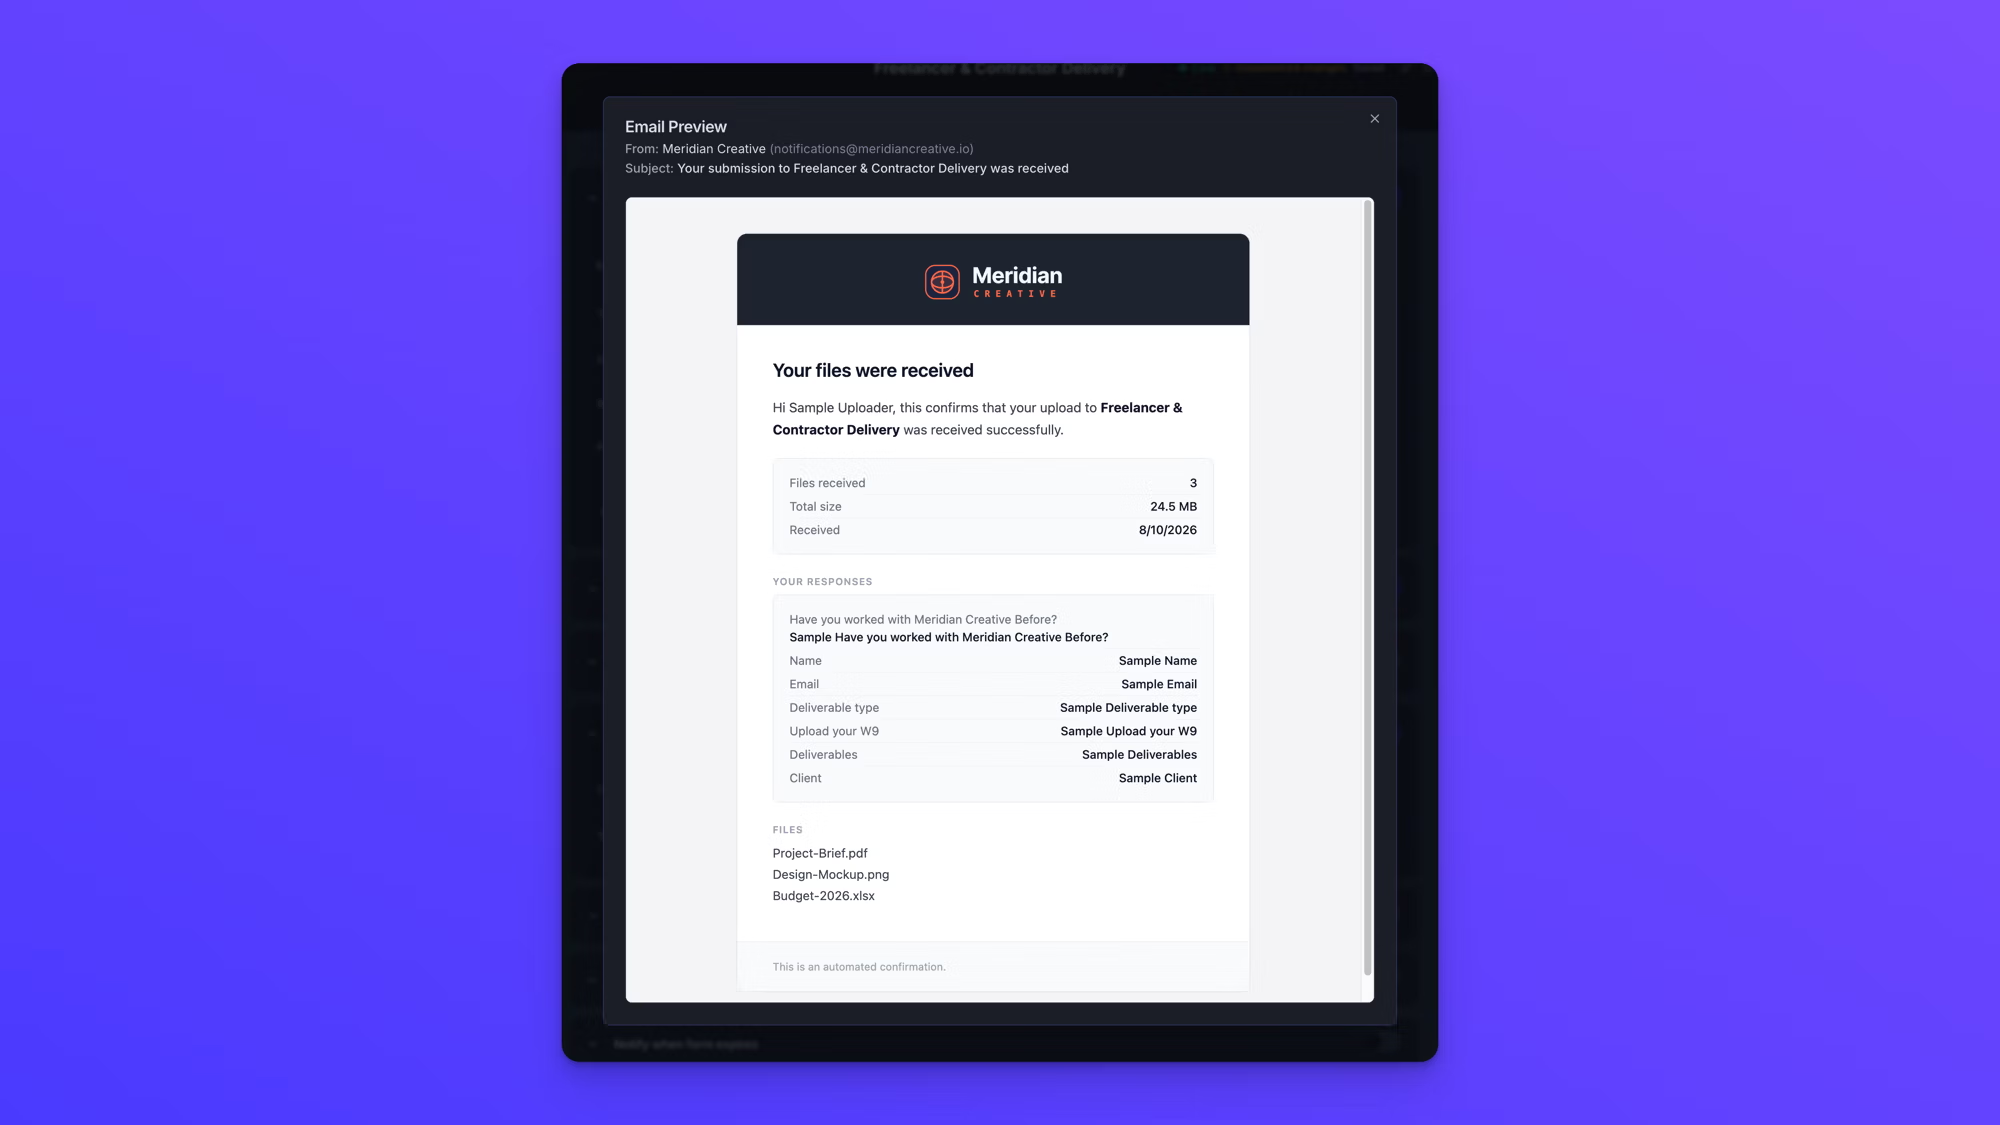
Every version contains, in order:
- Your form's logo, if you have added one.
- A heading and a greeting.
- The number of files and their total size.
- Every form response, with each field shown beside the value entered.
- The names of the files that came in.
- A closing line.
The logo and its settings live in the Logo section of the Style panel, on the Build tab. On form and In emails both start on Show and are set separately, so you can keep a logo off the form and still send it in emails, or the reverse. The header of the email uses the same background color as your form's container, so a logo that reads well on the form reads well in the email. See Style your form.
The uploader's confirmation tells them their files arrived and that nothing more is needed. Its subject names your form, as in "Your submission to Freelancer & Contractor Delivery was received". The file names are plain text, and the email does not show the address the submission came from, because it is going to the uploader.
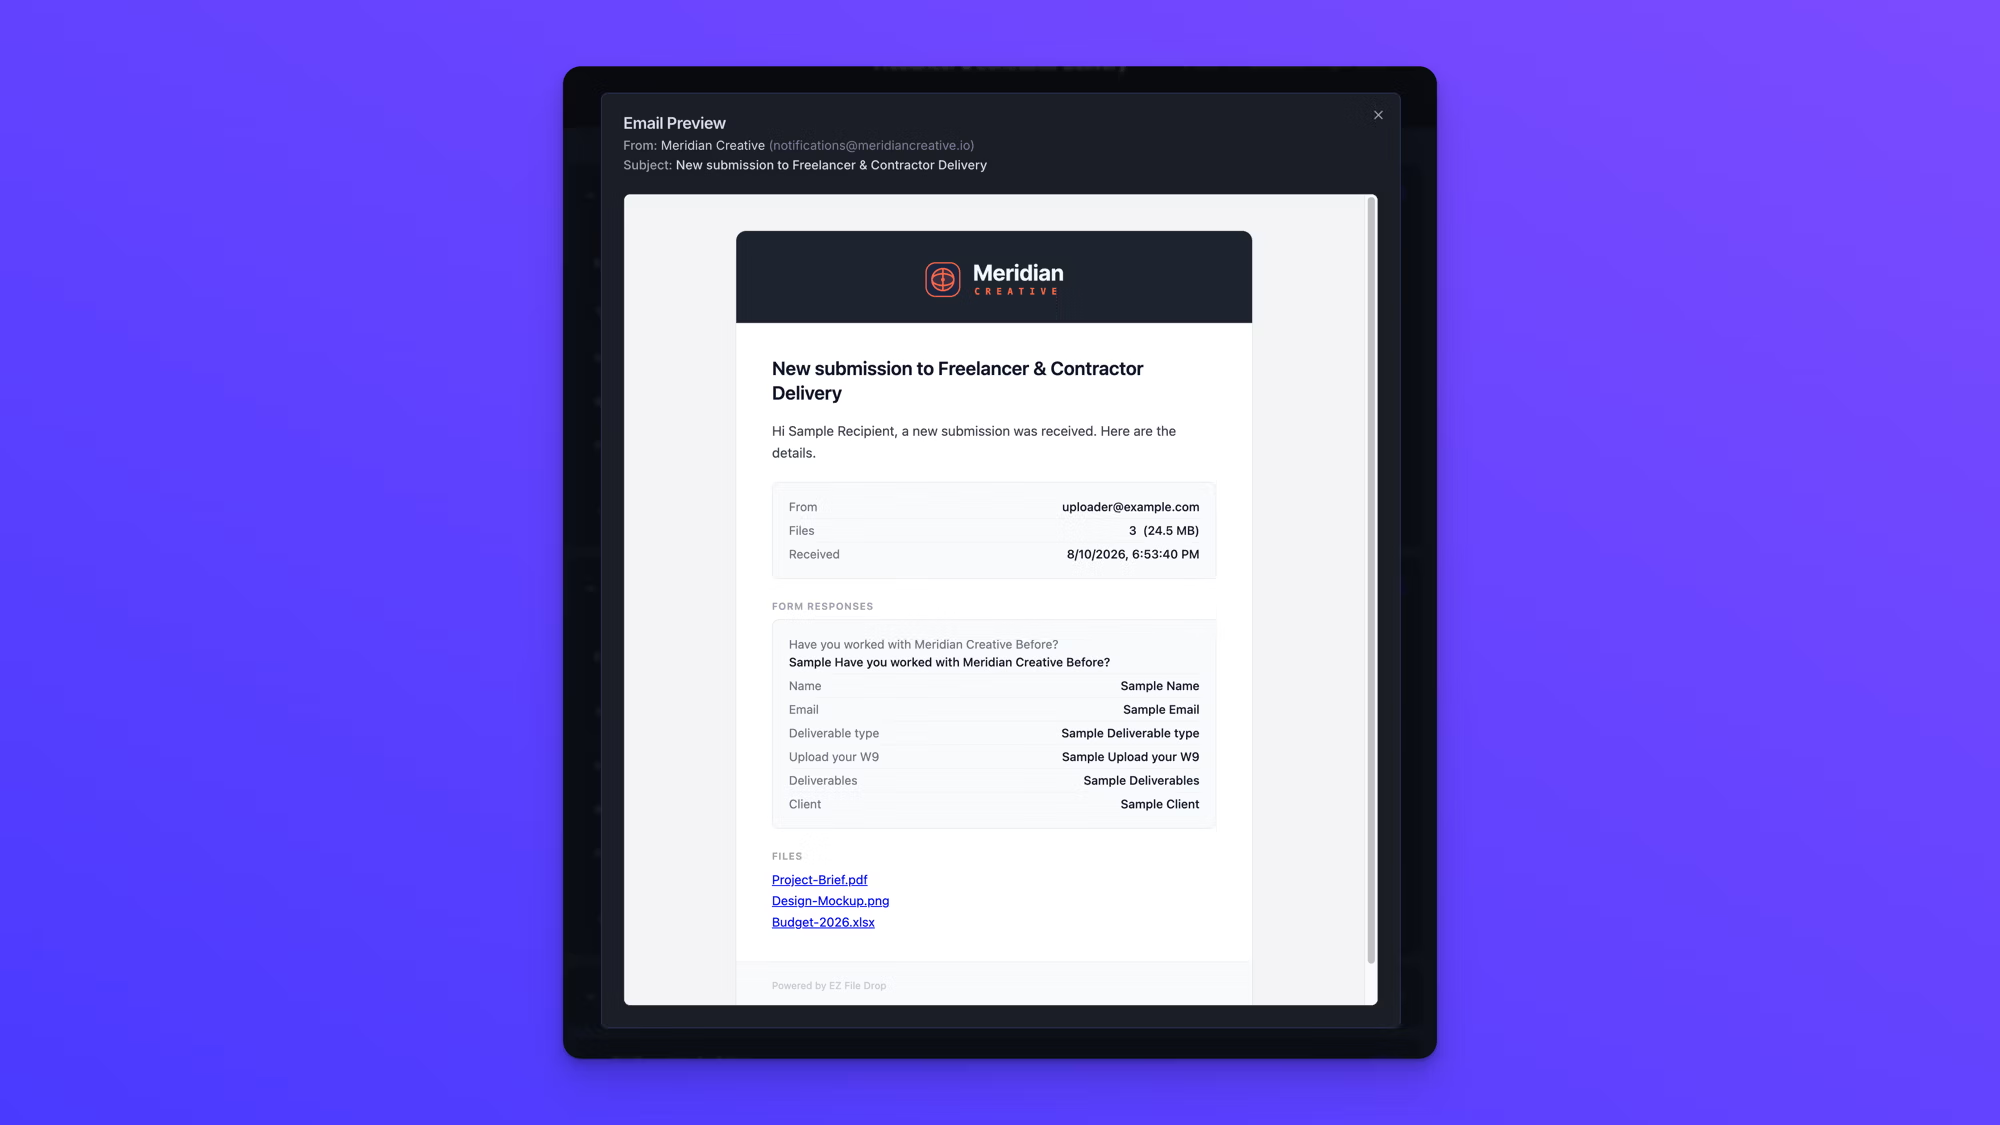
Your team's notification reads as a report on a new submission, with a subject that names your form, as in "New submission to Freelancer & Contractor Delivery". It shows the address the submission came from, timestamps it to the second, and turns each file name into a link you can click to open the file.
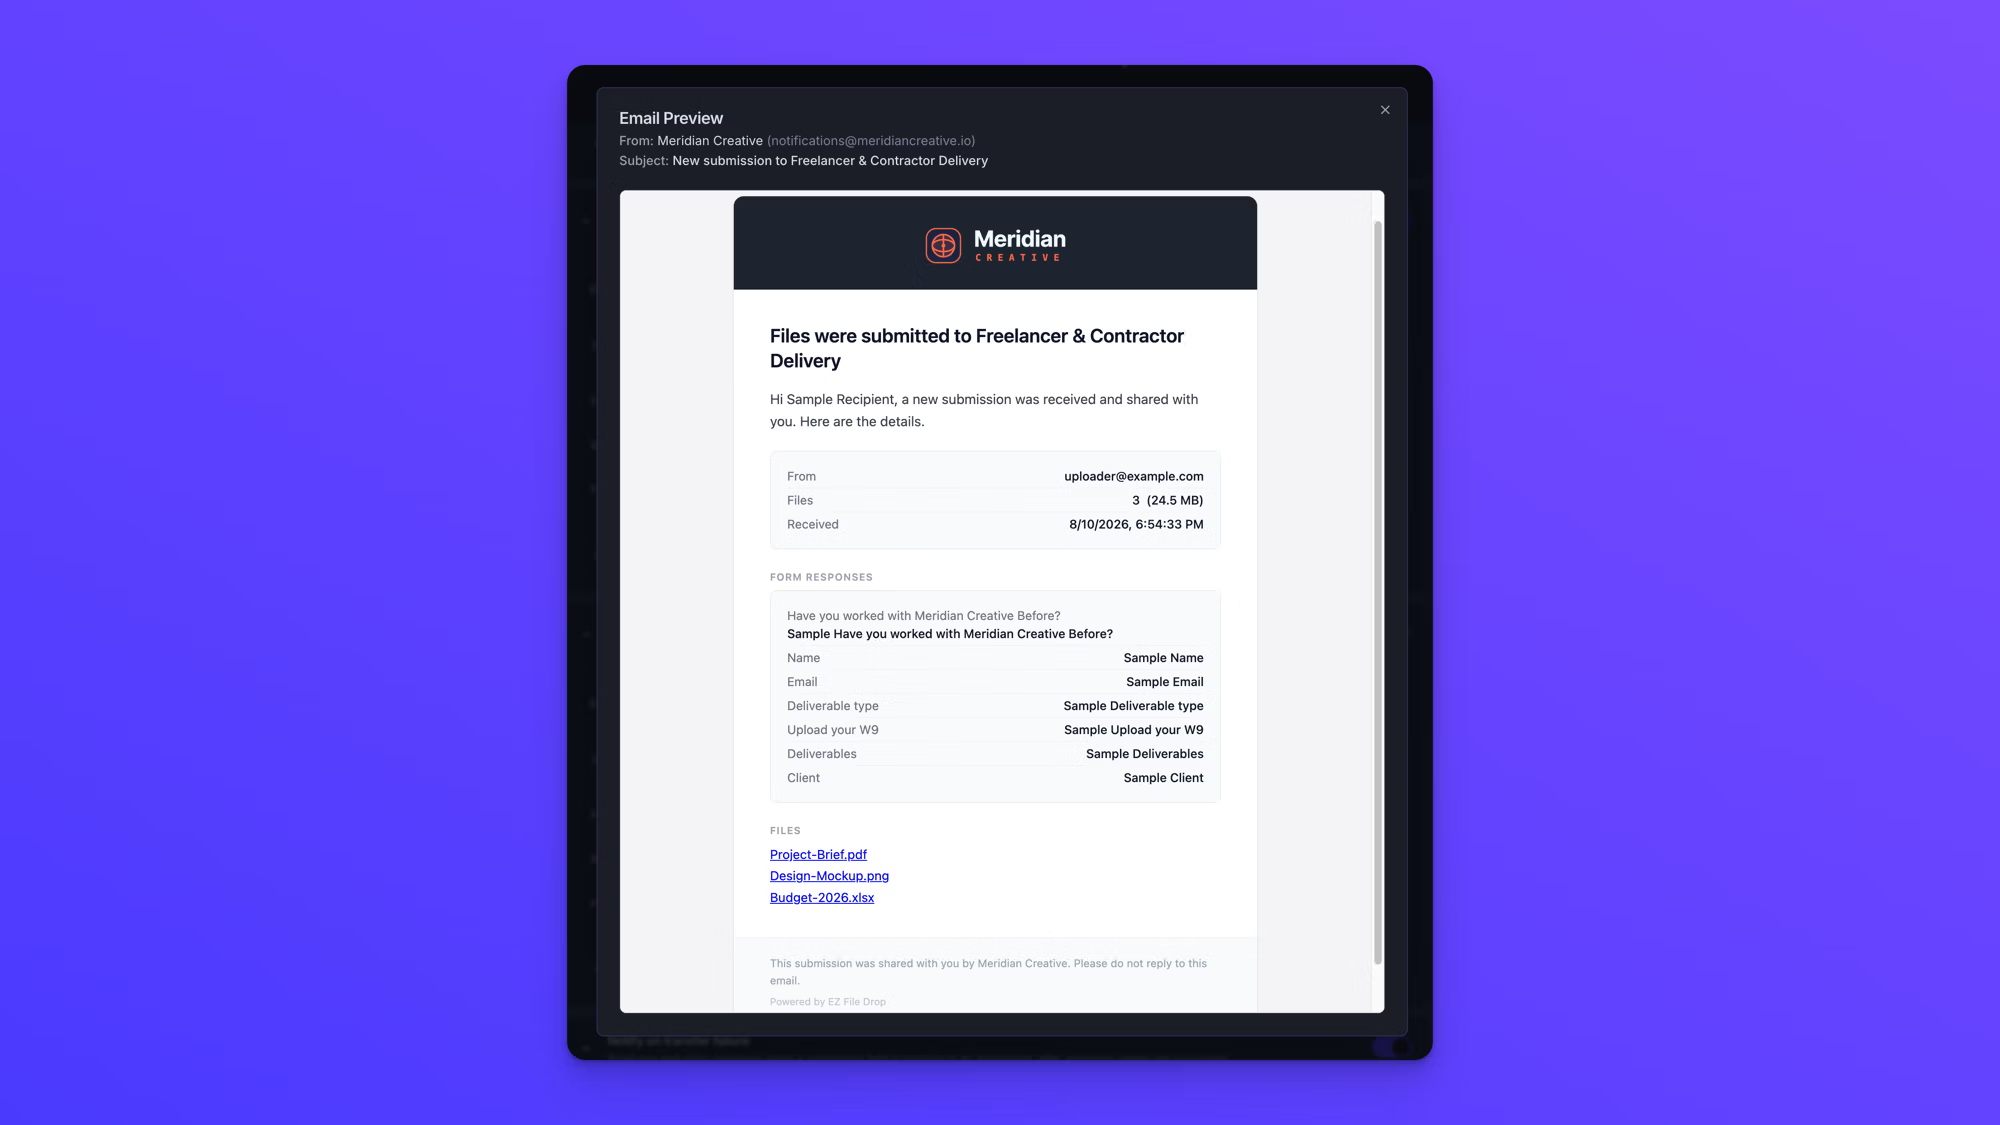
The third party's copy matches your team's, with two additions. It says the submission was shared with them, and its closing line names your business, as in "This submission was shared with you by Meridian Creative."
The wording is fixed on all three. You cannot edit the subject or any of the copy. To send something different, set Email Type, at the top of the card, to Custom.
Write your own HTML email
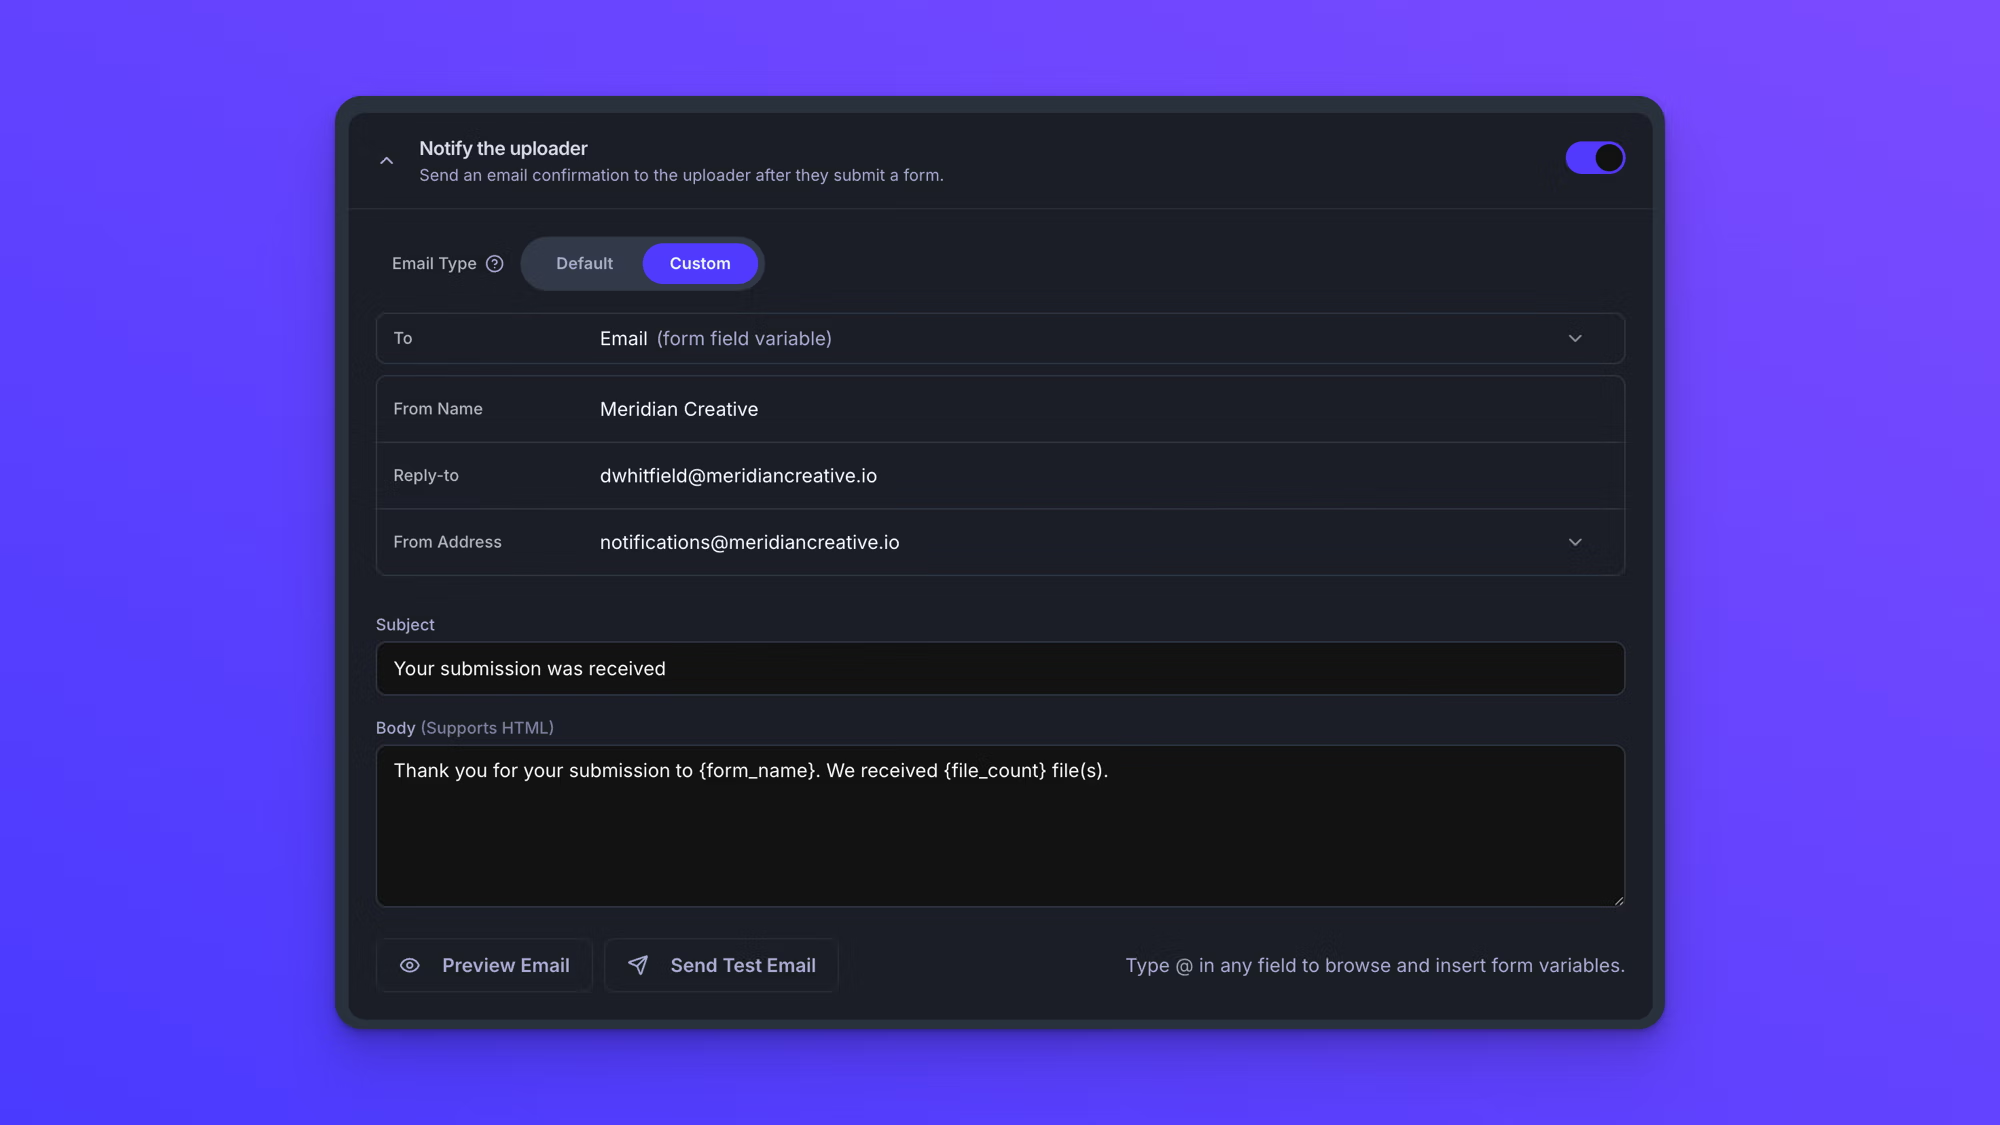
Setting Email Type to Custom replaces the default email with one you write yourself. Subject and Body appear, and Body accepts full HTML, so this is where you build a complete email of your own design rather than a plain message. Both boxes start with a short line of plain text, which you replace with your own.
Email Type is set on each card separately, so you can leave your team on Default and write a custom email for uploaders alone.
Type @ in Subject or Body to browse the variables you can insert, then pick one. The list includes every field on your form, plus details of the submission itself such as the form name, the file count, and the time it arrived. Variables work anywhere in your HTML.
Layout blocks collect nothing from the uploader, so they are not in the variable list. See Add form fields.
Custom is available on the Business and Premium plans.
Choose who gets the email
Notify the uploader, Notify your team, and Notify a third party each have a To row, and the rows do not all work the same way.
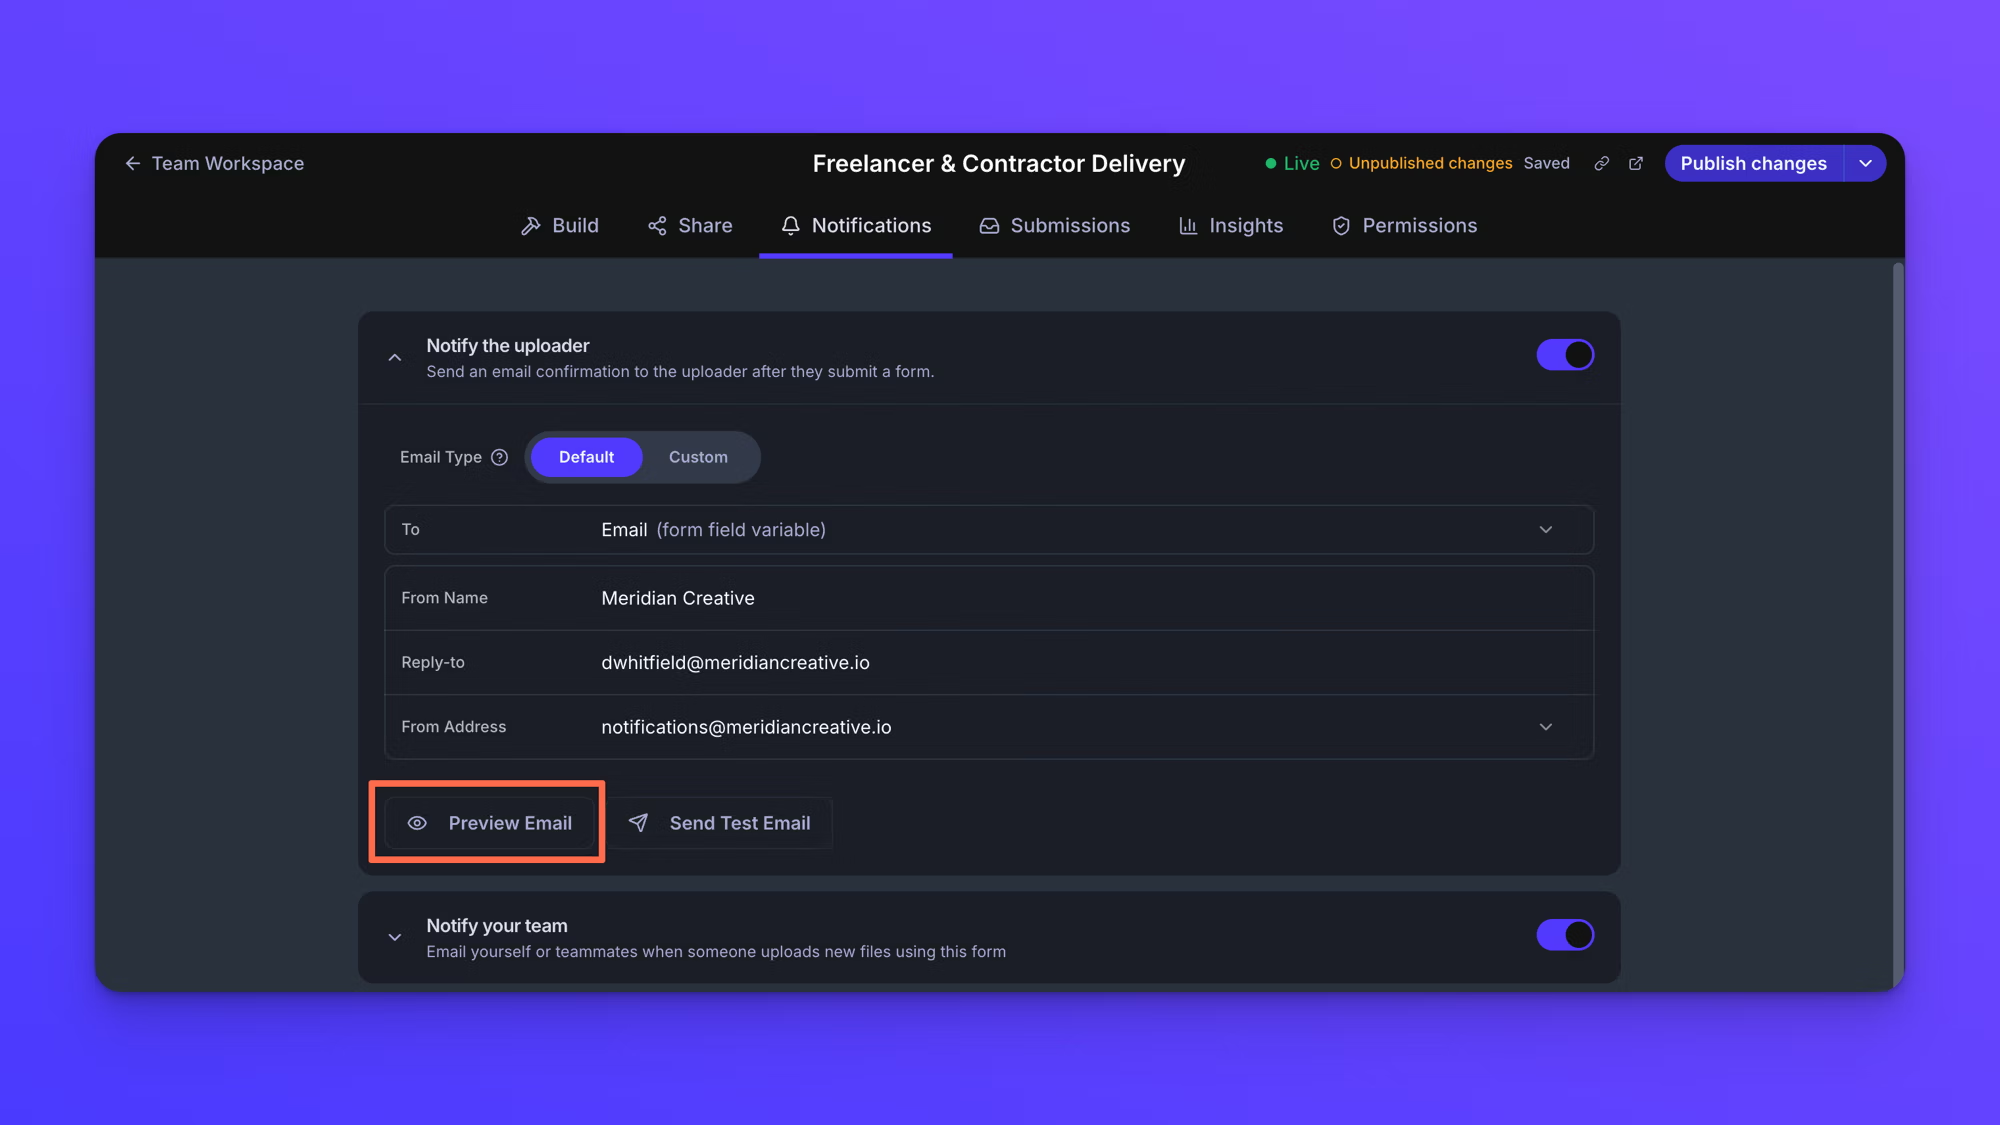
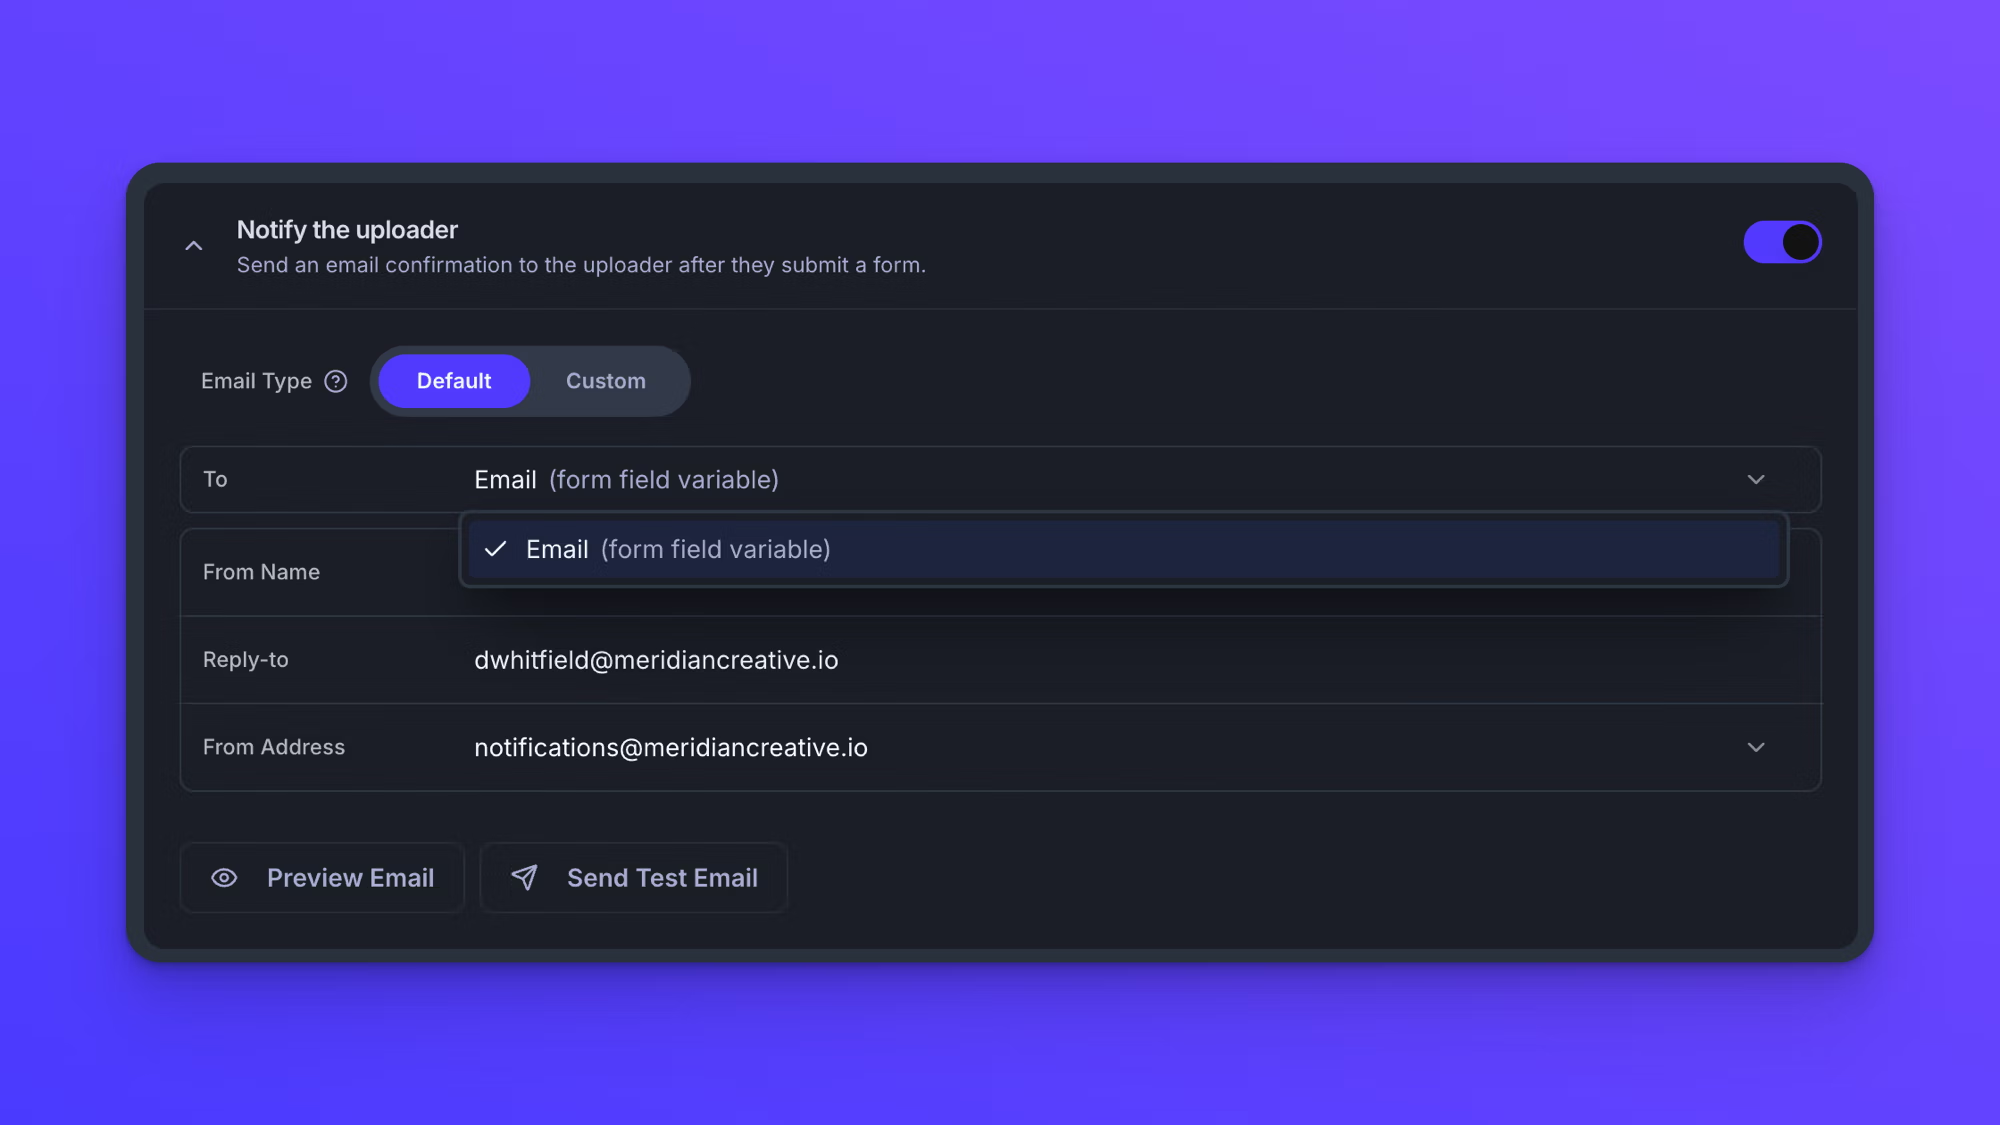
Notify the uploader reads the address off the form. As long as the form has an Email field, that field is used automatically, and To shows which one, listed by its label with "(form field variable)" after it. On a form with more than one Email field, use To to pick between them.
Notify your team and Notify a third party each take a list you build. In the To row, type a name in the first box and an email address in the second, then click the plus button. Only the email address is required, and pressing Enter in the email box also adds the person. Repeat for each recipient, and click the X beside a name to remove them.
The two lists are kept separately, so add your own email address to Notify your team if you want the email yourself.
Choose who the emails come from
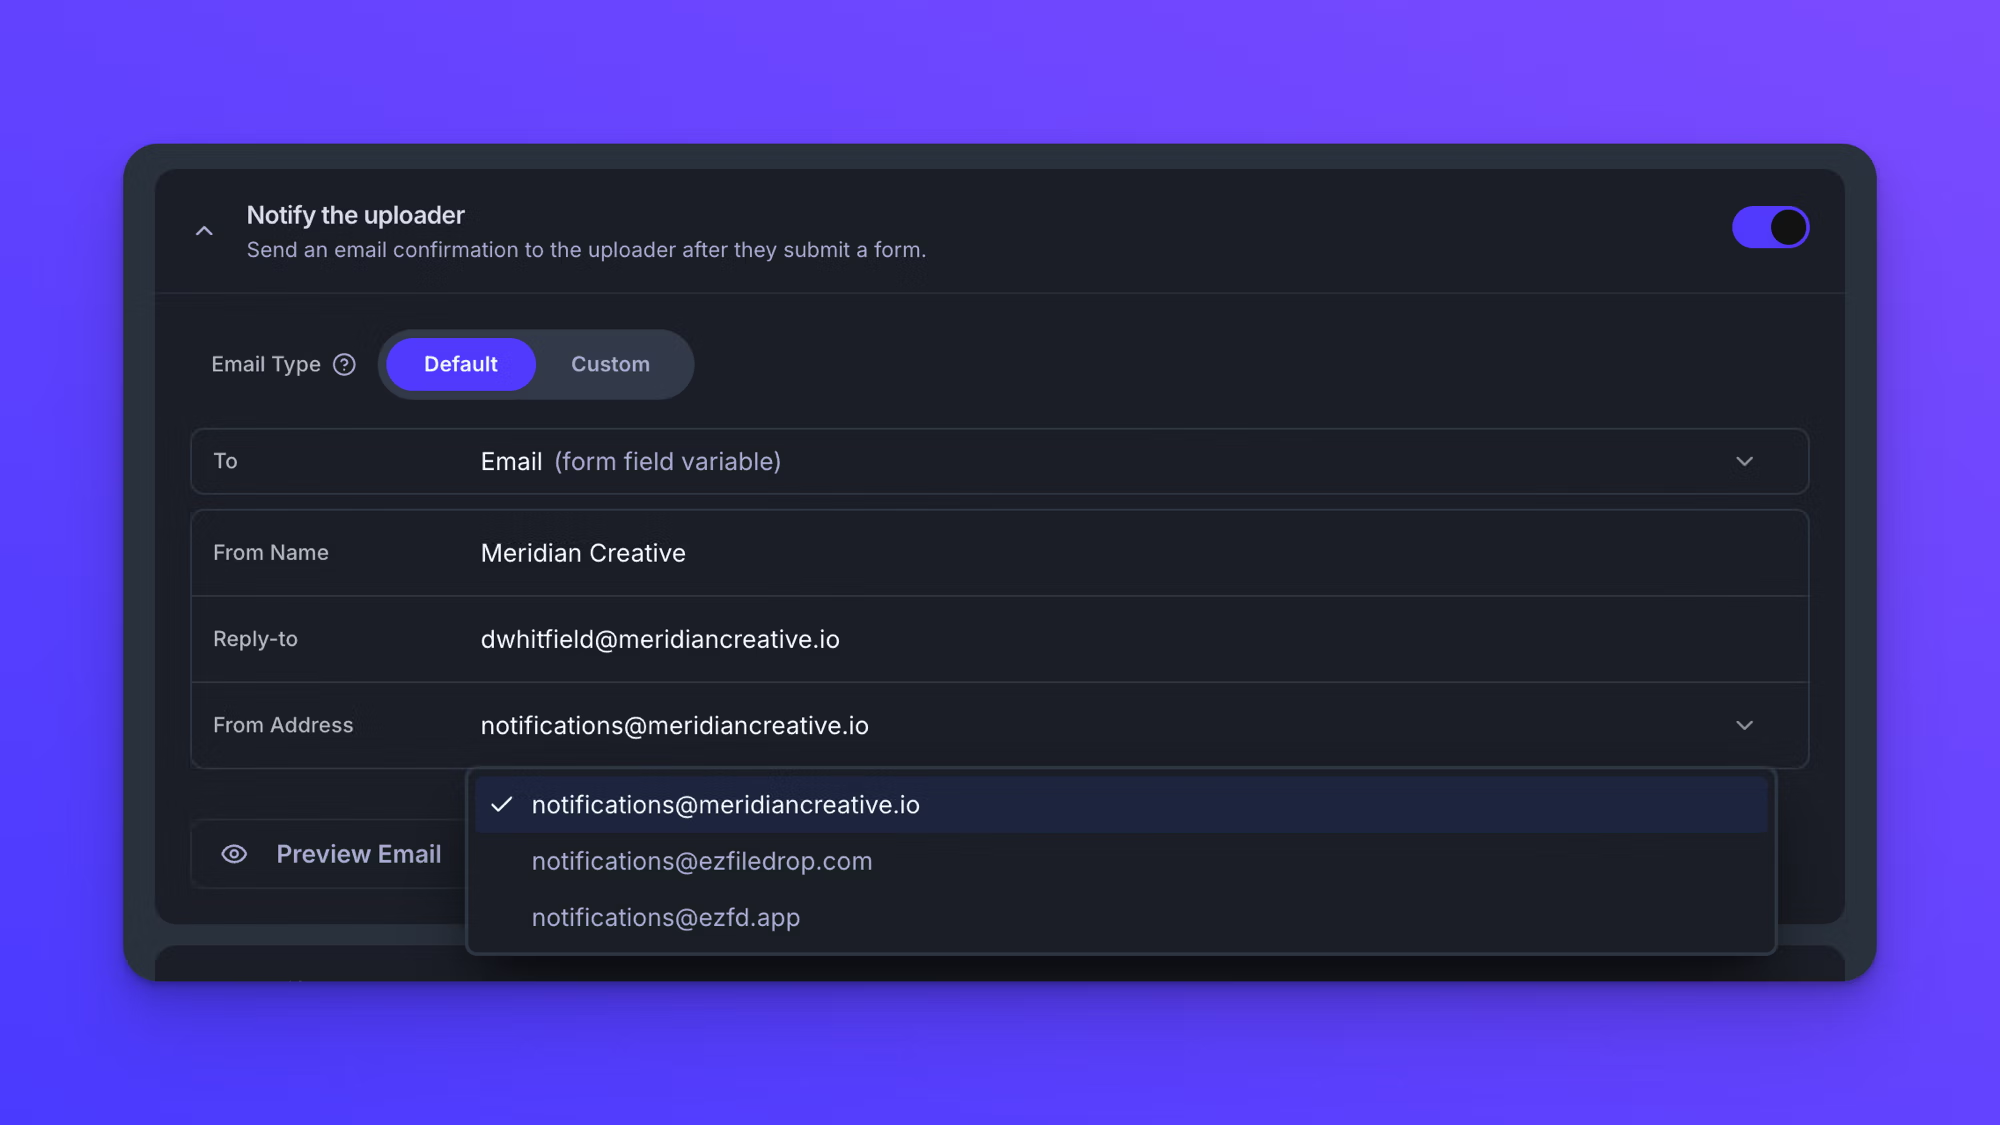
Three more rows appear in Notify the uploader, Notify your team, and Notify a third party: From Name, Reply-to, and From Address. They belong to the form rather than to a single card, so a change made in any card applies to all three emails.
- From Name is the name that shows in the inbox. If you leave it empty, it uses your team name.
- Reply-to is the address a reply goes to. It starts as the form owner's email address.
- From Address is the address the email is sent from. The part in front of the @ is fixed at "notifications", and you choose the domain after it. The list holds ezfiledrop.com and ezfd.app, plus any domain your team has verified for email sending. Sending from your own domain is part of the Premium plan. See Set up a custom domain.
Changing From Name, Reply-to, and From Address is available on the Business and Premium plans.
Preview and test an email
Two buttons sit at the bottom of Notify the uploader, Notify your team, and Notify a third party.
- Preview Email opens the finished email the way its recipient will see it, with the sender name, sender address, and subject above it.
- Send Test Email asks for an email address and sends a sample to it.
Both buttons work on Default and on Custom. On Custom they use whatever is in the Subject and Body boxes at that moment, so you can check the email you wrote before anyone receives it.
Notify on transfer failure
Notify on transfer failure emails you when a submission cannot be delivered to your upload destination, after all automatic retries have failed. This notification is on by default, and it is the only one that tells you files did not arrive, so it is worth leaving on.
The card reads "The form owner is always notified. Add anyone else who should be alerted (operations, support, etc.) so failed deliveries can be retried promptly." Add them in its To row.
Notifications tied to a Security & Limits setting
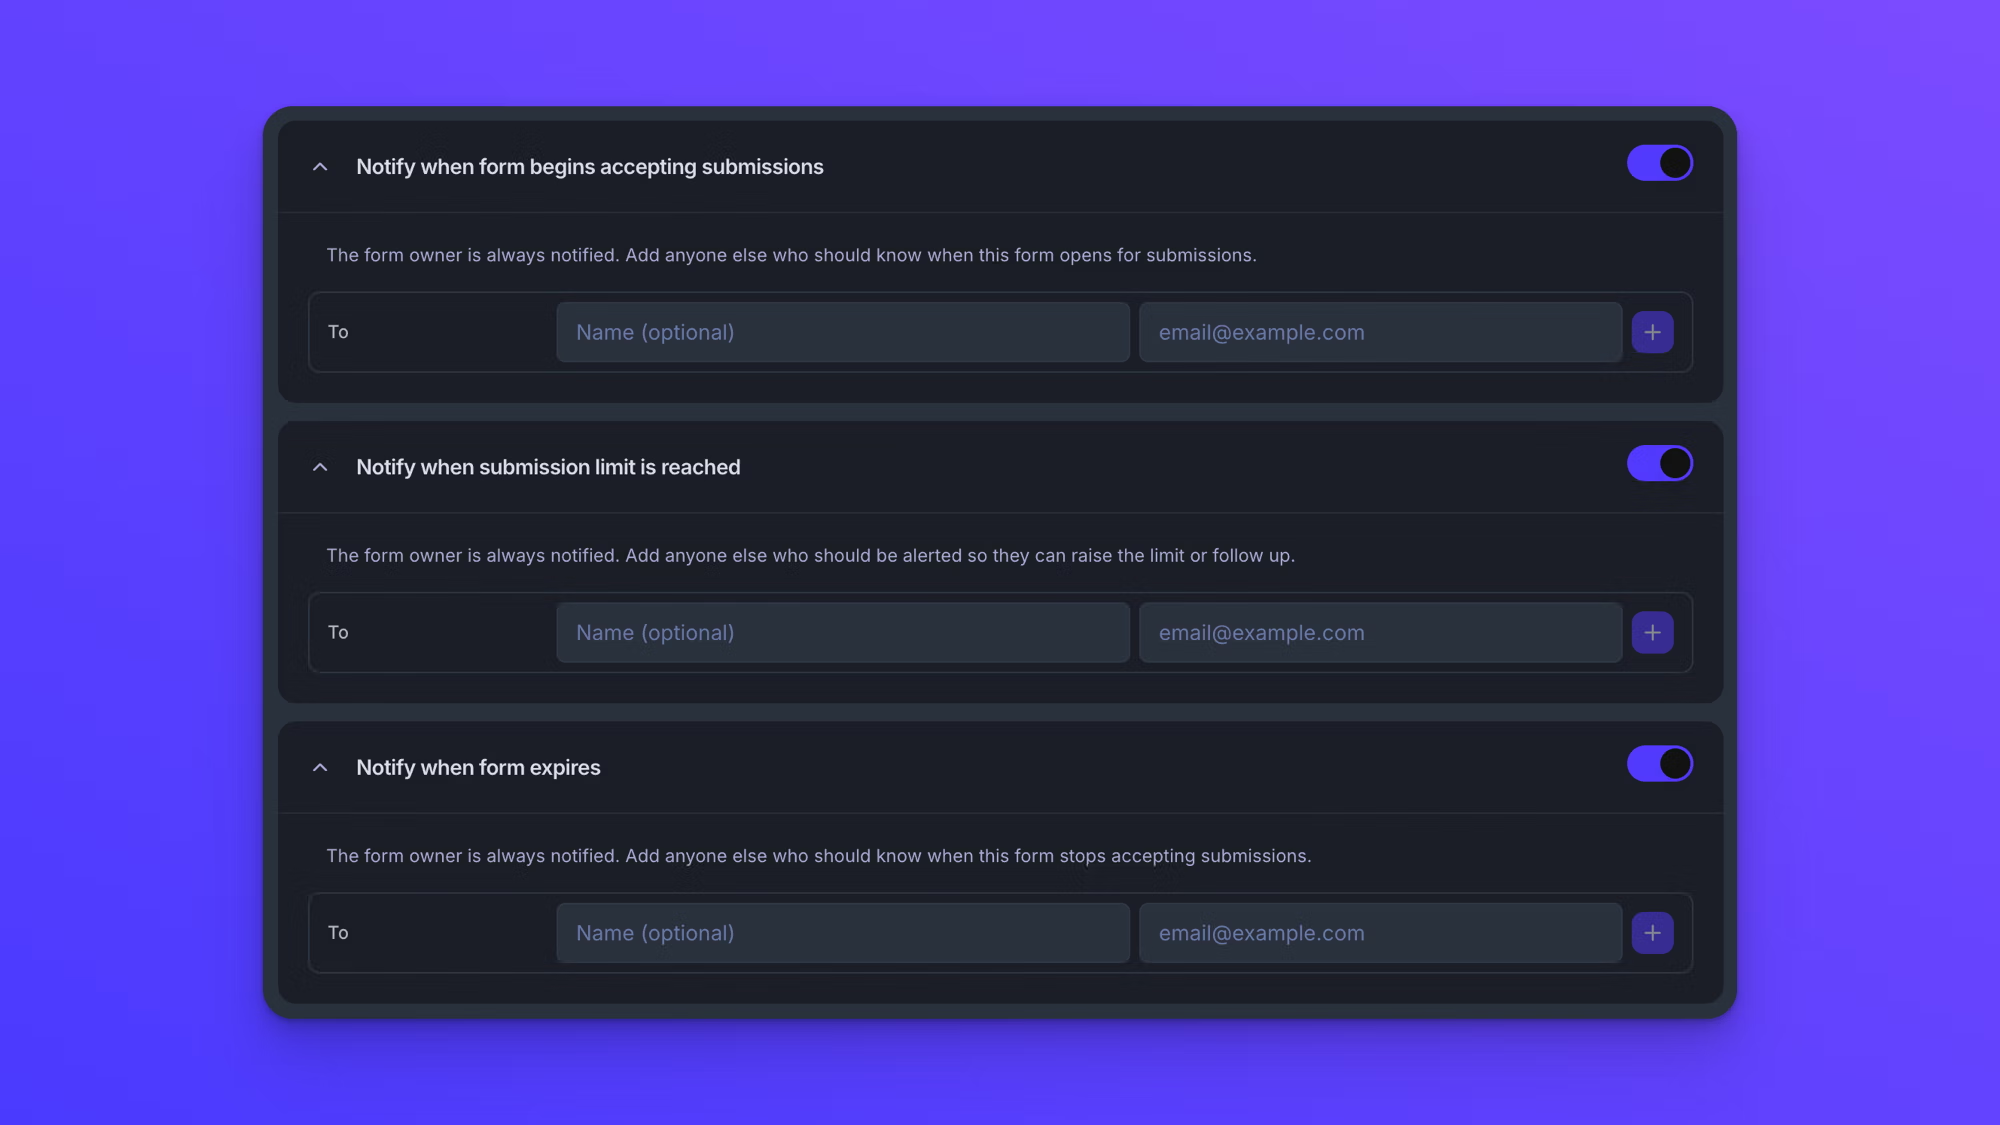
Three notifications report on the form's own schedule and limits rather than on submissions. Each one stays dimmed and cannot be switched until the setting behind it is turned on in Security & Limits, in the Build tab.
- Notify when form begins accepting submissions waits on Begin accepting submissions at date/time.
- Notify when submission limit is reached waits on Limit the number of submissions.
- Notify when form expires waits on Cut off submissions at date/time.
The two date settings are covered in Schedule a form to open and close, and the submission limit in Restrict file types and set upload limits.
Turning on one of those settings makes its card available with the notification already on, so there is nothing to switch. A dimmed card always shows its switch off, which is why these three look off beforehand.
All three say the same thing when they open: "The form owner is always notified." Add anyone else in the To row. Turn a card off if you do not want that email at all.
Behavior notes
- Three notifications are on by default: Notify the uploader, Notify your team, and Notify on transfer failure. Notify a third party is off. The other three cannot be switched until their Security & Limits setting is turned on, and they come on with it.
- Changes on the Notifications tab save as you make them, but saving is not publishing. A Live form keeps using its last published notification settings until you click Publish changes in the top right. Until then the status area shows "Saved" and "Unpublished changes" together.
- The uploader's confirmation is sent once the files have been delivered to your upload destination, not at the moment the success screen appears.
- A teammate with Viewer access can open the Notifications tab but cannot change anything on it, and Send Test Email is hidden from them.
- Removing a custom domain on the Domains page returns your notifications to the EZ File Drop sending address. They keep sending, and only the address changes. See Set up a custom domain.