


Restrict file types and set upload limits
These settings control which files an upload form accepts, how many it takes, and how large they can be. They are available on the Business and Premium plans.
You need a form with a File Upload field in it. See Add form fields.
Which setting goes where
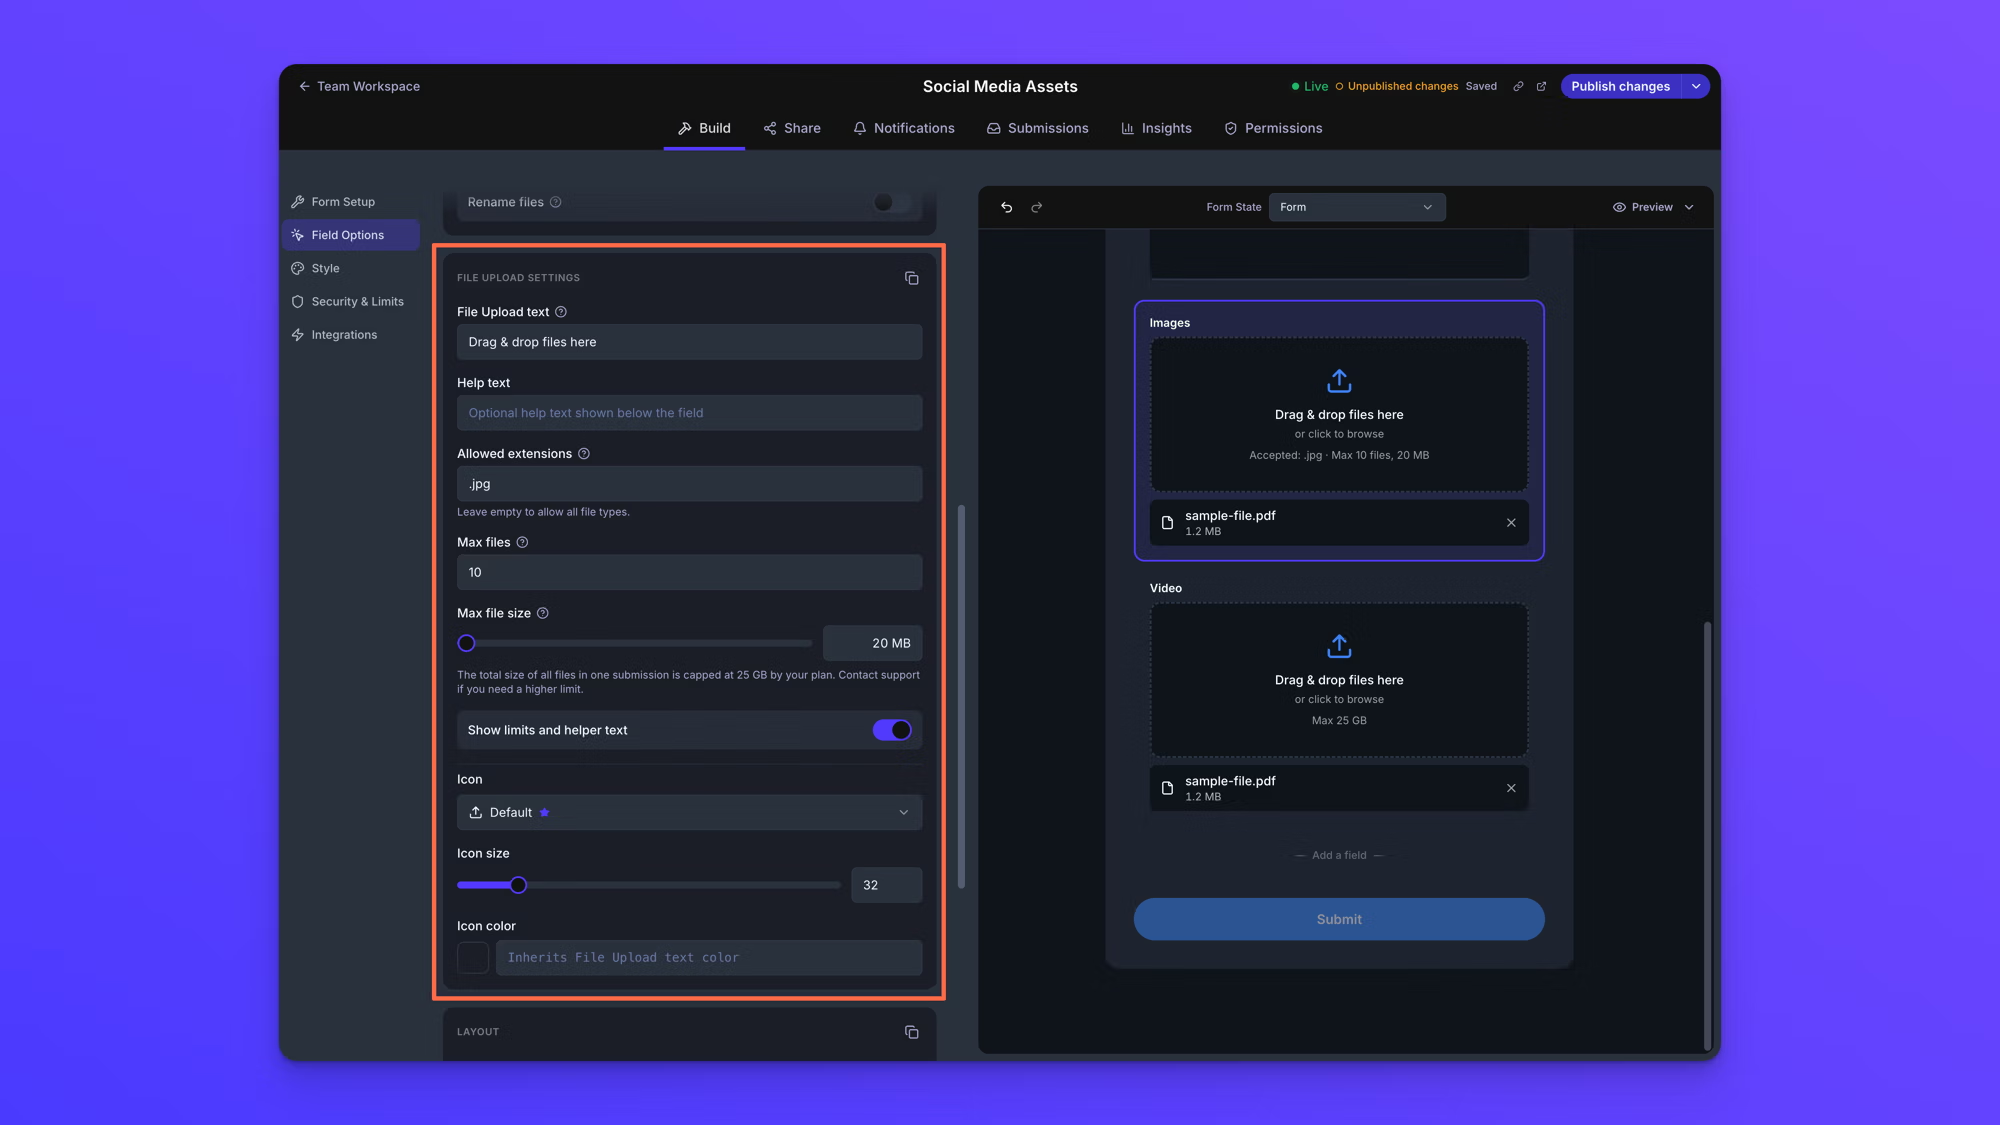
Four of these settings belong to a single File Upload field, and you set them in Field Options, in the Upload Field Settings section: Allowed extensions, Max files, Max file size, and Show limits and helper text. A form with more than one File Upload field has its own set of these for each field.
Two settings apply to the whole form. You set them in Security & Limits: Max total size per submission and Limit the number of submissions.
Choose which file types a field accepts
- On the Upload Forms page, open your form.
- On the form canvas, click the File Upload field you want to set. The left panel switches to Field Options.
- Scroll to Upload Field Settings and enter the file types you want in Allowed extensions, separated by commas.
- Changes save automatically. Publish them with Publish changes.
Leave Allowed extensions empty to accept every file type, which is the default. A leading dot is optional, so jpg and .jpg both work, and capitalization does not matter.
The check reads the extension on the end of the file name. A file with no extension at all is never accepted while a restriction is in place. Someone who tries a file that is not on the list sees a message naming the types the field takes, like "Only jpg, png, pdf files are allowed."
Limit how many files and how large each one is
Max files sets how many files the field takes. It counts only the files in that field, so two fields set to 10 each allow 20 files in one submission. Leave it empty for no limit. Someone who adds more than the limit sees "Maximum 10 files allowed.", and the files over the limit are left off.
Max file size sets how large a single file can be. Drag the slider or type a value. It applies to each file on its own rather than to the submission as a whole, and its ceiling is the form's total size per submission, so it can never be set higher than that. Someone who adds a file over the limit sees "Files must be under 20 MB.", naming whatever you set.
Show the limits to uploaders
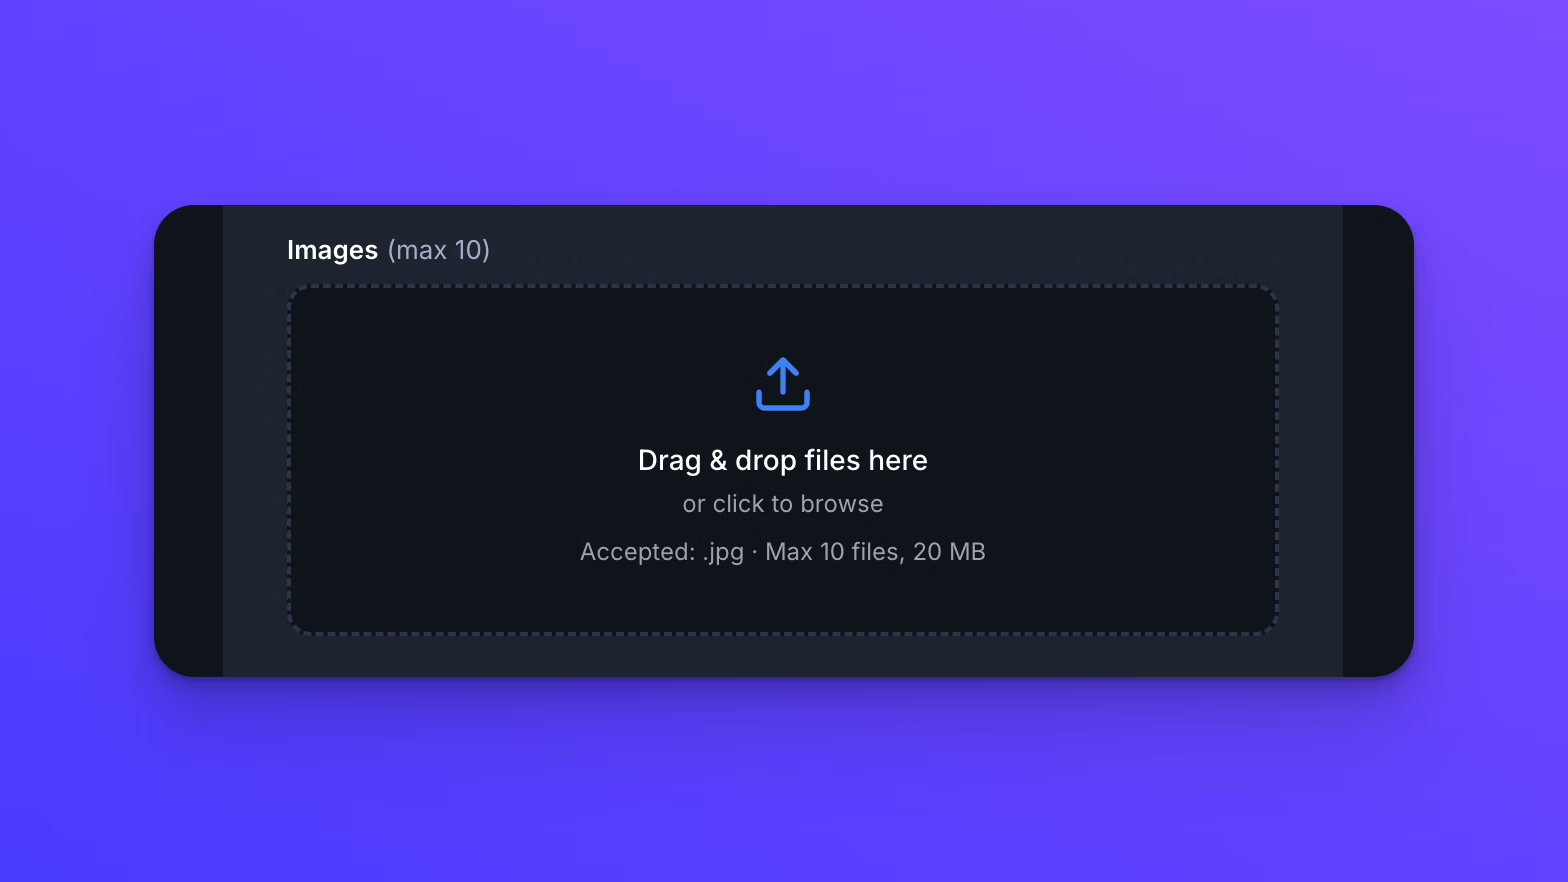
Show limits and helper text is on by default. It puts the field's limits on the form, under the upload text, so people read them before they choose a file. The line reads like "Accepted: jpg · Max 10 files, 20 MB", and it only includes the limits you have actually set.
Turning it off removes that line along with the "or click to browse" line beneath the upload text. The field's label still shows "(max 10)" when Max files is set, which this toggle does not control.
Set a total size for each submission
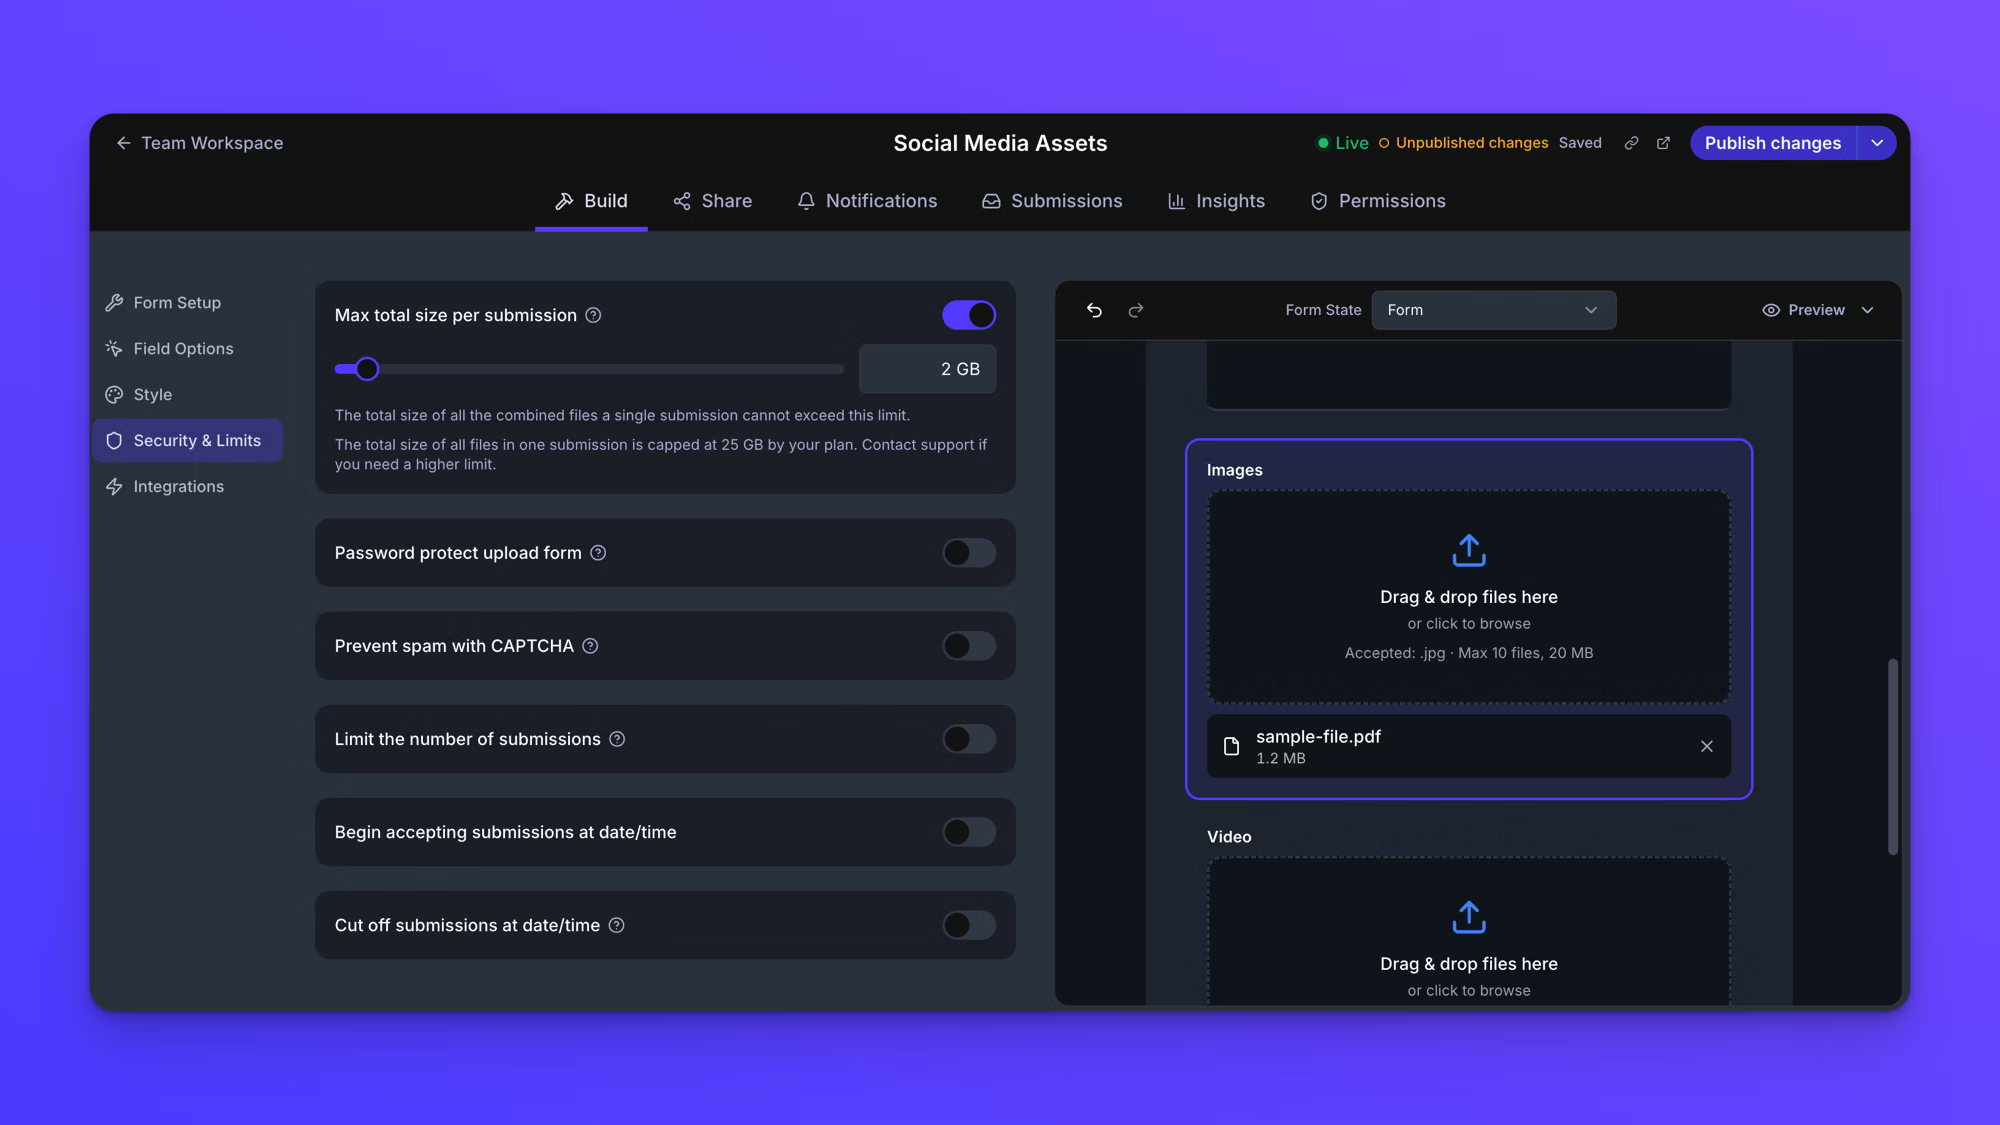
Max total size per submission caps the combined size of everything in one submission, across every File Upload field on the form.
It is off by default, and your plan's limit applies. On the Business and Premium plans that limit is 25 GB. If you need a higher one, contact support and we can raise it.
- In the Build tab's left menu, click Security & Limits.
- Turn on Max total size per submission.
- Drag the slider or type a value.
Turning it on starts the setting at your plan's limit, and you lower it from there for this one form. You cannot set it above your plan's limit. Uploaders never see this number on the form. It appears only when a submission goes over, in a message telling them how far over they are and to remove some files or send them in a separate submission.
Limit the number of submissions
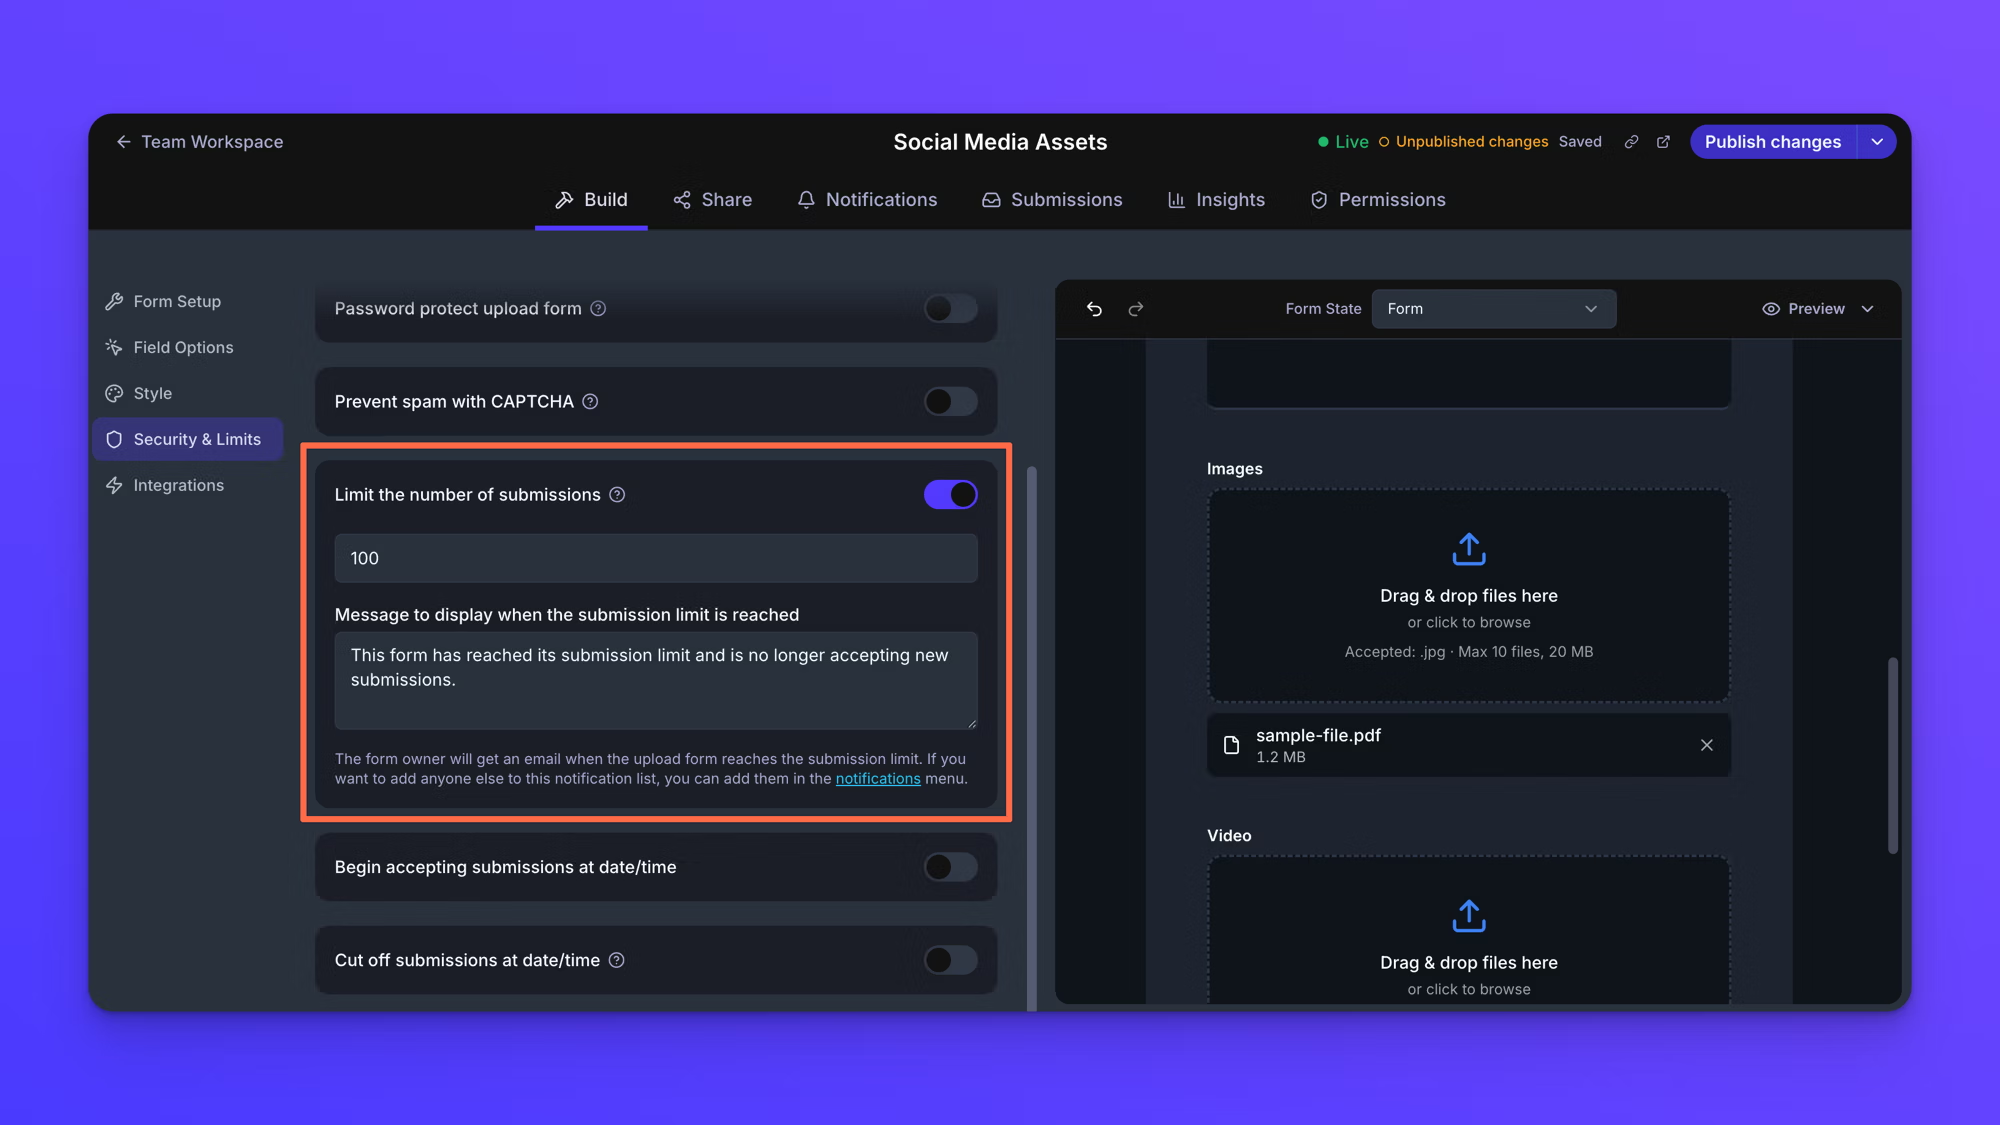
Limit the number of submissions closes a form once it has taken a set number of them. It suits a contest or a call for entries, where you want to stop at a fixed count rather than a fixed date.
- In Security & Limits, turn on Limit the number of submissions.
- Enter how many submissions to accept. It starts at 100.
- Edit the Message to display when the submission limit is reached if you want different wording. The default reads "This form has reached its submission limit and is no longer accepting new submissions."
Once the form reaches that number, anyone who opens its link sees your message in place of the form. You can look at that screen before it happens with the Form State selector; see See your form's states.
You get an email the first time a form reaches its limit. To send that email to other people too, add them in the Notifications tab; see Set up email notifications.
Behavior notes
- Every submission counts toward the limit, including any whose files did not finish delivering. The count cannot be reset, so to reopen a form either raise the number or delete submissions. See View and manage submissions. A form reopened this way does not send the limit email a second time, so check the count yourself if you are relying on it.
- A File Upload field with no Max file size set shows the form's total size per submission as its limit on the form.
- To give another File Upload field the same limits, click the copy icon at the top right of Upload Field Settings, select the other field, then click the paste icon in its Upload Field Settings. It carries Allowed extensions, Max files, and Max file size, and it also carries whether the field is required.
- On the Starter plan these settings are locked in the builder, and a form that was set up on another plan stops applying them. File types, file counts, per-file sizes, and the submission limit are not enforced while the form is on Starter. Your settings are kept and start working again on Business or Premium. Uploads are capped at 5 GB per submission throughout.
- Changes to these settings are saved automatically a moment after you make them, and the indicator at the top of the form reads "Saving…" and then "Saved". Saving is not publishing. A Live form keeps showing its last published version until you click Publish changes in the top right.