


Add form fields
Form fields are how an upload form collects information alongside the files people send. You add, arrange, and edit fields on the form canvas, the working area in the Build tab where your form appears.
The form canvas shows every field at once so you can work on it. Preview, at the top right of the canvas, opens the form the way an uploader will see it.
You need an upload form to work in. If you have not made one yet, start with Create your first upload form.
Add a field at the end of the form
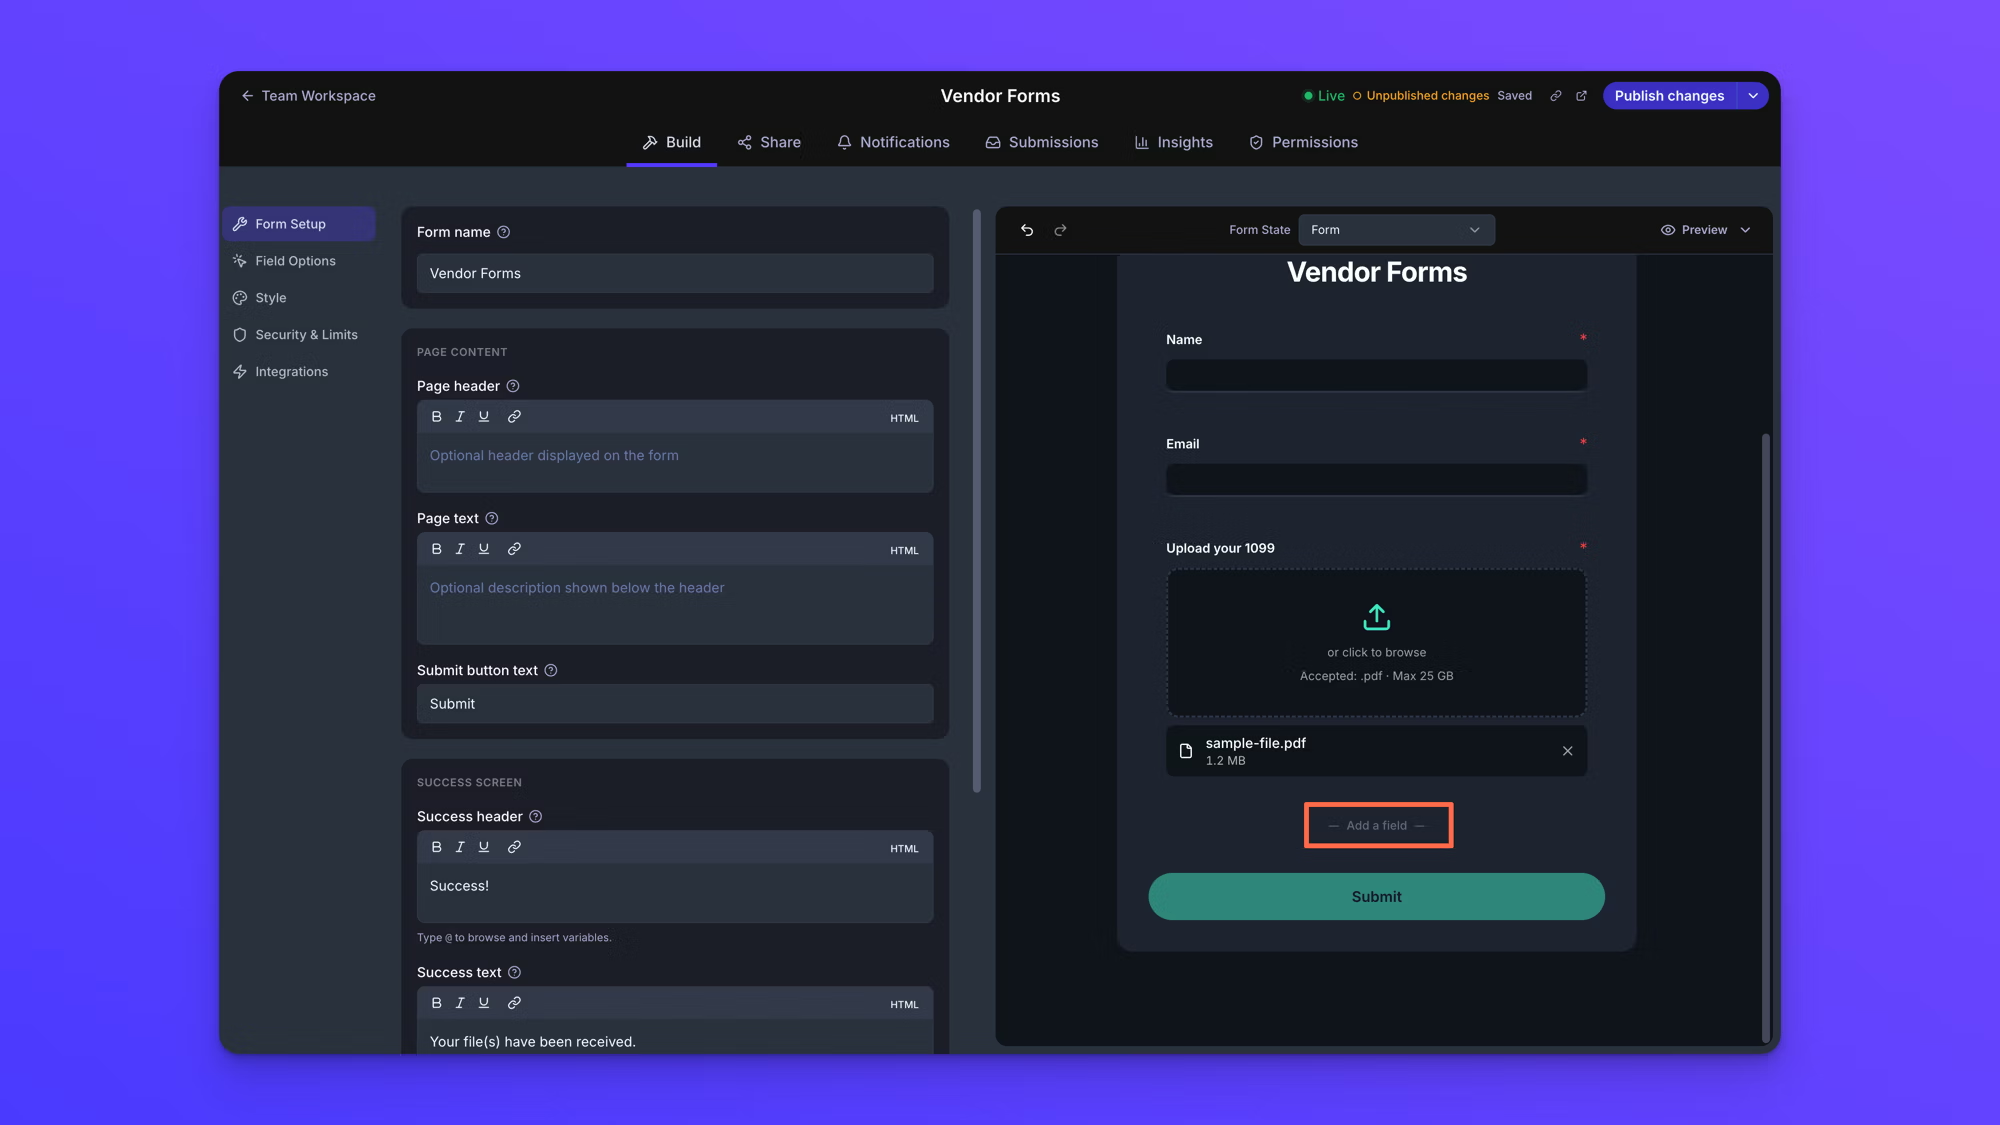
The form canvas has an Add a field button at the bottom, below the last field. It is always there, so this is the fastest way to add a field when its position does not matter yet.
- On the Upload Forms page, open your form.
- Scroll to the bottom of the form canvas and click Add a field.
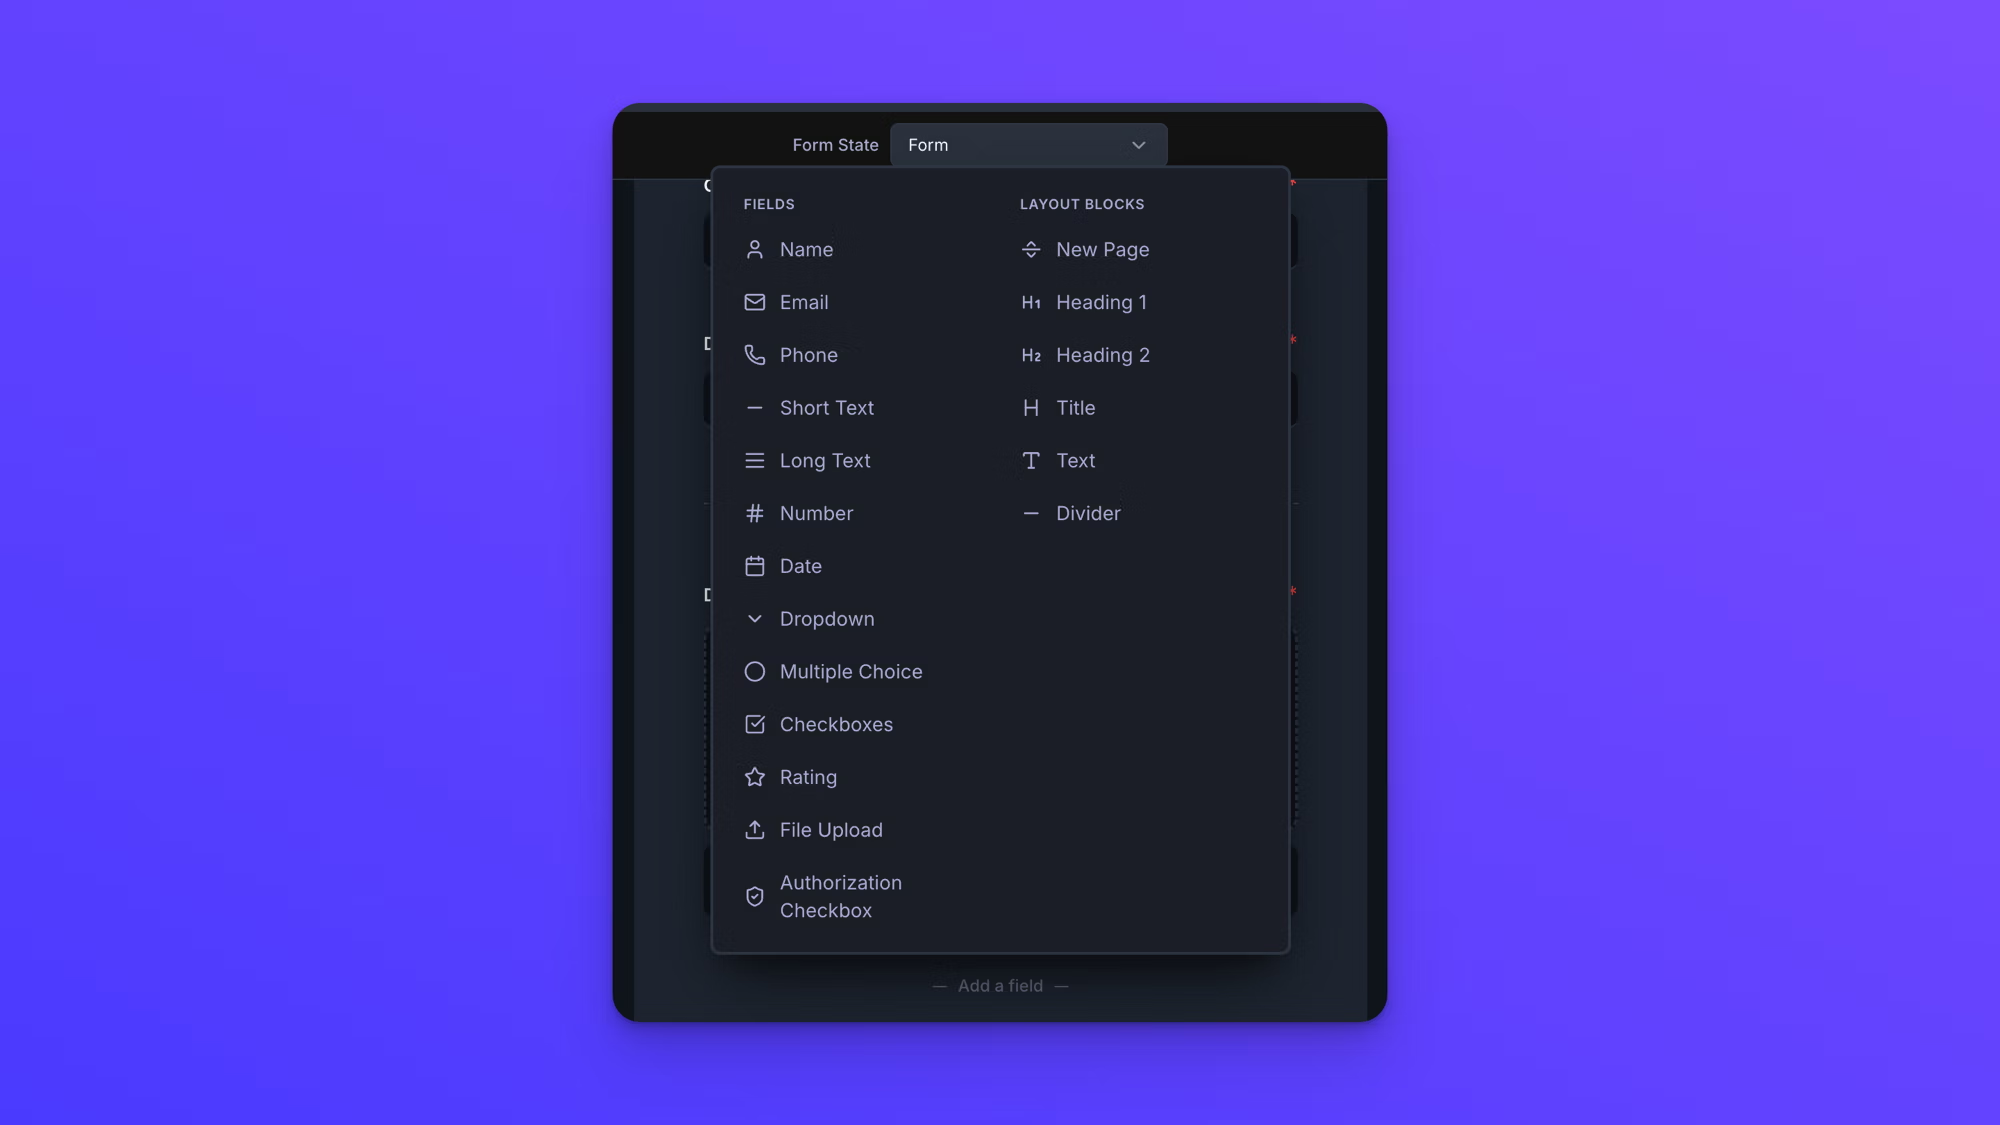
- The field picker opens with two columns, Fields and Layout Blocks. Click the field type you want.
The new field is added at the end of the form.
Add a field in a specific spot
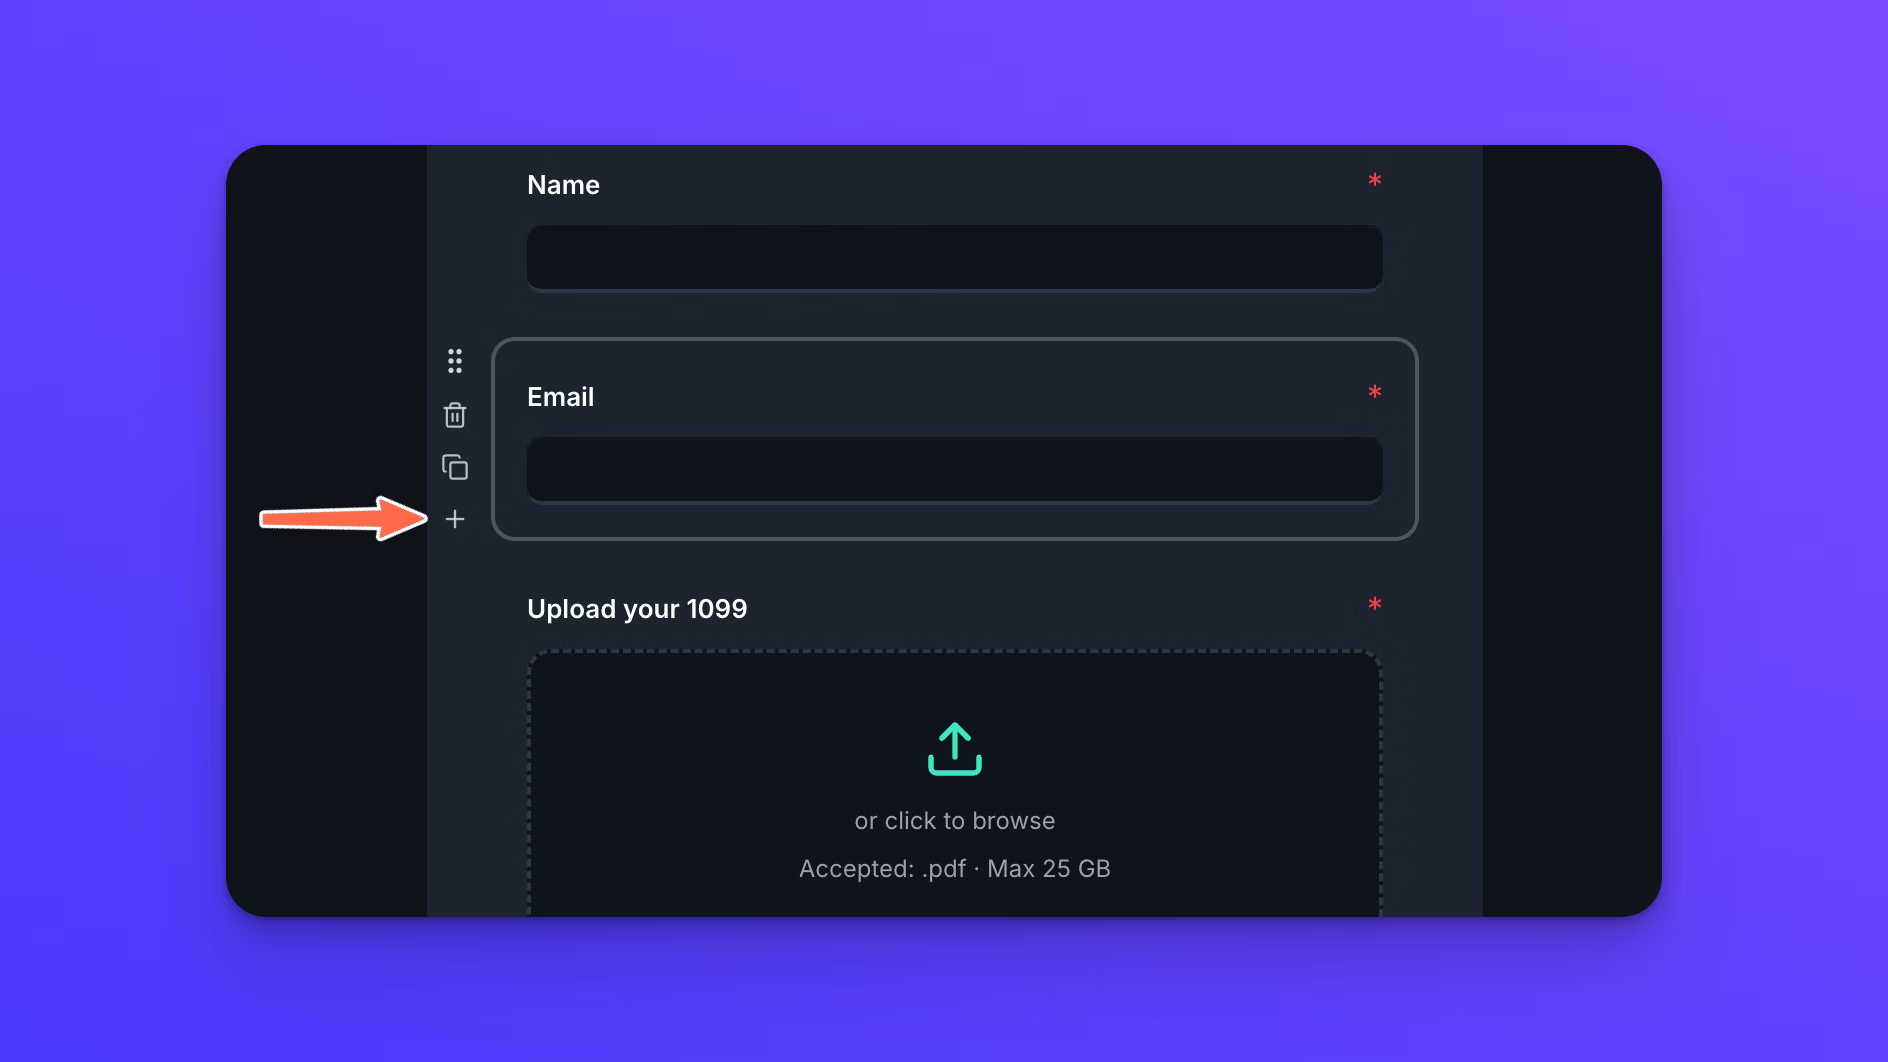
To place a new field between two fields you already have, use the toolbar that appears when you hover over a field. Hover over any field on the form canvas and a small vertical toolbar appears just to its left. It has four controls, top to bottom: a drag handle (Drag to move), a trash icon (Click to delete), a duplicate icon (Duplicate field), and a plus icon (Add field below). Layout blocks have the same toolbar.
- Hover over the field you want the new field to follow.
- Click the plus icon, labeled Add field below.
- In the field picker, click the field type you want.
The new field is added directly below the field you hovered over.
Field types you can add
The field picker's Fields column lists every field type an upload form can use: Name, Email, Phone, Short Text, Long Text, Number, Date, Dropdown, Multiple Choice, Checkboxes, Rating, File Upload, and Authorization Checkbox.
Both ways of adding a field open this same picker, so the full list is available either way.
Layout blocks
Layout blocks sit in the Layout Blocks column of the field picker, beside the field types, and you add one the same way you add a field. There are six.
New Page is at the top of the column and breaks a form into multiple steps; see Build a multi-page form. Heading 1, Heading 2, Title, and Text put text on the form, and Divider draws a line between sections. None of those five collect data, so nothing in them is stored with a submission.
Move, duplicate, and delete a field
The same hover toolbar that adds a field also moves, copies, and removes one. Hover over any field on the form canvas to show it.
- To move a field, drag it by the drag handle at the top of the toolbar and drop it where you want it. Any field can go anywhere in the form, including onto a different page on a multi-page form.
- To duplicate a field, click the duplicate icon. The copy appears directly below the original and is selected for you, with its properties open. It carries the original's settings, including its Label, whether it is required, its Query parameter key, and any conditional logic rule. A copy of a File Upload field is the one exception. It does not carry the original's upload destination, so set one on the copy before you publish.
- To delete a field, click the trash icon. There is no confirmation step, so if you remove the wrong field, use Undo.
Undo a change
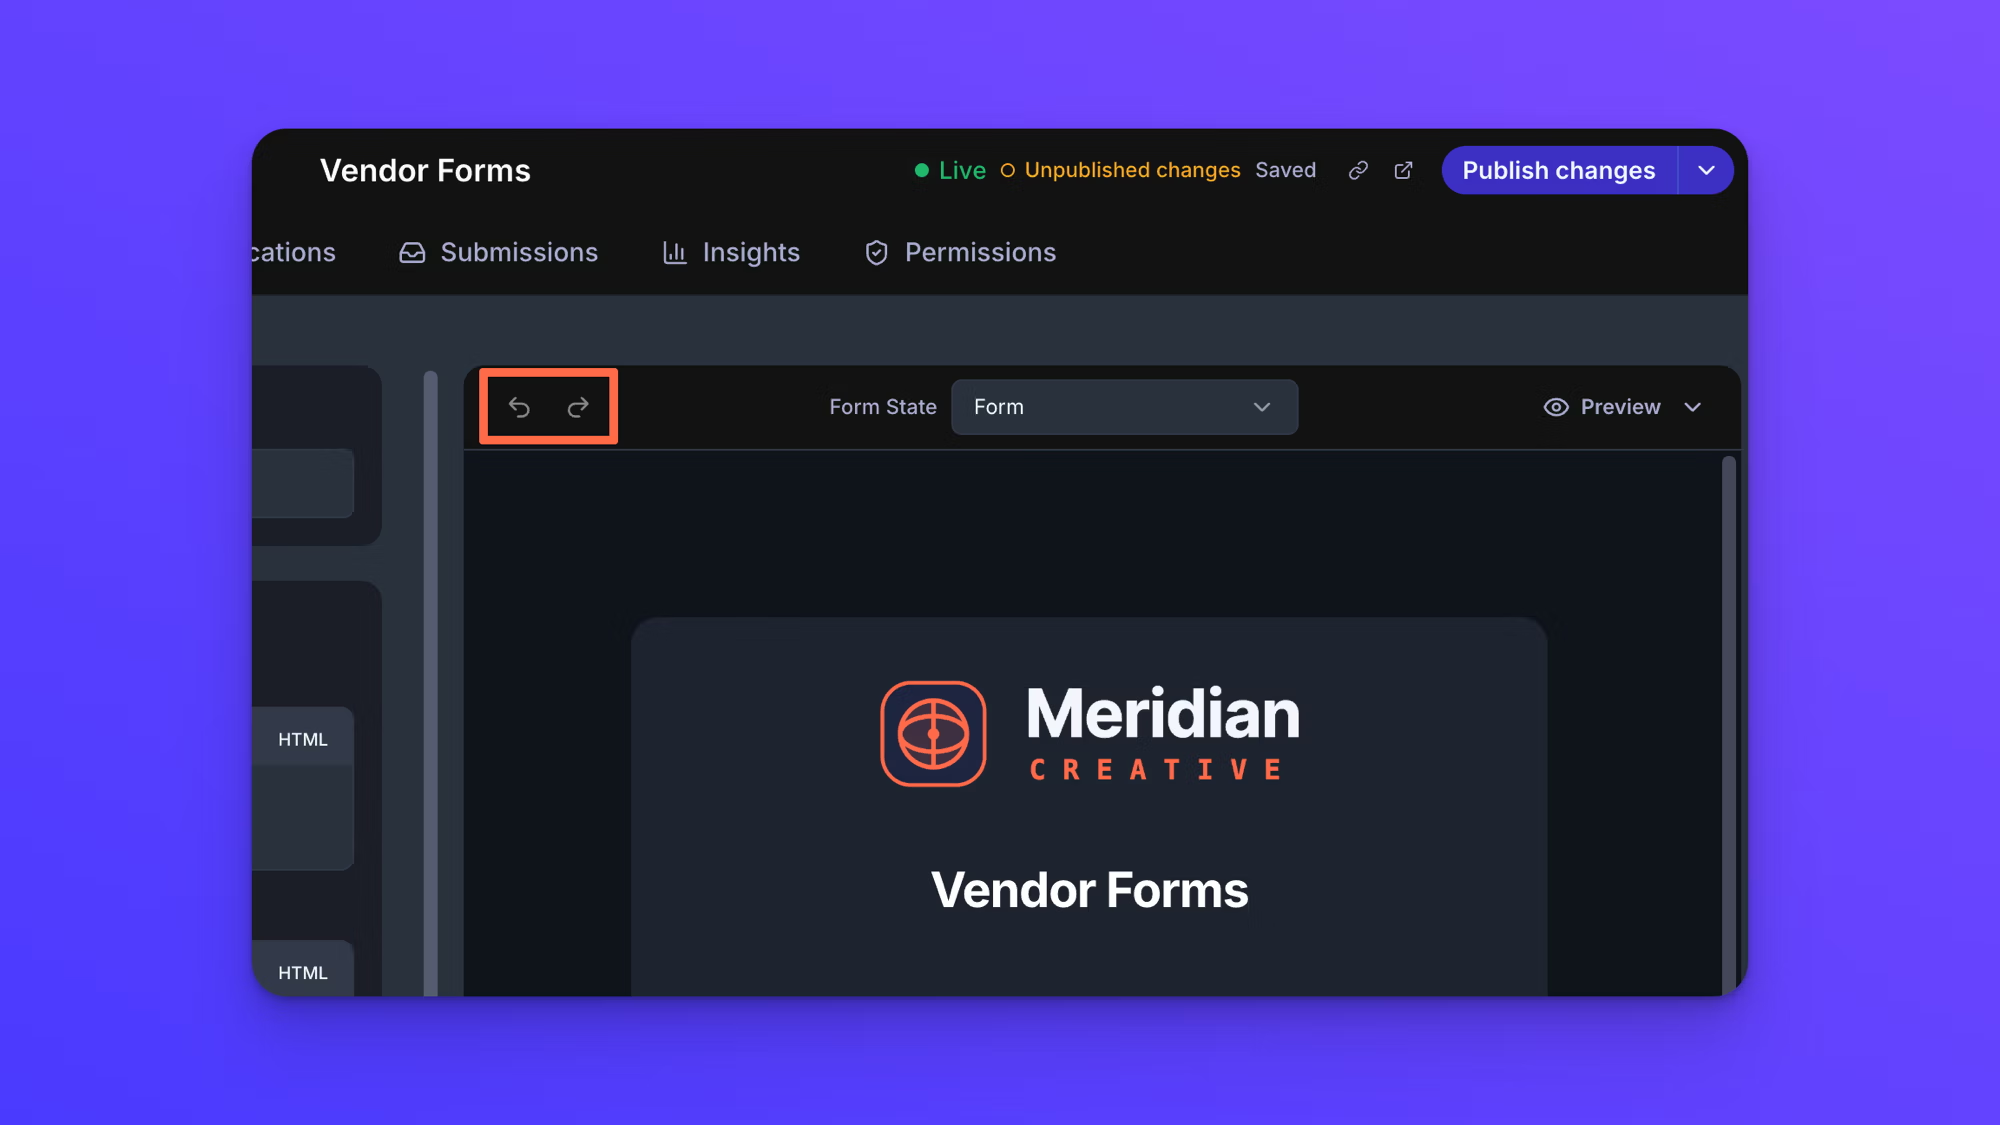
Undo and Redo sit at the far left of the strip above the form canvas, opposite the Form State selector. On a Mac the shortcuts are Cmd+Z and Cmd+Shift+Z, and elsewhere Ctrl+Z and Ctrl+Shift+Z. Both buttons grey out when there is nothing to undo or redo.
Undo goes back 50 steps and covers more than fields. Anything you change in the Build tab is in it, including styling, Form Setup, and Security & Limits.
Undo brings a deleted field back whole. A File Upload field returns with its upload destination and its dynamic subfolder settings still in place.
The history lasts as long as you are in the form. Moving between the form's tabs keeps it, and leaving the form or reloading the page clears it.
While your cursor is in a text box, the keyboard shortcut undoes your typing instead of your last change to the form. Click away from the box first, or use the Undo button.
Work with more than one field at a time
Fields can be selected in groups and acted on together.
- Hold Shift and click to select every field between the one already selected and the one you click.
- Hold Cmd on a Mac, or Ctrl elsewhere, and click to add or remove a single field from the selection.
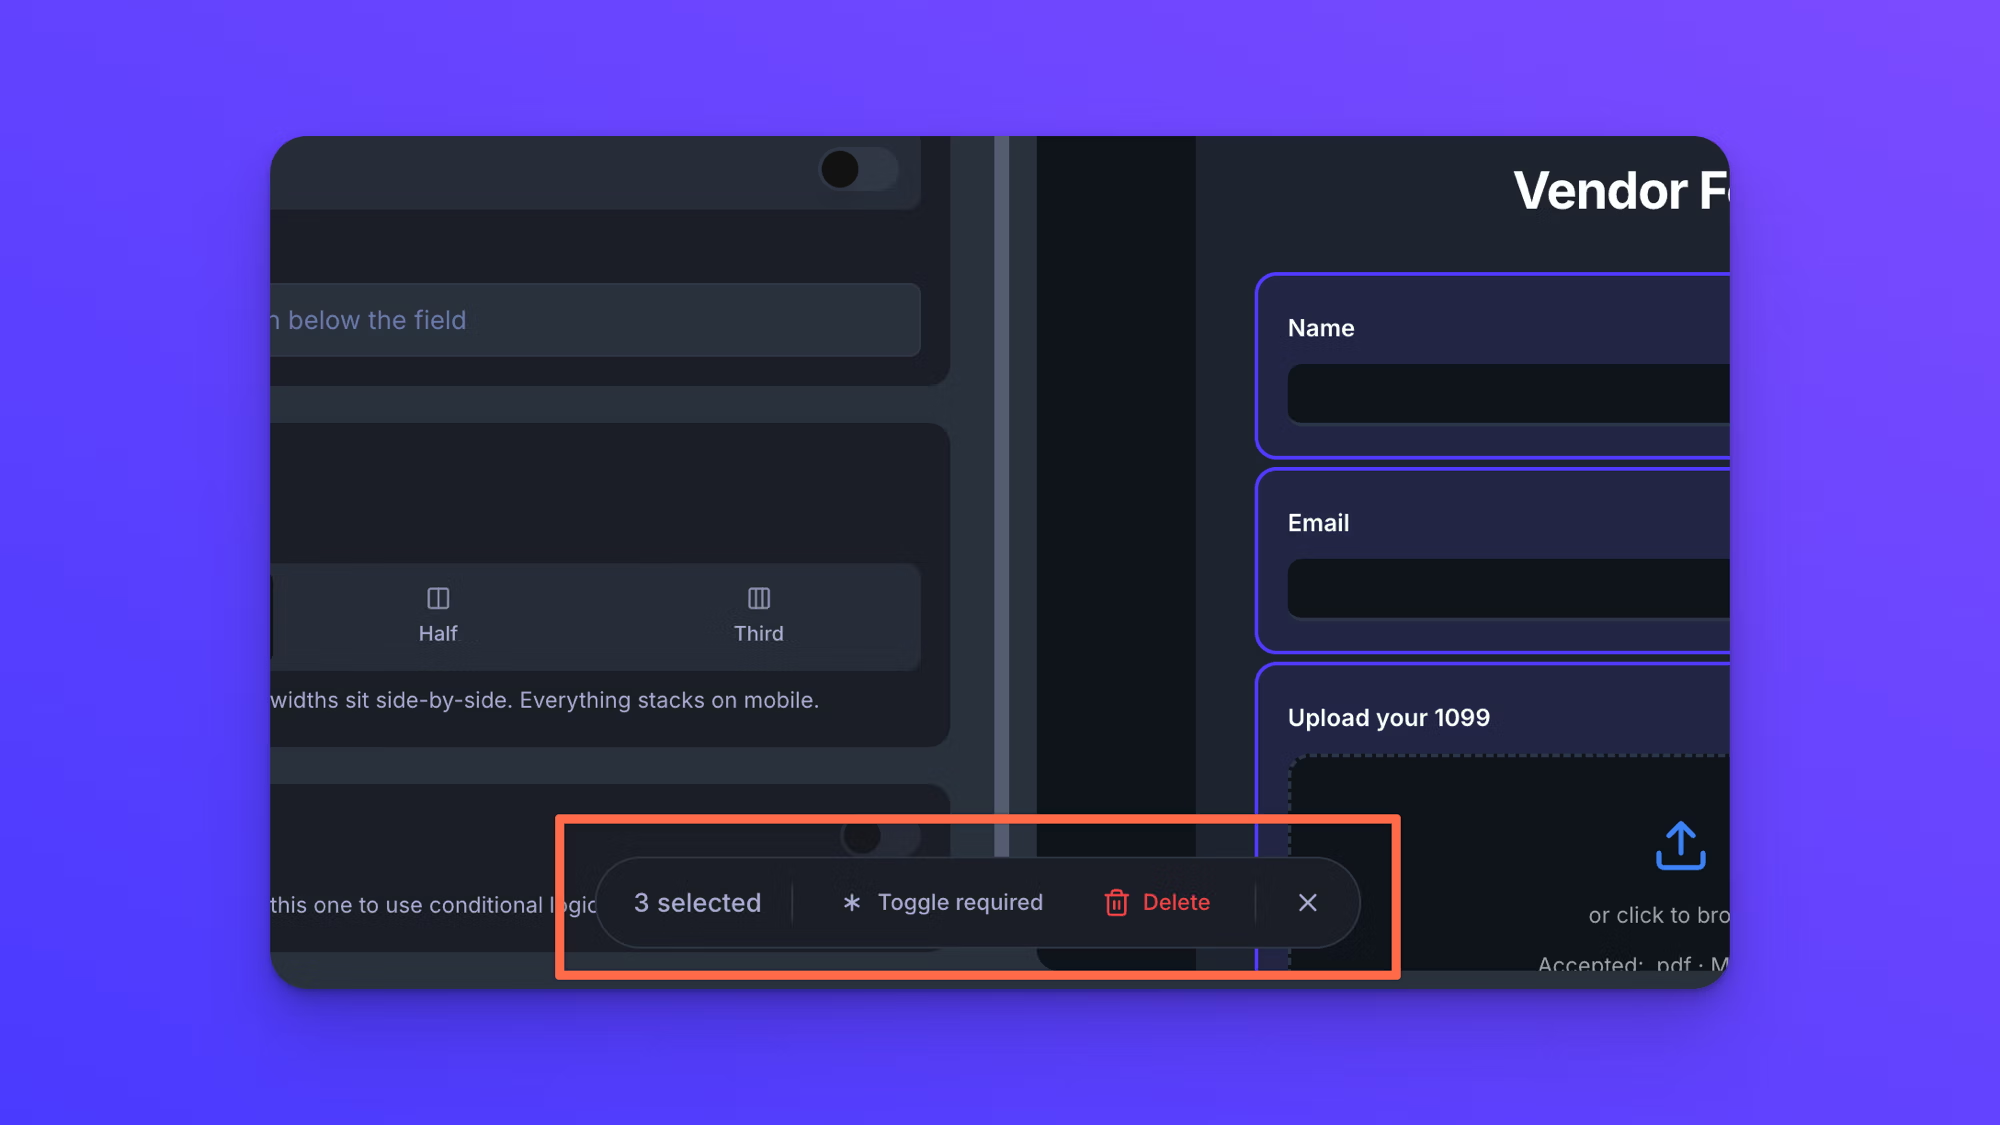
With two or more selected, a bar appears at the bottom of the screen showing how many you have. Toggle required makes all of them required, or clears required from all of them if they already are. Layout blocks in the selection are left alone. Delete removes all of them at once, and Undo brings them all back together.
A selection of several fields drags as one group, so a run of fields can be moved through the form together.
Selecting more than one field does not open Field Properties. Click a single field for that.
Edit a field's properties
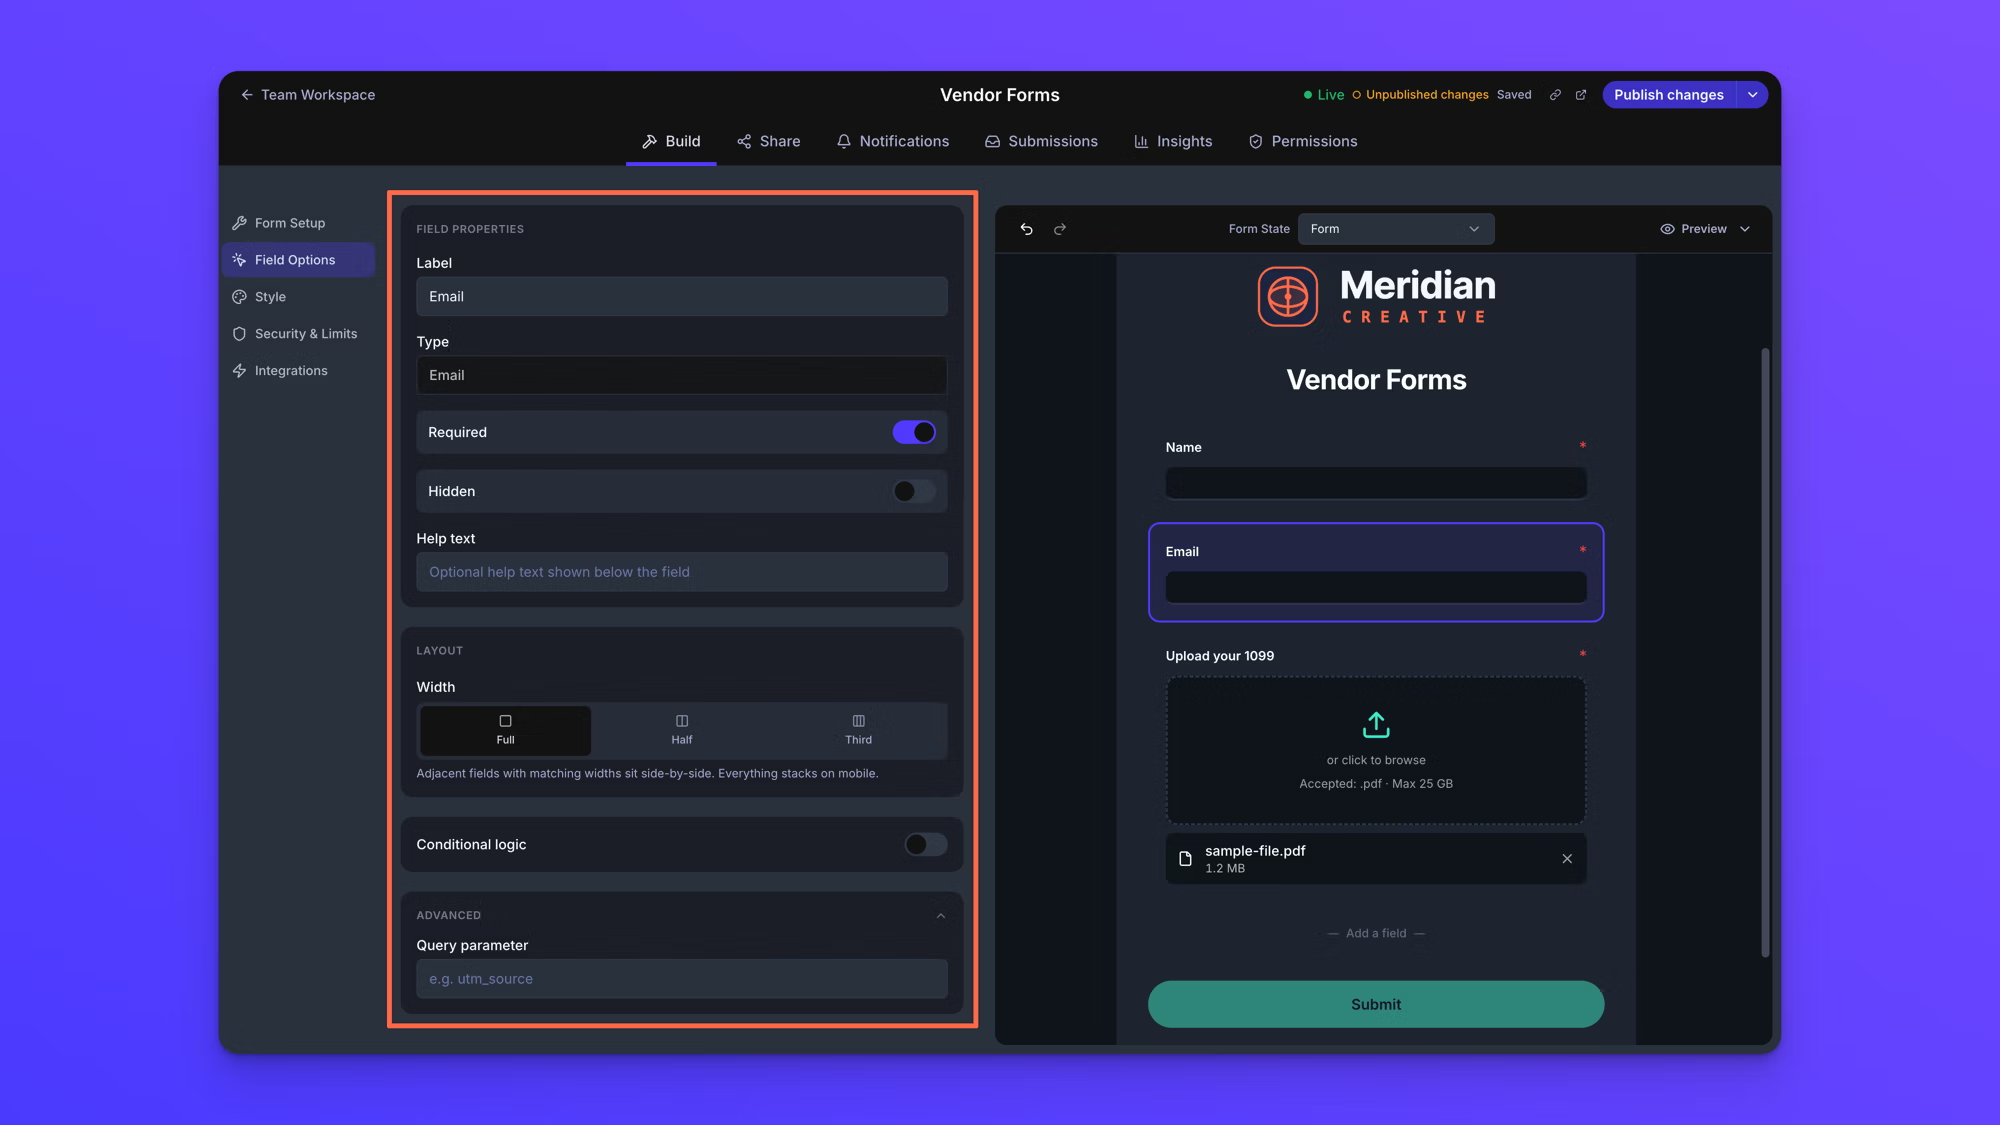
Each field has its own settings, and selecting a field opens them in the Field Properties panel.
Click the field you want to edit on the form canvas. The left panel switches to Field Options and shows that field's properties. This works from Form Setup, Notifications, Integrations, and Security & Limits, so you do not need to open Field Options first. Style is the exception. While it is open, clicking a field selects it for styling instead of opening its properties. See Advanced form styling.
What appears in the panel depends on the field type you selected, since a Rating field and a File Upload field need different settings. Most fields also have an Advanced section, which is where a field's Query parameter key is set; see Pre-fill forms with URL query parameters. File Upload fields, Authorization Checkbox fields, and layout blocks do not have one.
Behavior notes
- Changes to your form's fields are saved automatically a moment after you make them, and the indicator at the top of the form reads "Saving…" and then "Saved". Saving is not publishing. A Live form keeps showing its last published version until you click Publish changes in the top right.
- Fields can be reordered at any time after they are added, so the position a field lands in when you add it is not permanent.
- There is no limit on the number of fields a form can have, and no limit on the number of options on a Dropdown, Multiple Choice, or Checkboxes field.
- A form can include more than one File Upload field. Each File Upload field has its own upload destination settings, so a single form can deliver files to different folders, or to different cloud accounts entirely. More than one File Upload field per form is available on the Business and Premium plans.
- A duplicated field keeps the original's Query parameter key, so both fields fill from the same value in a link. Give the copy its own key if you want them filled separately.
- Deleting an Email field asks you to confirm when it is the last one on the form, or the one your uploader confirmation email is sent to, since removing it turns that email off. See Set up email notifications.