


Build a multi-page form
A multi-page form breaks a long form into steps, so uploaders answer a few questions at a time instead of scrolling one long page. You build it by adding New Page blocks where you want each split. Multi-page forms are available on the Business and Premium plans.
You need an upload form with a few fields in it. If you have not made one yet, start with Create your first upload form.
Split a form into pages
A New Page block marks where one page ends and the next begins. Everything above it is one page, everything below it is the next, and you add one block for each split you want.
- On the Upload Forms page, open your form.
- Hover over the field the split should follow and click the plus icon, labeled Add field below. To add the split at the end of the form instead, click Add a field at the bottom of the form canvas.
- In the field picker, click New Page in the Layout Blocks column.
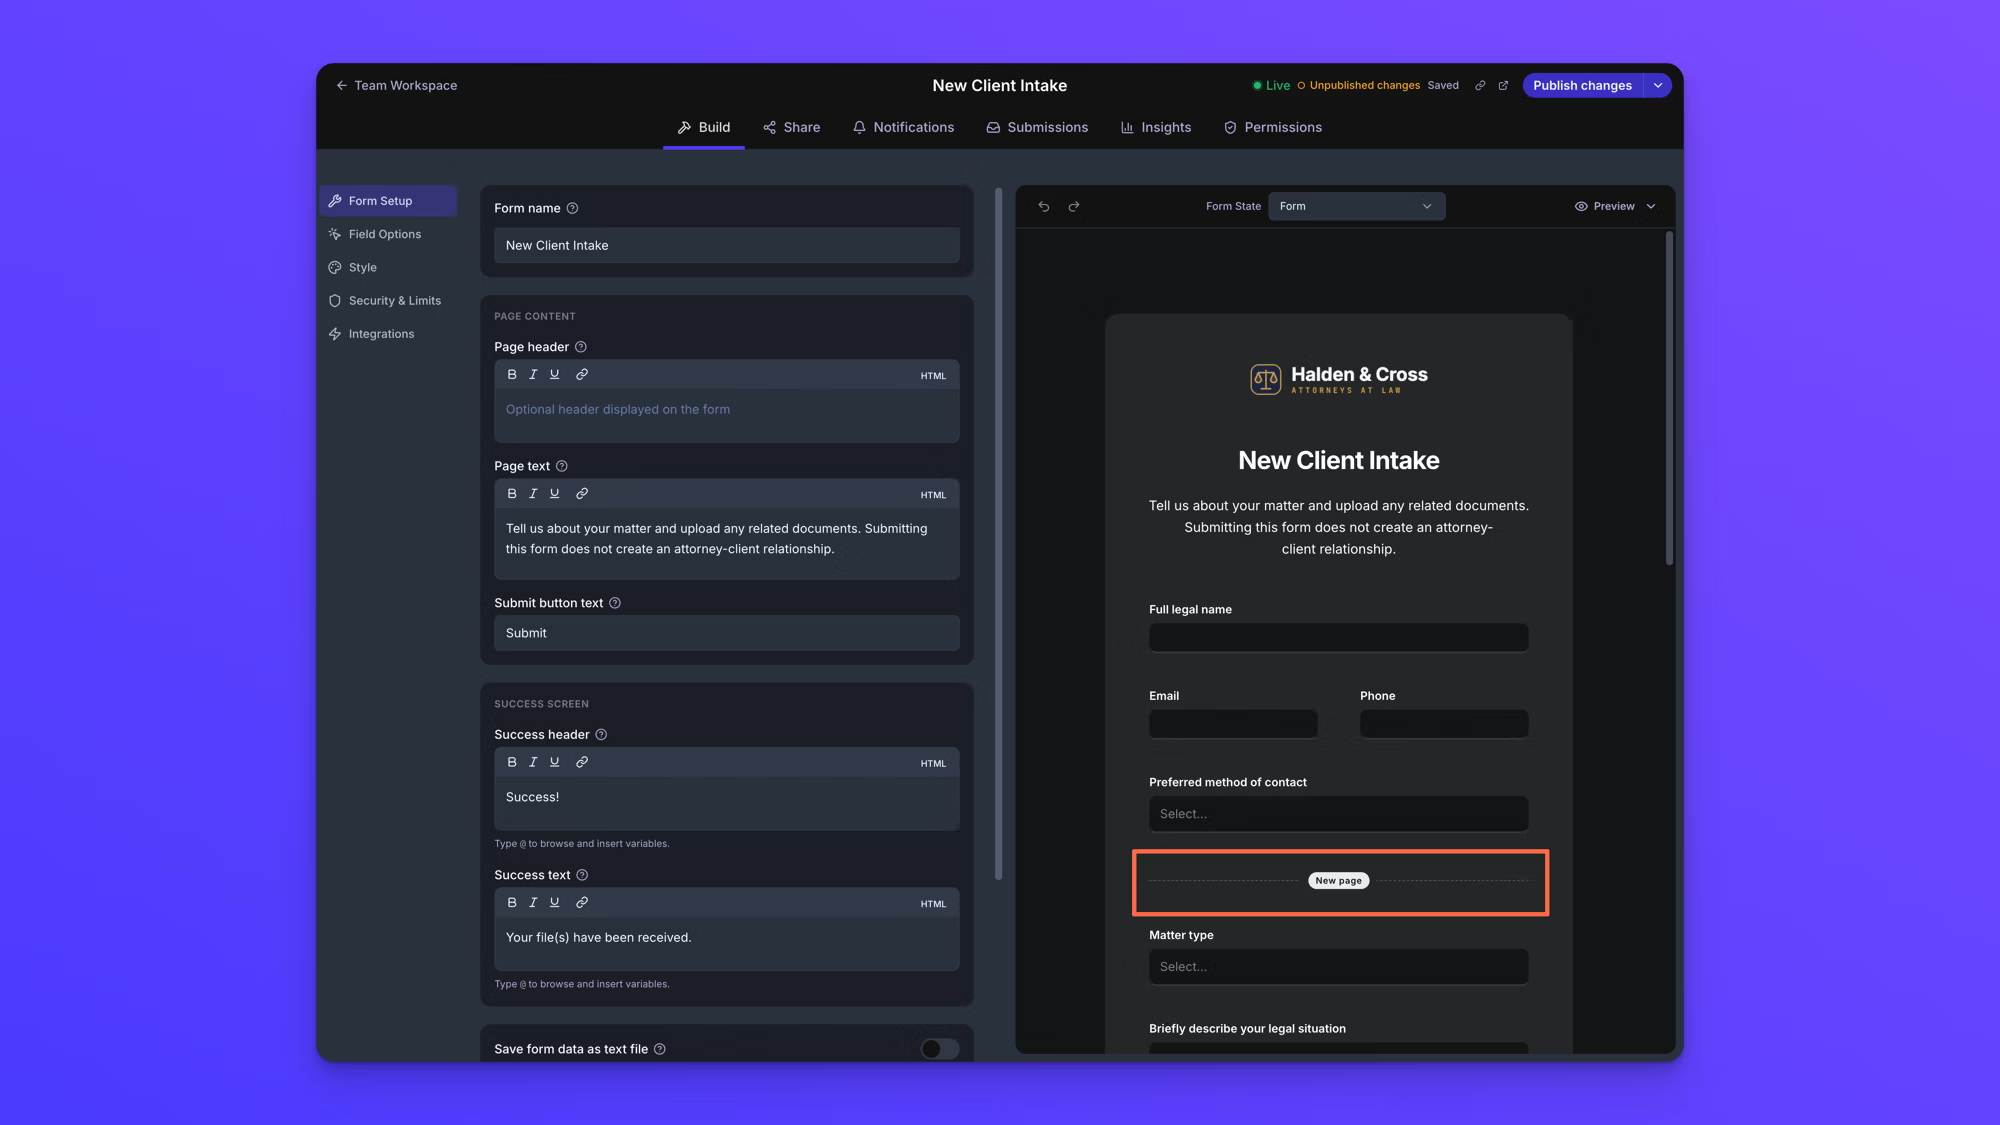
On the form canvas, the block appears as a dashed divider labeled New page. Add another New Page block for every additional page you want.
See the pages in Preview
The form canvas shows the whole form from top to bottom, dividers included, with every field on screen at once. It does not break the form into pages, so it is not where you check your work.
Preview, at the top right of the form canvas, opens the form the way an uploader sees it, one page at a time. Use it to click through the form the way someone filling it out will.

Choose a progress indicator
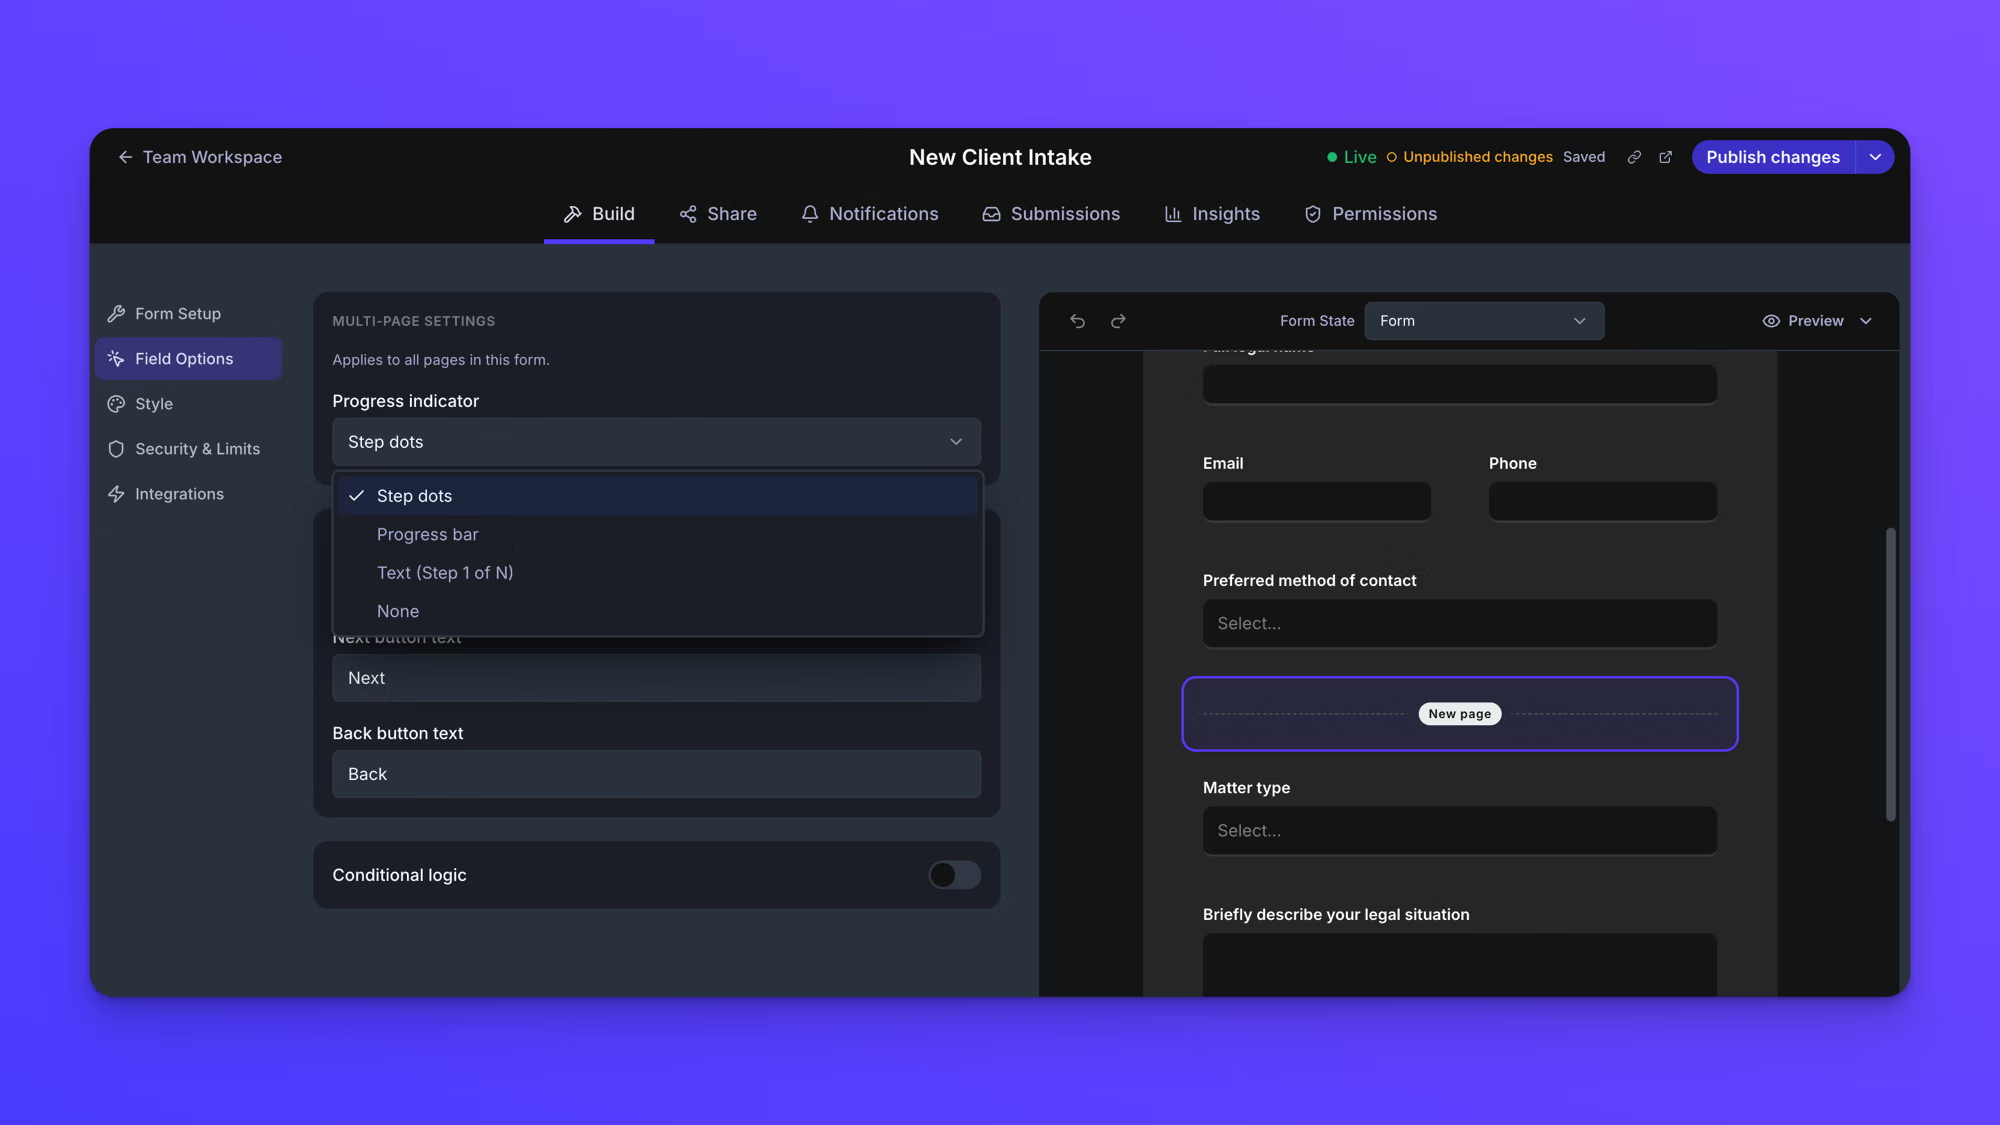
The progress indicator tells uploaders how far through the form they are. Select any New Page block on the form canvas, and the Multi-Page Settings section opens in Field Options with the Progress indicator setting in it. The setting applies to the whole form, so you only set it once no matter how many pages you have.
There are four choices:
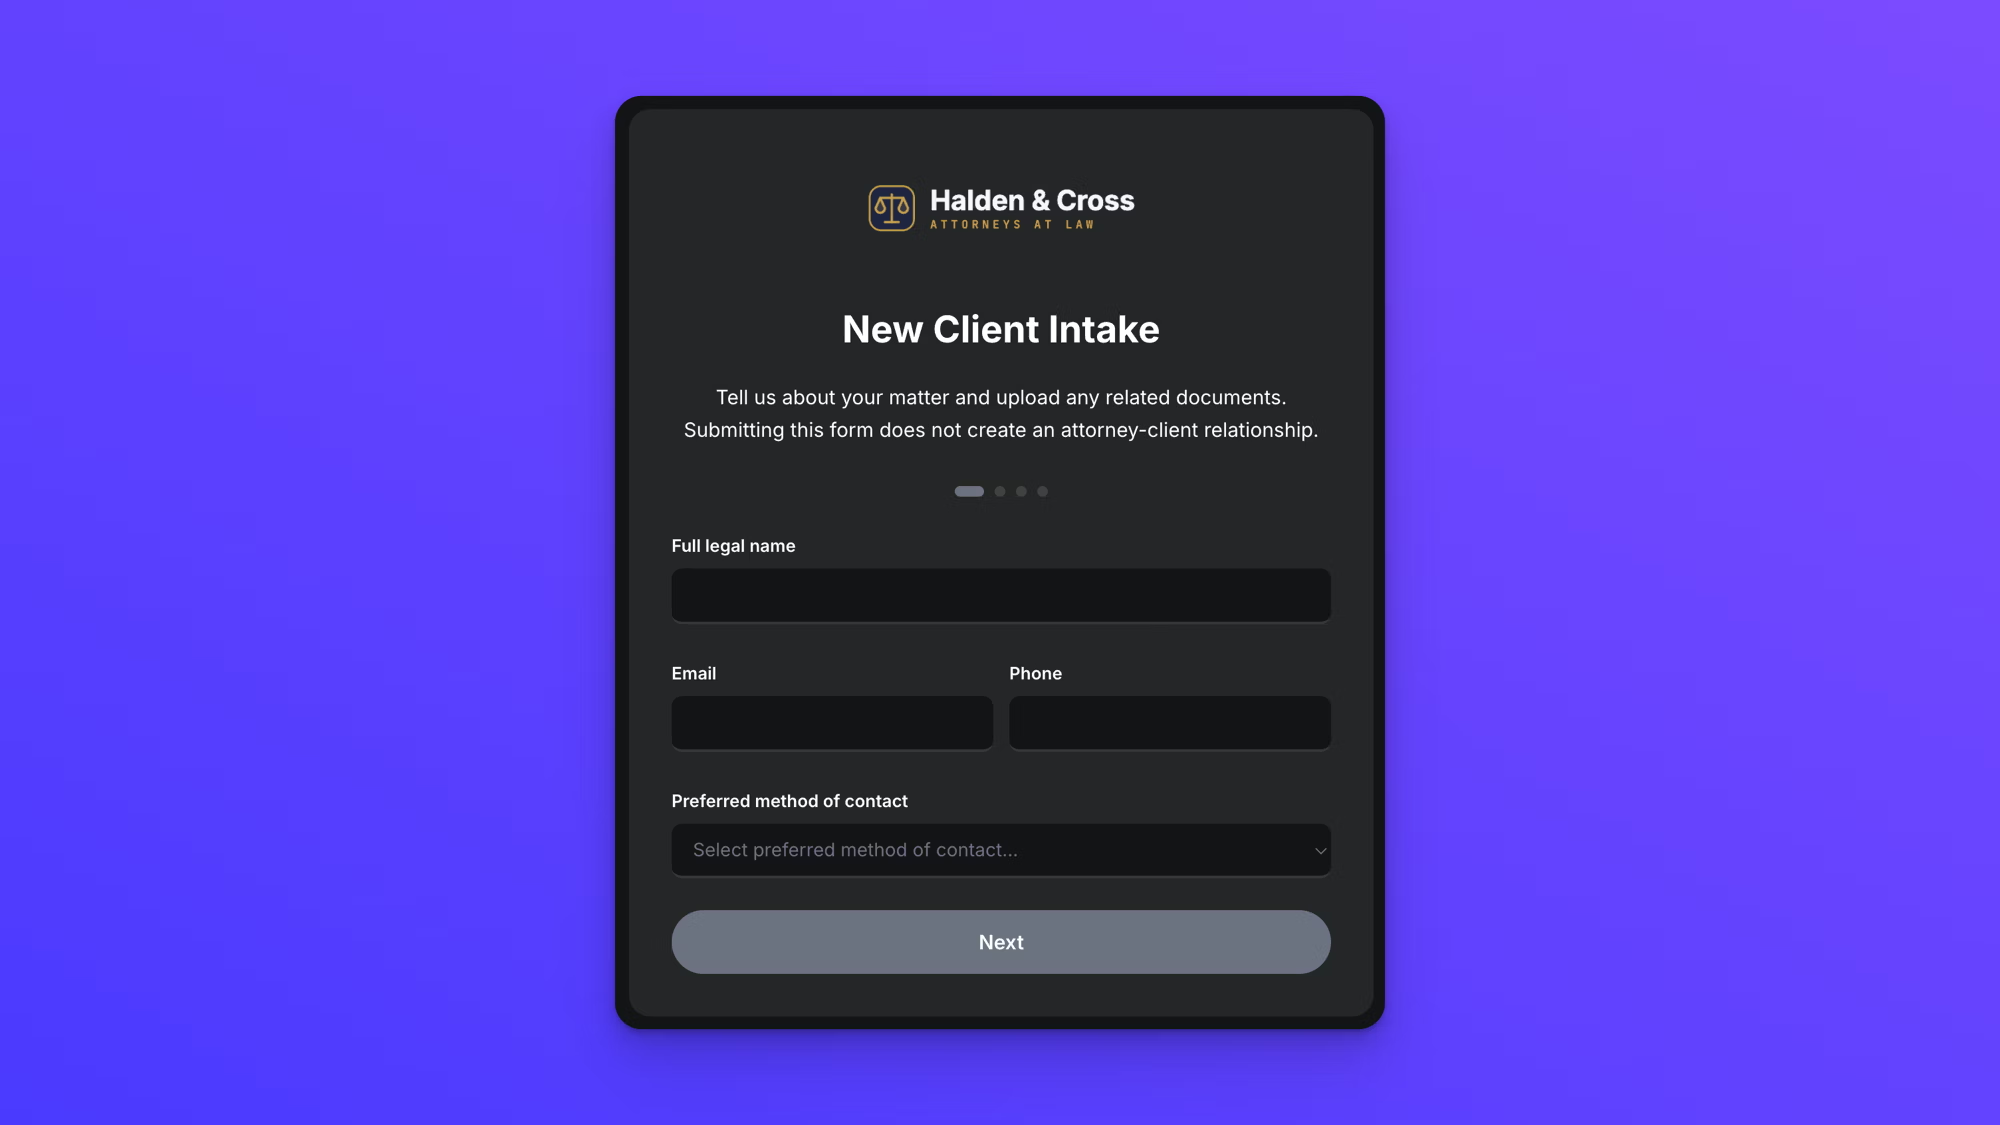
- Step dots: a row of dots, one per page, with the dot for the current page widened.
- Progress bar: a bar that fills as uploaders move forward, with the page count beneath it.
- Text (Step 1 of N): the page count on its own. Uploaders see it as Page 1 of 3.
- None: no indicator at all.
Set the button wording
Each New Page block has its own Next button text and Back button text settings, so the buttons can be worded differently at each step. Both sit in Block Properties, below Multi-Page Settings. They default to Next and Back.
The button on the last page is not a Next button. It uses the Submit button text set in Form Setup, which defaults to Submit.
What uploaders see on each page
The form's title and description stay at the top of every page, along with your logo, so the form keeps its identity as people move through it. The progress indicator sits below them.
Back appears above the fields as a text link. It is not on the first page, since there is nowhere to go back to. The button that moves forward sits below the fields at the bottom of the page.
Required fields are checked one page at a time. Clicking the forward button checks only the fields on the current page, and uploaders cannot move on until the required ones on that page are filled in. When something is missing, the fields themselves are marked and a message appears just above the forward button.
Show or hide a whole page with a condition
A New Page block can carry conditional logic the same way a field can. The condition governs the page that follows the block, so when it is not met, that whole page is skipped and uploaders go straight past it. Select the block, turn on Conditional logic, and build the condition. See Show or hide fields with conditional logic.
The first page of a form always appears. There is no New Page block above it to carry a condition.
Only a condition on the New Page block itself removes a page. If every field on a page is hidden by that field's own conditions, the page still appears, empty, with its forward button.
Behavior notes
- There is no limit on the number of pages a form can have.
- A New Page block placed as the very first thing in a form creates an empty first page. Placed as the very last thing, it does not add an empty page at the end. Two New Page blocks with nothing between them create an empty page in the middle, with its own forward button.
- The progress indicator counts only the pages an uploader will actually see. On a form where a condition removes a page, the total can change as they answer.
- Fields can be dragged from one page to another on the form canvas, so a form can be re-split at any time. See Add form fields.
- All of a form's pages produce one submission. Uploaders do not submit page by page.
- An uploader's progress is saved in their browser as they fill the form in. If they reload the page or come back later, their answers and the page they had reached are restored. A message at the top of the form tells them their files need attaching again, because files are never saved. A Start over link in that message clears everything and takes them back to the first page.
- Changes to a form's pages are saved automatically a moment after you make them, and the indicator at the top of the form reads "Saving…" and then "Saved". Saving is not publishing. A Live form keeps showing its last published version until you click Publish changes in the top right.