


Embed a form on your website
An embedded upload form sits on a page of your own website, so people upload without ever leaving your site. It is the same form as the one on your share link, with the same fields, the same upload destination, and the same submissions. Embedding is available on the Business and Premium plans.
The form has to be published before an embedded copy will work. See Form statuses.
Copy the embed code
- On the Upload Forms page, open your form.
- Click the Share tab.
- Scroll to Embed Code.
- Set the four switches, covered below.
- Click Copy embed code.
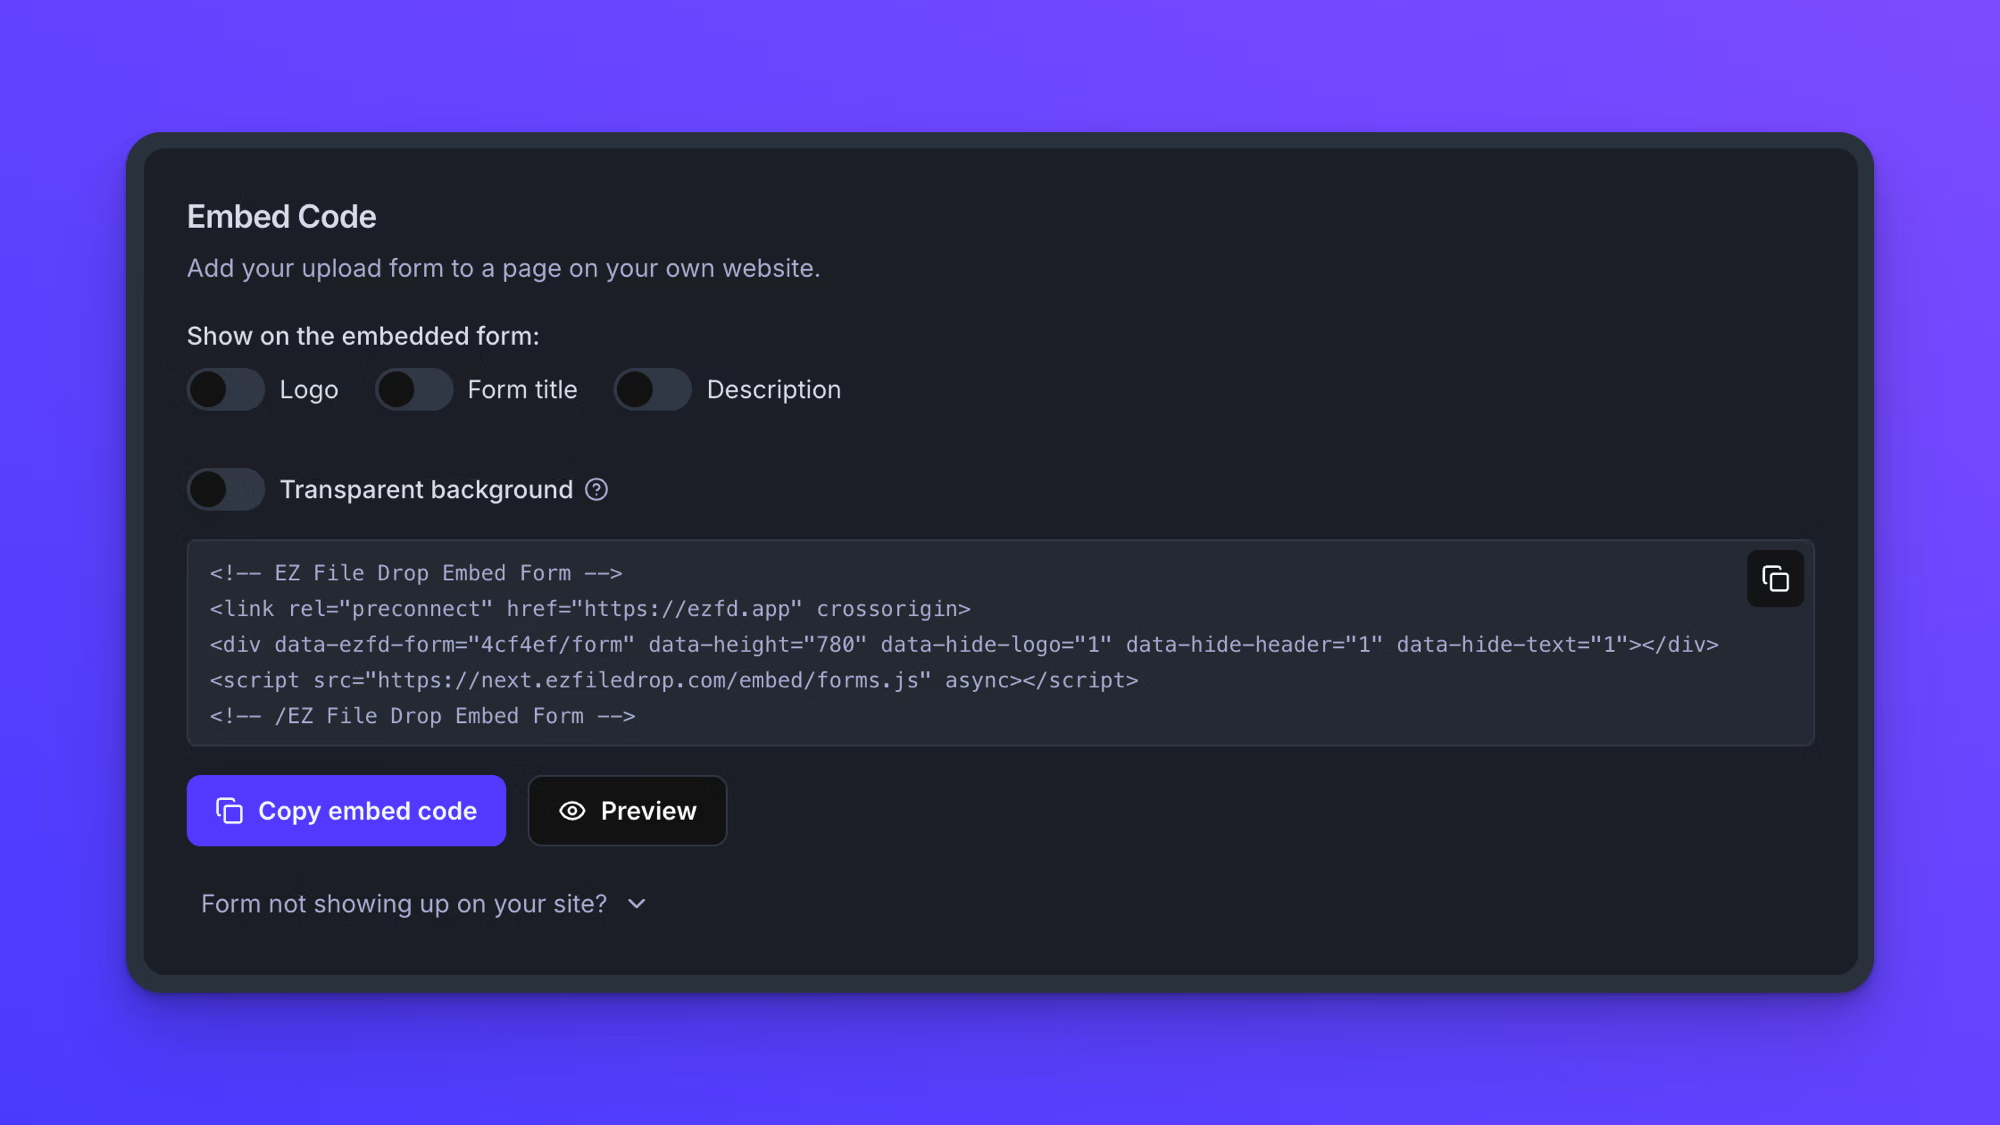
The embed code is JavaScript, built to load your form quickly. Paste the whole block, exactly as copied, at the point on the page where the form should appear.
On the Starter plan the Embed Code section is dimmed behind a padlock, above a line reading "Embed codes are available in Business and Premium plans."
Choose what appears in the embedded form
Four switches sit above the embed code. Three of them are grouped under Show on the embedded form, and Transparent background sits on its own below them. All four start off.
- Logo shows or hides the form's logo.
- Form title shows or hides the title set in Form Setup.
- Description shows or hides the description set in Form Setup.
- Transparent background lets your page's background show through behind the form.
Because all four start off, an embed code copied without touching them gives you the fields, the File Upload area, and the submit button on their own, on the form's usual background. That is usually what you want when the page around the form already carries your logo and explains what to send, and what is left still carries the form's colors, font, and styling. See Style your form.
Turn Logo, Form title, and Description on to carry the form's logo, title, and description into the embedded copy, the way they appear on the form's own share link.
Set the switches before you copy. Each one is written into the embed code at the moment you copy it rather than saved on the form, so all four are off again the next time you open the tab, and changing one later means copying the code again and replacing what you pasted.
Transparent background is for making the form read as part of the page rather than as a panel dropped onto it. The form's colors, fonts, and field styling stay exactly as you set them and only the background goes, so a form built in a dark style still looks dark against a dark page. Leave it off when the page behind the form is busy, or when the form needs to stand as its own block.
Preview before you paste
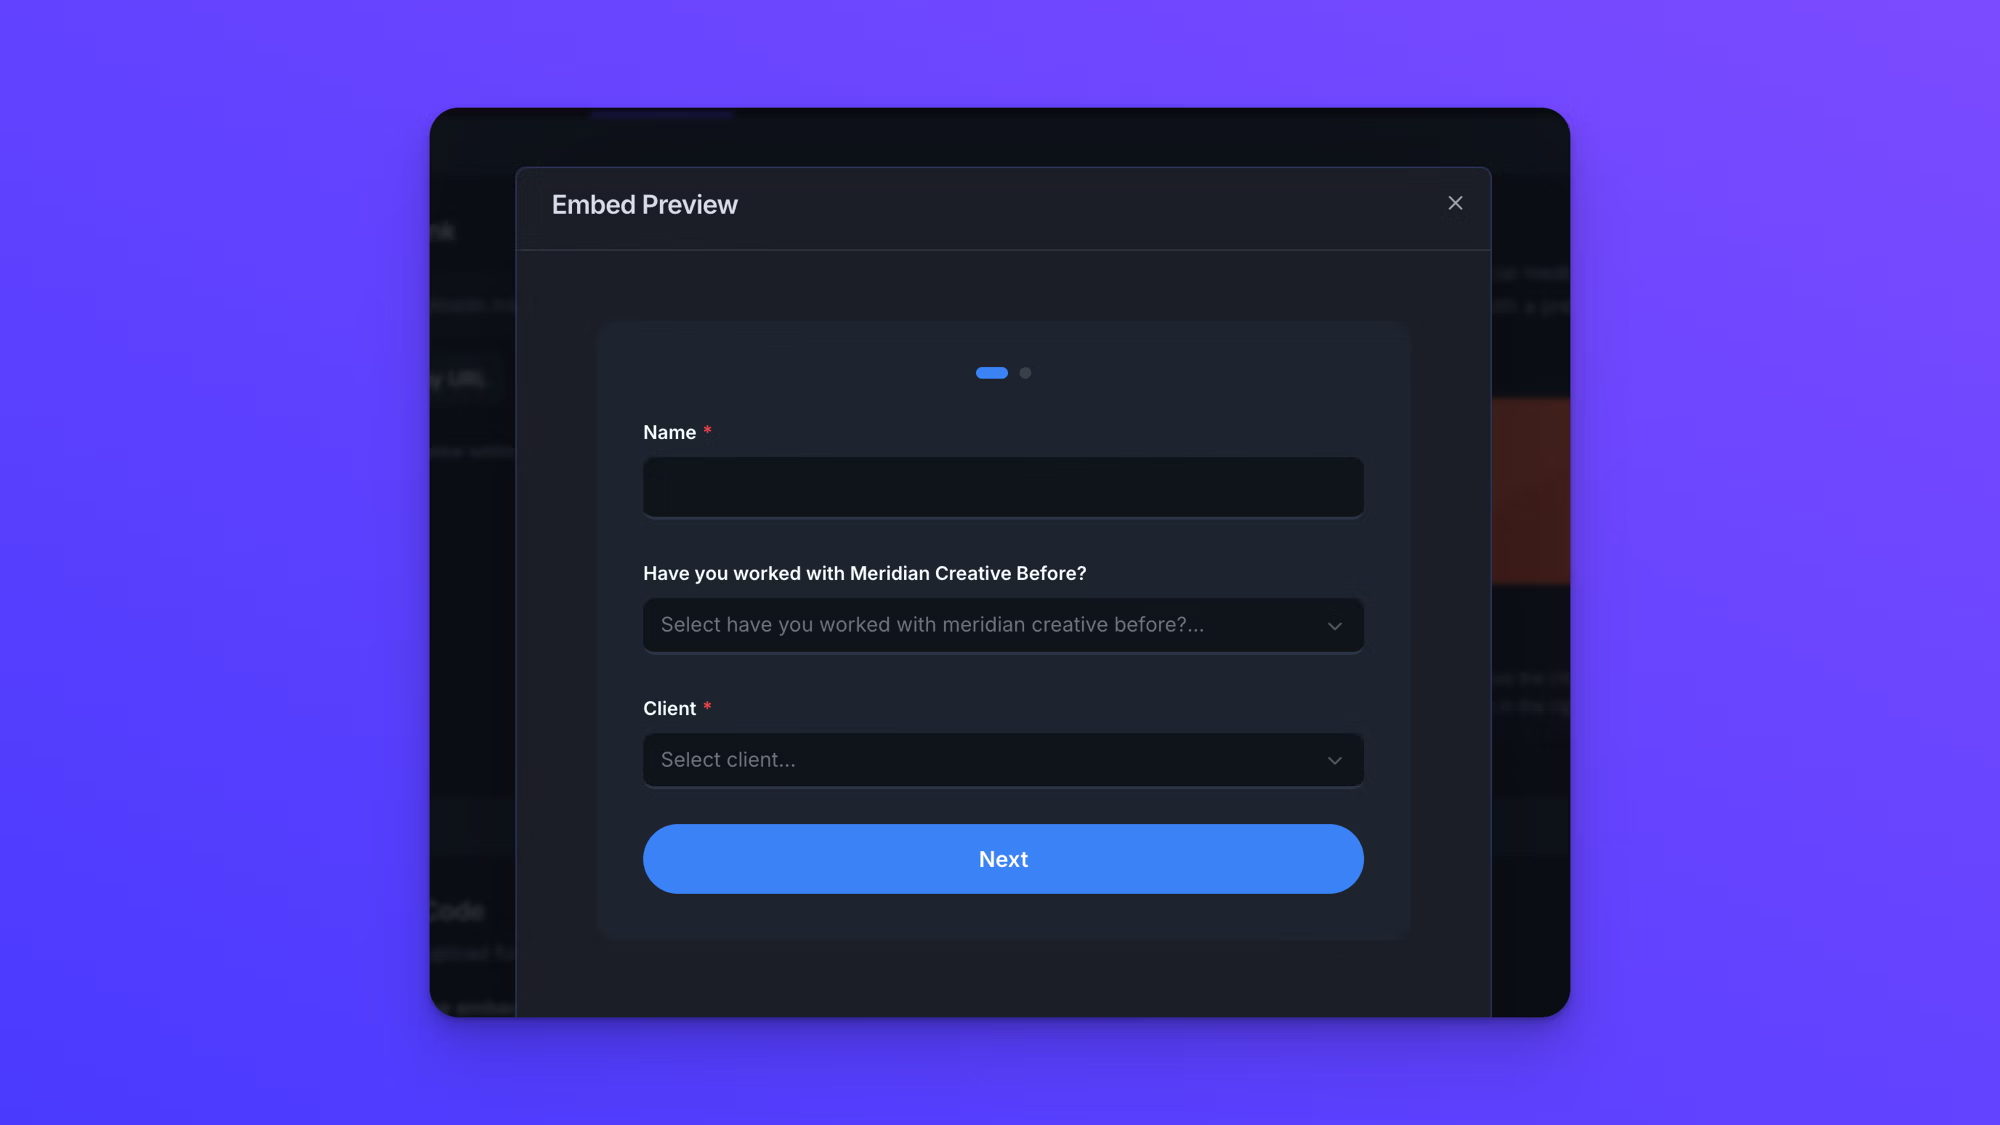
Preview opens an Embed Preview window showing the form as your switches have it, so you can check the result before touching your site.
Transparent background is the one switch Preview cannot show you. The window puts the app's own gray background behind the form rather than your page, so turning the switch on makes little visible difference here. Check that one on your own page instead.
The password screen and the CAPTCHA are both skipped in Preview, so a password-protected form shows its fields here and still asks for the password once it is embedded for real.
Paste the code into your page
Paste the code into whatever your site builder calls a code element, at the spot where the form should appear, then save and publish that page.
- On WordPress, use a Custom HTML block in the block editor.
- On Webflow, use an Embed element.
- On Squarespace, use a Code block.
- On Wix, use an Embed HTML element, added from Embed Code in the editor's element menu.
Anything else that accepts raw HTML works the same way.
WordPress has one catch. The Custom HTML block works on self-hosted WordPress and on WordPress.com plans that include hosting features, which starts at their Business tier. WordPress.com's Free, Personal, and Premium plans strip script and iframe tags out, so neither the embed code nor the fallback code will show a form on any of them.
How the embedded form sizes itself
The embedded form sizes itself to fit. There is no height for you to set, and the space the form takes up on your page grows and shrinks with it as fields appear and files are added, so it never scrolls inside its own box.
If the form does not appear on your page
Form not showing up on your site? below the buttons opens a second, fallback embed code. Some websites block the sizing script the embed code relies on, which stops the form from loading. The fallback code loads the form in an iframe instead, which does not need that script.
Without the sizing script the fallback cannot measure your form, so it needs a height given to it. Fallback height sets that height in pixels and starts at 1000. Set it taller than the form needs rather than shorter. A form taller than the height you set is cut off, while extra height shows as empty space below the form. Change the number first, then copy the fallback code, because the number is written into the code as you copy it.
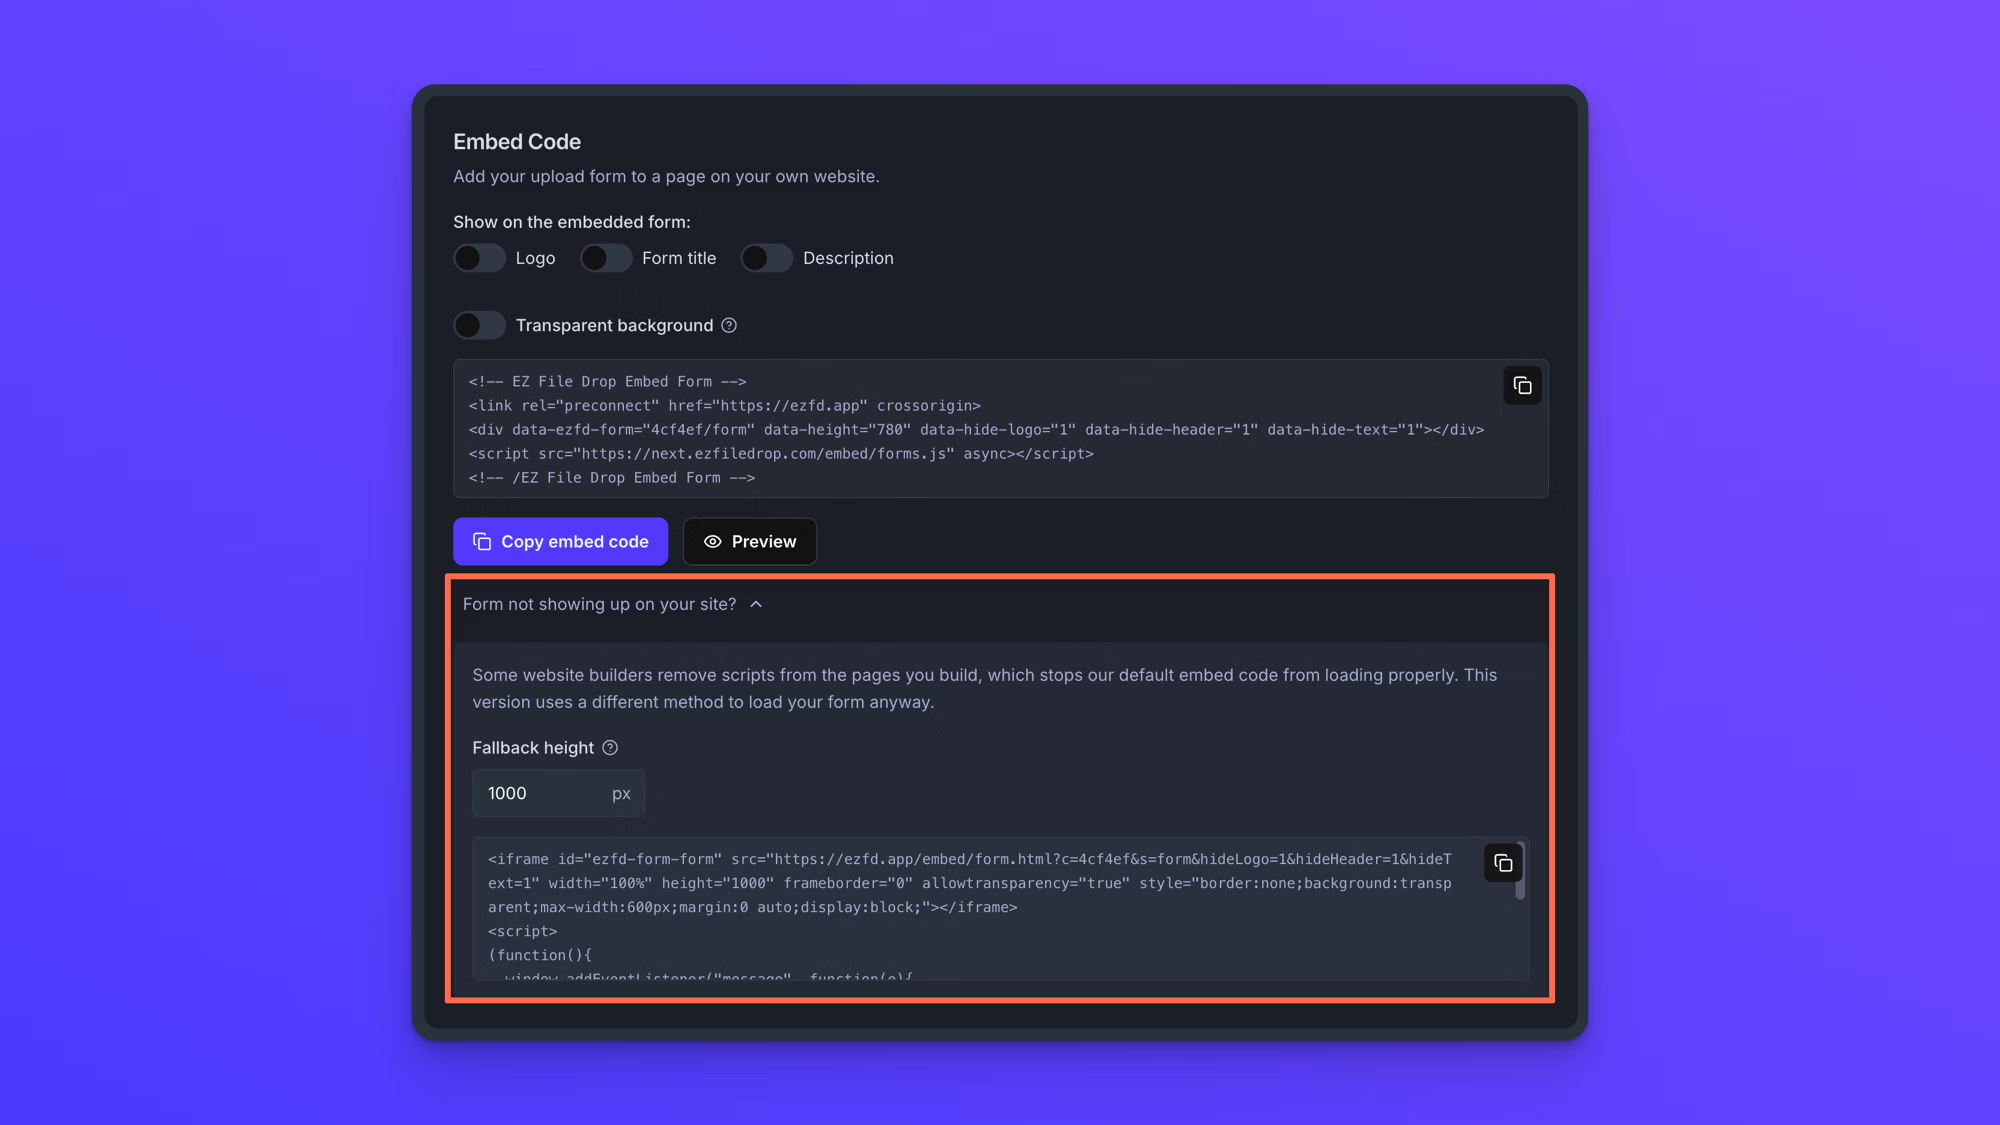
Reach for the fallback only when the default code has not worked. The default code sizes itself to the form and pre-fills fields from query parameters on your page's address. The fallback code does neither.
The four switches apply to both codes. Set them before you copy either one.
What changes in an embedded form, and what does not
An embedded form behaves almost exactly like the form on its own share link. Uploads are delivered to the same upload destination, submissions land in the same place, notifications send the same way, and file organization works the same. Four things are worth spelling out.
- Insights. An embedded form records visits and submissions like any other, and reports the site it is embedded on as its traffic source. See Form insights.
- Password protection. A password-protected form asks for the password where the form sits on your page, before the fields appear.
- Redirect after submission. We recommend leaving this off on an embedded form. A redirect takes the person away from the page you just put the form on, and the success screen, which you can word and style yourself, is a better ending. See Redirect uploaders after submission.
- Pre-filled fields. Query parameters on your own page's address pre-fill an embedded form, using the same keys you set on the form's fields. A link to your page carrying those keys fills them the same way a link to the form's own share link does. This works with the embed code. It does not work with the fallback iframe code, which cannot pass the parameters through. See Pre-fill forms with URL query parameters.
Behavior notes
- Embedding is available on the Business and Premium plans. On the Starter plan the Embed Code section is locked and no code can be copied.
- Embedding works during the free trial. An embedded trial form carries a banner above it reading "Powered by a free trial of EZ File Drop", and choosing a plan removes it.
- A Draft form embedded on your page shows the message "This form is not accepting submissions yet." where the form would be.
- The switches live in the code you paste rather than on the form, so changing them is not a form change and there is nothing to publish afterward.
- Changing the form itself is a form change like any other. A Live form keeps serving its last published version to every embedded copy until you click Publish changes.
- Changing a form's URL breaks its embed code along with its link. Copy the code again and replace what you pasted. See Share your form.
- The same form can be embedded on several pages and shared by link at the same time. It is one form, one set of submissions, one upload destination.