
How to Collect Files and Documents From Clients
Collecting files and documents from clients sounds simple until the third follow-up email. Attachments bounce, shared folder links ask for a sign-in, and the files that do arrive are named "scan0034.pdf." This guide covers why client file collection breaks, what a process that works actually needs, and how to set one up with EZ File Drop, an upload form that delivers every file into your own cloud storage. Already living this problem? Jump to the setup steps.
Why collecting files from clients gets messy
Most client file collection runs on two tools that were built for something else: email and shared folder links. Both work for one file from one person. Both start to fail once you're collecting from a dozen clients who each send a handful of documents.
Email attachments hit a size limit
Every email provider caps how much a client can attach. Google's help page is plain about it: "For personal Gmail accounts, the limit is 25 MB." The Outlook app defaults to 20 MB for Outlook.com and other internet accounts, and 10 MB for Exchange business mailboxes.
A single tax return PDF fits. A folder of scanned receipts, a video, or a set of design files does not. Clients either split the send across five emails or give up and ask you what to do.
When a client goes over the limit in Gmail, Gmail swaps the attachment for a Google Drive link. That file now lives in your client's Drive, not yours, and you may have to request access before you can open it.
Shared folder links ask clients to sign in
The usual next step is sharing a folder with each client so they can add files themselves. Most clouds only let someone add files to a shared folder if they have an account on that same service. An accountant who works in Box, for example, can share a folder with each client, but every one of those clients then needs a Box account and has to sign in to use it.
Plenty of clients don't have an account on the service you use, and few want to create one just to send you a bank statement. Every new client also means creating a folder, sharing it, and sending the invite by hand. We walk through the Google side of this in how to let anyone upload files to your Google Drive without signing in.
Files arrive with no context
When files do come through, they come named "scan0034.pdf," "IMG_4471.jpg," and "Document (3).pdf." Which client sent it? Which project, which tax year, which version? You end up opening each file, renaming it by hand, and replying to ask what it is.
Nobody is sure what arrived
The last symptom is the one clients feel most: "Did you get my file?" Attachments sit in one thread, links in another, and a few files came through a text message. The client gets no confirmation, and you have no single place to check.
What a client file collection process needs
A process that holds up across many clients has six things in place:
- One reusable link per request type. The same link goes to every client in that workflow, so you set it up once.
- No account or sign-in for the client. Every login step loses people, especially on a phone.
- Room for the files your work involves. Raw photos, video, and large document batches, without splitting them up.
- Context captured with the files. Client name, project, and document type, asked for on the same page as the upload.
- Delivery into storage you already use, organized by client. Files should end up in your Google Drive, Dropbox, OneDrive, SharePoint, or Box, in a folder per client.
- Confirmation on both sides. The client knows it went through, and you know it arrived.
Email and shared folders each miss at least three of these. The next section compares the options that cover more of the list.
Your options for collecting files from clients
There are five realistic ways to collect client files. Each fits a different volume and a different kind of client.
Some clouds let people upload without an account. Dropbox File Requests does, but every page carries Dropbox branding and collects nothing beyond the files; we cover the details in whether Dropbox File Request can be used to collect files from people. OneDrive's Request files works only on business and school accounts, can be switched off by your admin, and asks only for the uploader's name (more on OneDrive). Google Drive has no equivalent, and Google Forms requires every uploader to sign in with a Google account (why that happens).
The rest of this guide sets up the upload form approach.
How to collect files from clients with EZ File Drop
EZ File Drop builds that upload form on top of the cloud storage you already use. Setup takes about ten minutes, and the same form then works for every client.
1. Connect your cloud storage
In the left sidebar, click Cloud Connections and choose your provider. EZ File Drop connects to Google Drive, Dropbox, OneDrive, SharePoint, Box, and FTP/SFTP, and you can connect more than one. See connect Google Drive for the walkthrough.
2. Create the form
Click Upload Forms, then Create upload form. Name it after the request, like "Year-End Documents" or "Project Assets," so the link makes sense to clients. The full flow is in create your first upload form.
3. Add the fields that give each file context
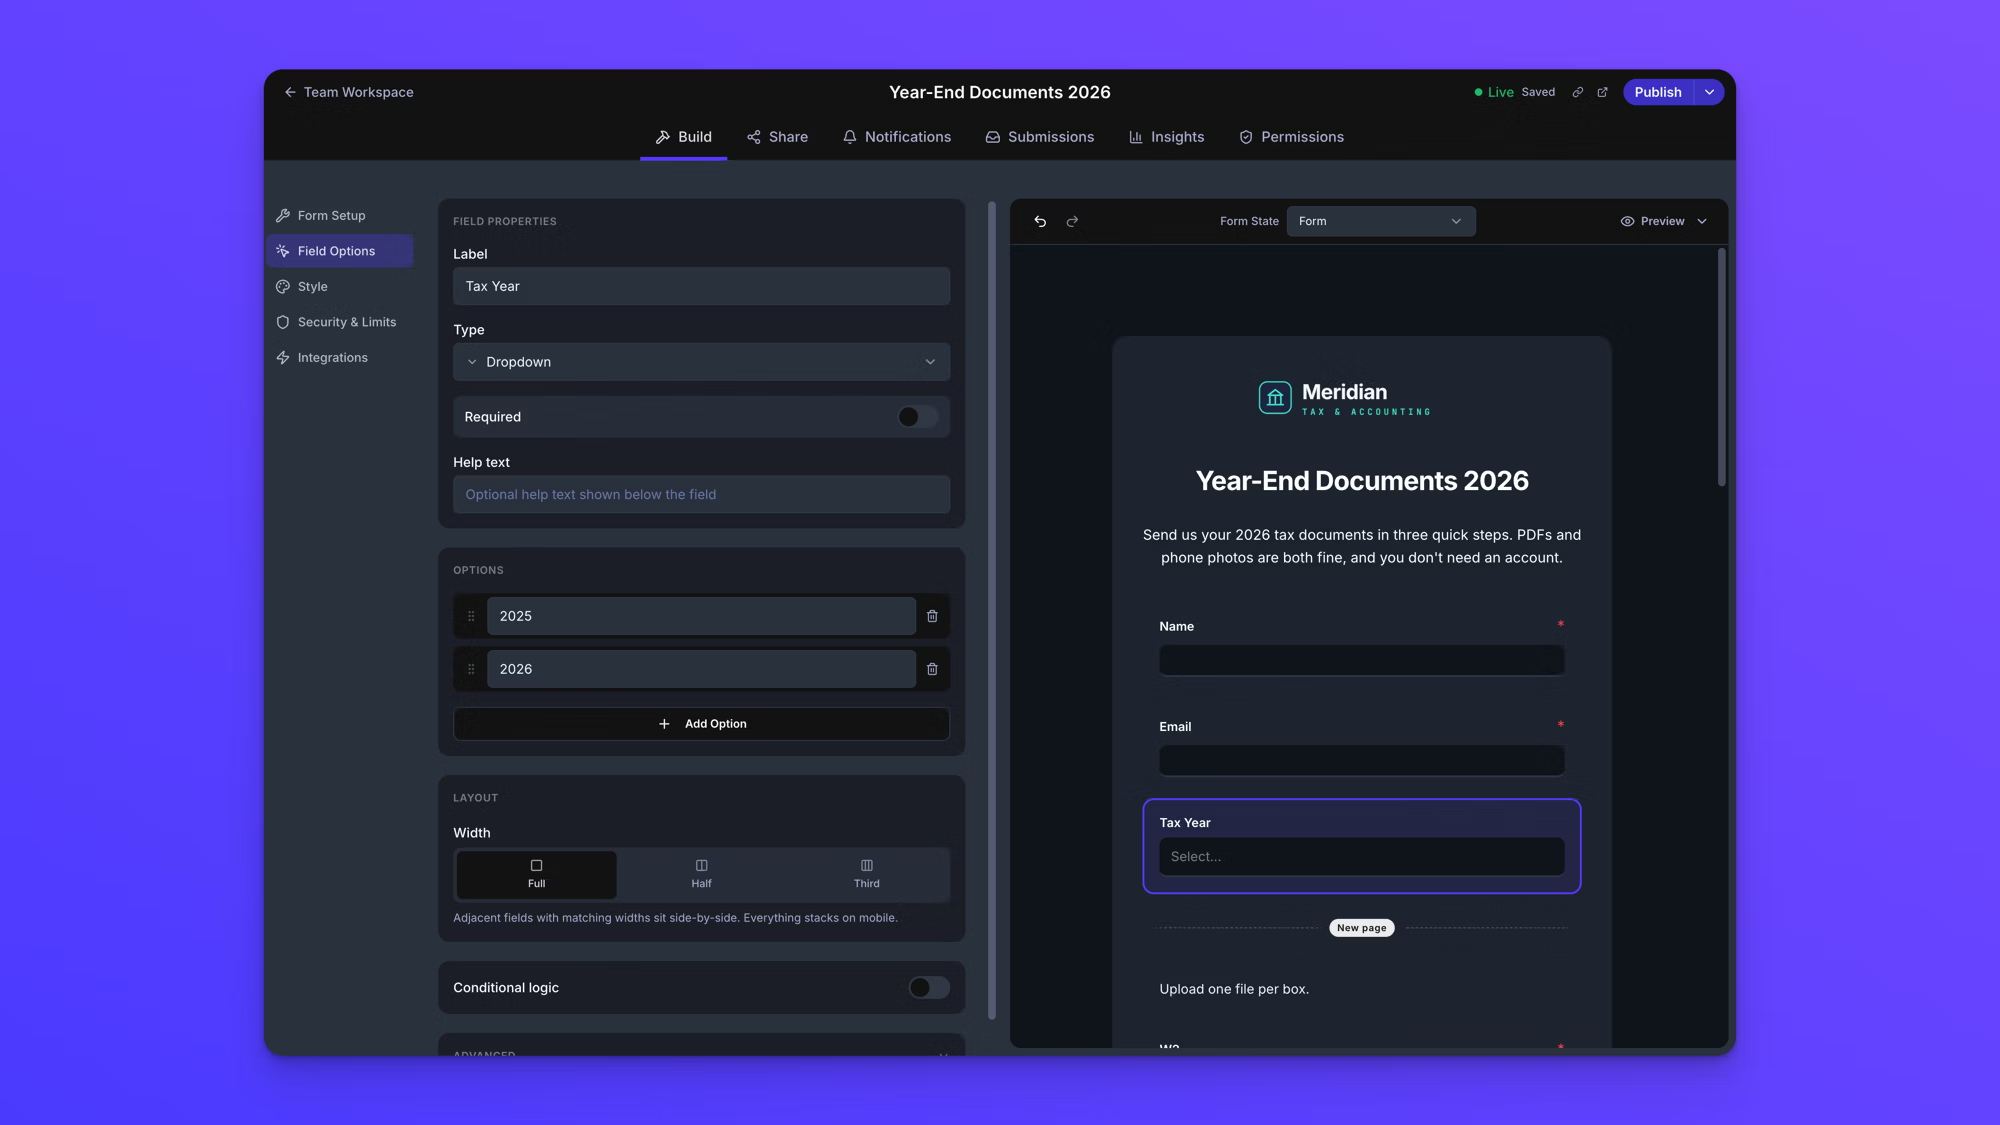
Click Add a field and add a Name field, an Email field, and a Dropdown for document type. Keep it to what you'd otherwise email back to ask. More in add form fields.
4. Choose where files go and how they're sorted
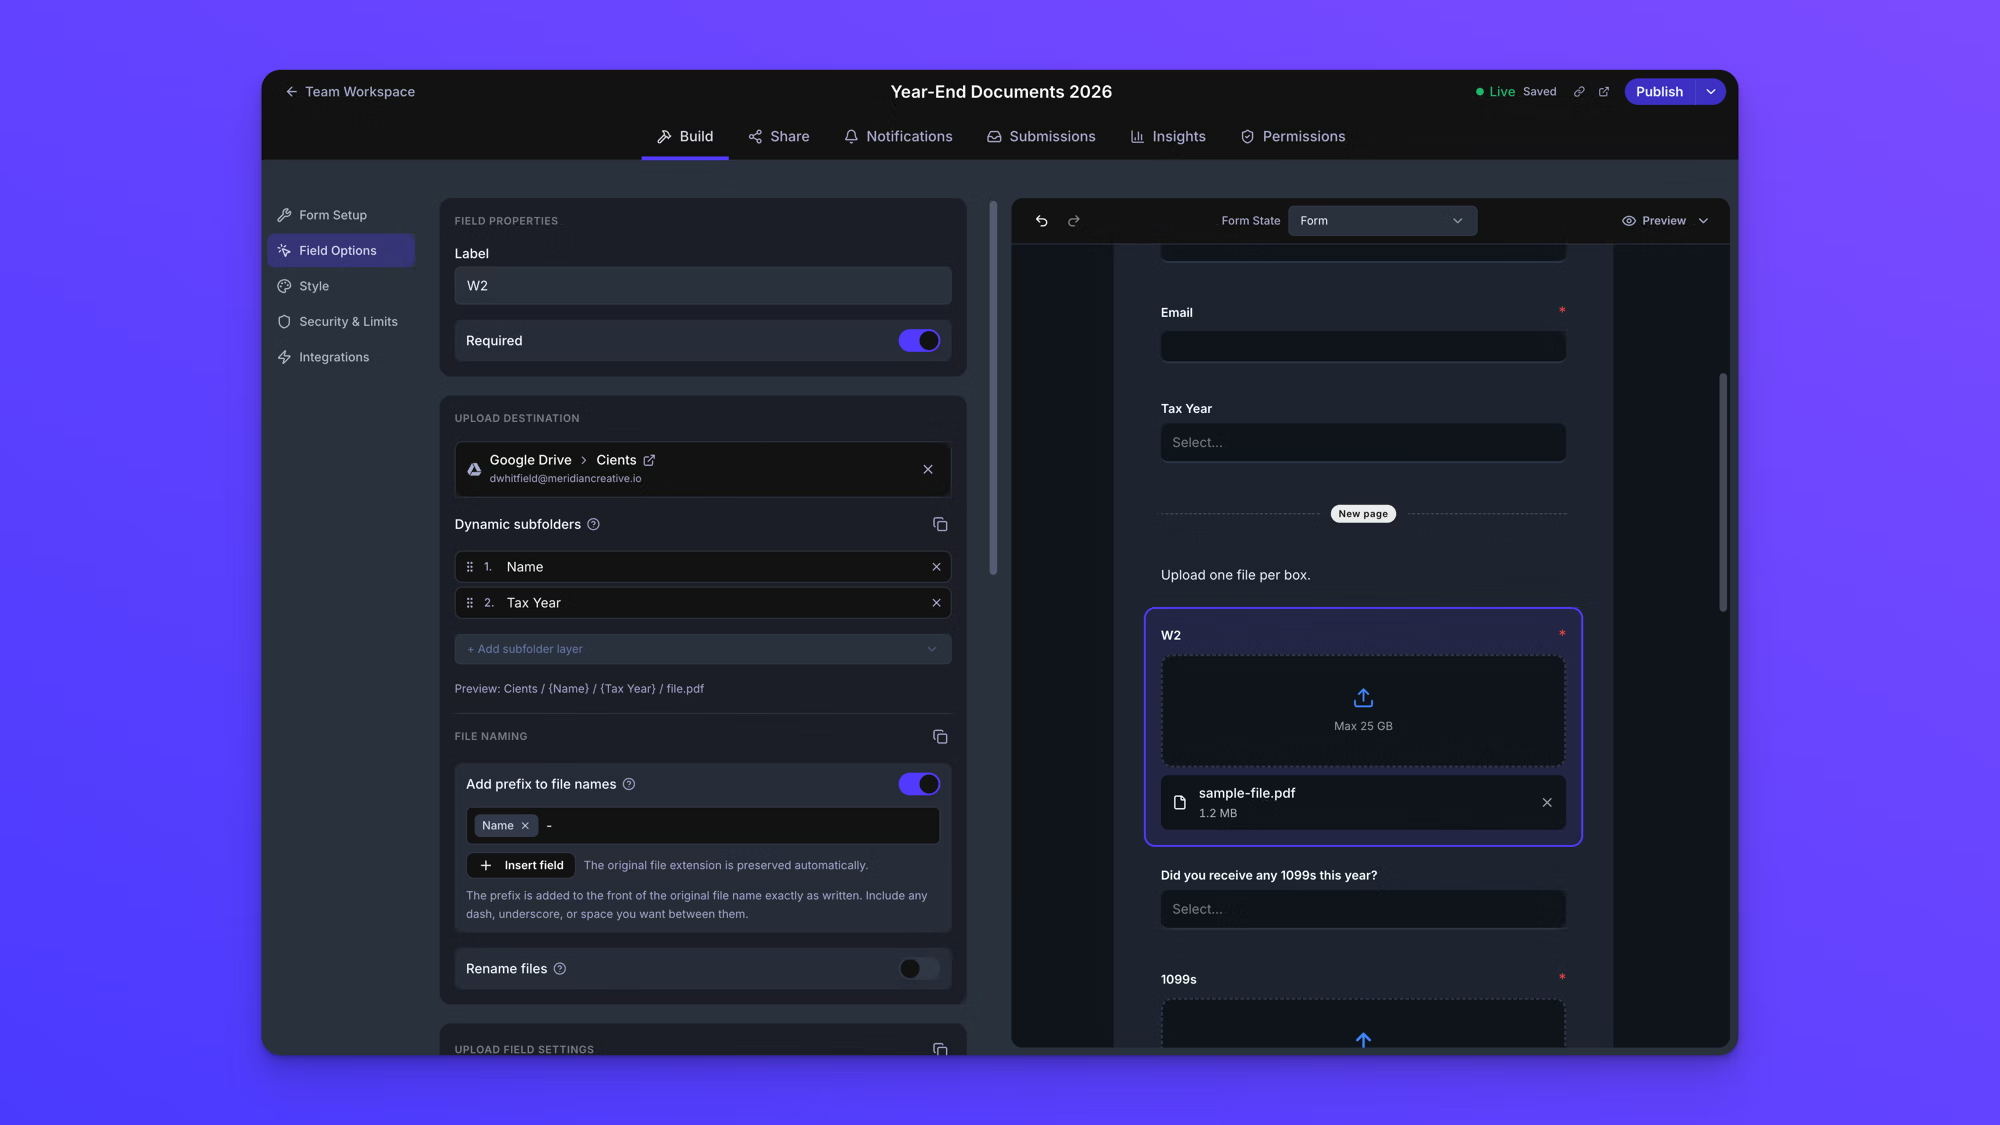
Click Select upload destination below the File Upload field and pick a folder. Then use Dynamic subfolders to build a folder per client from the Name field, and add a prefix to incoming file names. Folder sorting and file renaming are available on the Business and Premium plans. See dynamic file organization and rename incoming files.
5. Turn on notifications for both sides
Send your team an email on every submission, and send the client a confirmation that their files arrived. Setup is in email notifications.
6. Publish and share the link
Click Publish, open the Share tab, and click Copy URL. Paste the link into your request email, your proposal, or your email signature, or embed the form on your website.
A worked example: year-end documents
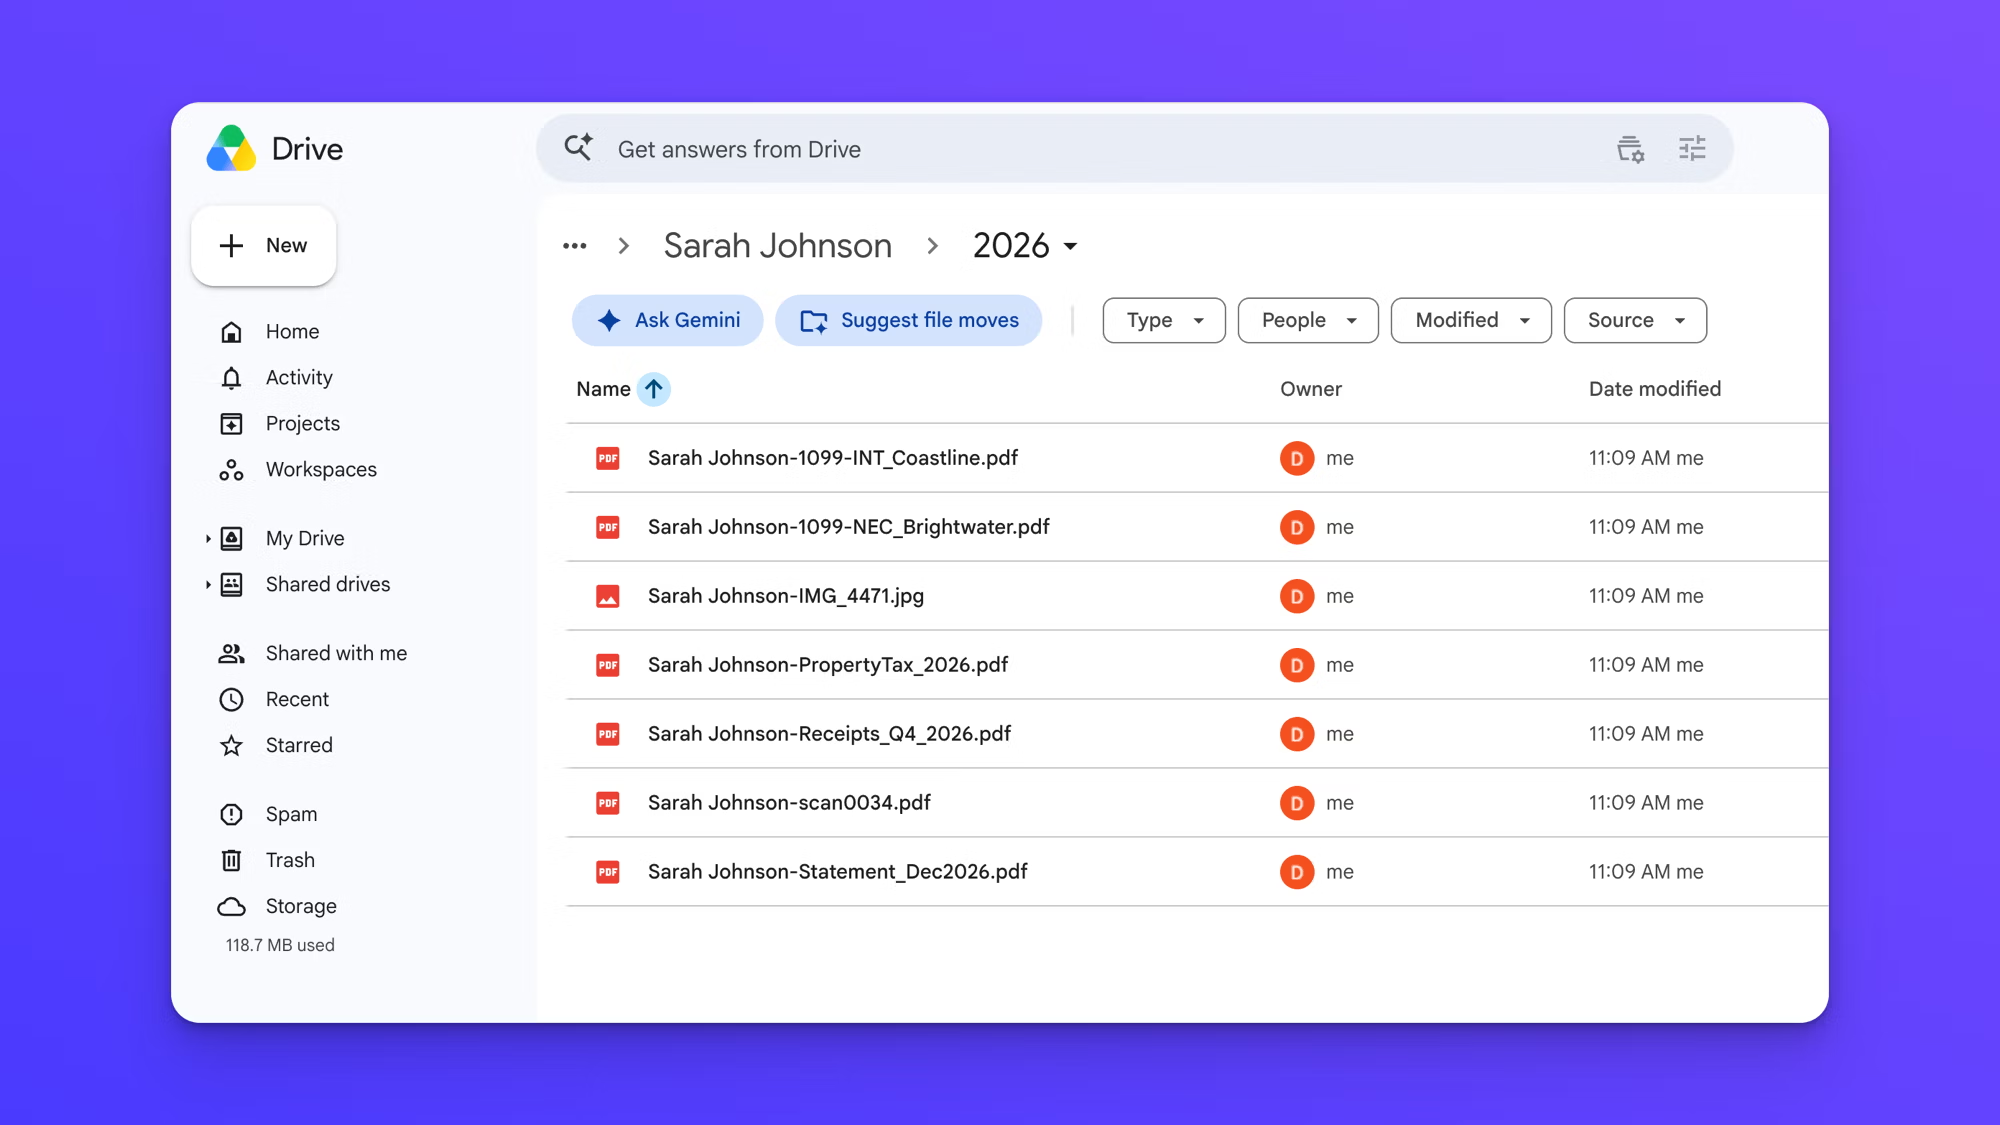
Say Meridian Tax and Accounting collects year-end documents from 40 clients. The form asks for the client's name, email, tax year, and document type, then takes the files. With subfolders built from name and tax year, and the client's name added as a file prefix, a scanned W-2 from Sarah Johnson arrives in your storage like this:
- Clients
- Sarah Johnson
- 2026
- Sarah Johnson - scan0034.pdf
- 2026
- Sarah Johnson
When Sarah sends her 1099s a week later, they go into the same "2026" folder. EZ File Drop reuses folders that already exist instead of creating duplicates, so each client's documents stay in one place no matter how many times they upload.
How to make sure clients send every document
A single drop zone invites a single file. If you need five specific documents, ask the client, "upload your W-2, 1099s, and bank statement here," and you'll usually get two of the three. The fix is to turn your document list into the form itself.
Give each document its own required upload field
Add a separate File Upload field for each document you need, labeled with the document's name, and mark each one required. The client sees exactly which files you're asking for, and the form won't submit until every required field has a file. Each field can also send its file to a different folder. Multiple File Upload fields on one form are available on the Business and Premium plans. See add form fields.
Hide the fields that don't apply
Not every client needs to send every document. Conditional logic shows a field only when an earlier answer calls for it. Add a Dropdown that asks "Did you receive any 1099s this year?" with Yes and No, then set the 1099 upload field to show only when the answer equals Yes. A required field that stays hidden is skipped when the form is checked, so a client who doesn't need to send one can still submit. Conditional logic is available on the Business and Premium plans; setup is in conditional logic.
Break long requests into pages
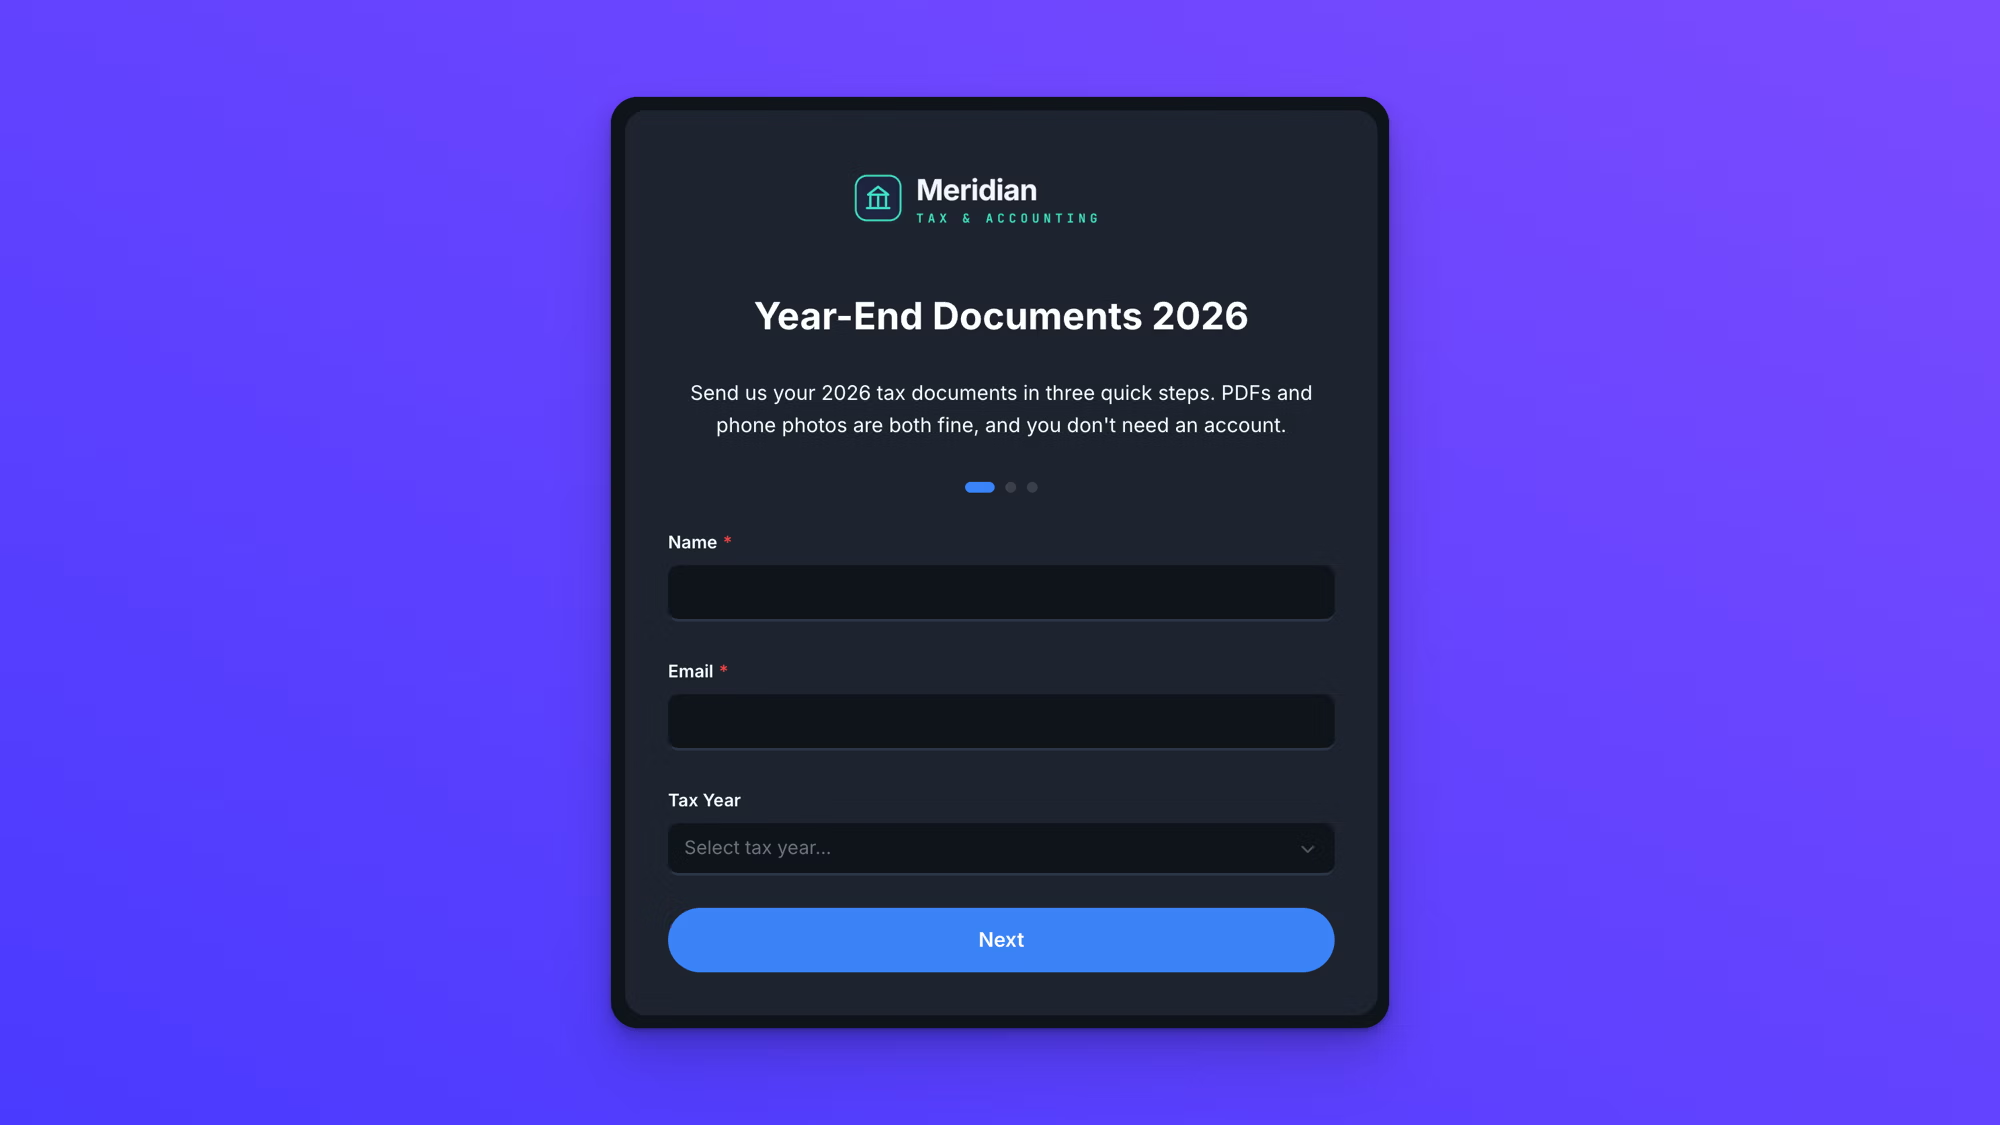
A form with ten upload fields and a few questions gets long. Add a New Page block between sections, such as contact details, income documents, and expense documents, and the form becomes a short series of steps with a progress indicator. Required fields are checked page by page, so a missing file is caught before the client moves on. Multi-page forms are available on the Business and Premium plans. See multi-page forms.
How to ask clients for files
The request itself matters as much as the tool. Name every document you need, say what format works, and give one place to send it. Here is a request you can adapt:
Hi Sarah, to finish your 2026 return we need three things: your W-2, any 1099s, and your December bank statement. PDFs or phone photos are both fine. Upload them here, no account needed: [your form link]. You'll get a confirmation email as soon as they come through.
That request works because it lists the exact documents, removes the format question, and answers "did you get it?" before the client asks. The same link goes in every client's email, so there's nothing new to set up per client.
Collecting client files by industry
The steps above work for any business. The fields and folder structure change by industry, and these pages go deeper on each:
- Accounting and bookkeeping: year-end documents, receipts, and bank statements sorted by client and tax year.
- Law firms: intake documents by client and matter. See also how to create a client intake form for law firms.
- Marketing agencies: brand assets, photos, and video from clients by project.
- Education: assignments and applications from students and families.
- Nonprofits: grant documents, volunteer forms, and event photos.
Frequently asked questions
What is the best way to collect files from clients?
Send every client the same upload link that works without an account. An upload form lets clients send files of any size your plan allows, asks for context like their name and document type, and delivers everything into your own cloud storage. It avoids email size limits and the sign-in wall that comes with shared folders.
How do I request documents from a client by email?
List each document you need by name, say which formats are fine, and include one link to upload them. Asking for attachments invites bounced emails and split sends, so point the client to an upload form instead. If the form sends a confirmation, tell the client to expect it.
Do clients need an account to upload files?
Not with EZ File Drop. Clients open the form link or the form on your website and upload with no account, no app, and no sign-in. They never see your cloud storage.
How do I make sure a client sends every document?
Give each document its own File Upload field and mark it required, so the form can't be submitted until every file is attached. Use conditional logic to hide fields for documents a client doesn't need to submit, and split a long list across pages. In EZ File Drop, these features are available on the Business and Premium plans.
How do I keep client files organized when they arrive?
Use form fields to sort the files as they come in. EZ File Drop can build a subfolder for each client from their name, add further layers like project or tax year, and add the client's name to each file name. If a client's folder already exists, new uploads go into it, so no duplicates are created.
Do I need a separate form for each client?
No. One form works for every client, so the same link goes into every request. Add a name field, and EZ File Drop can use it to create a folder for each client and file their uploads there. Folder sorting is available on the Business and Premium plans.
Collecting files from clients gets easier the moment the process stops depending on email attachments and shared folder permissions. Give every client one link, ask for the context you need up front, and let the files sort themselves on arrival. You can try EZ File Drop for free with no credit card required: the 7-day trial runs on the Business plan, so folder sorting and file renaming are included.
Written by Eric Stracke