
Can Webflow Forms Accept File Uploads? Yes, With Limits
Yes, Webflow forms can accept file uploads. Webflow has a native File upload button, but it only works on the Premium Site plan and the upper Ecommerce plans, it takes one file of up to 10 MB per button, and every file stays inside Webflow. Below we cover what the button can do, where it falls short, and why an upload might not be working. If you're already stuck, jump to the setup steps for adding an EZ File Drop upload form to any paid Webflow plan, with files delivered to your own cloud storage.
What Webflow's File upload button can do
On a qualifying plan, you drag a File upload button from the Add panel into a Form block, and visitors can attach a file to their submission. Here's what it handles:
- Up to 20 upload buttons per form, each set up on its own. One can take a résumé PDF and another a headshot image.
- File type limits per button. Allow documents, images, or a custom list of extensions such as .mp4 or .zip.
- Required or optional, like any other form field.
- Full styling of the button in all four states: default, uploading, success, and error.
- Submissions with links. Each uploaded file arrives as a link in the form's notification email, and you can see every file in Site settings > Forms.
- 10 GB of free storage for form uploads, billed per GB after that.
For a Premium site with a careers page that collects one résumé per applicant, that's genuinely enough.
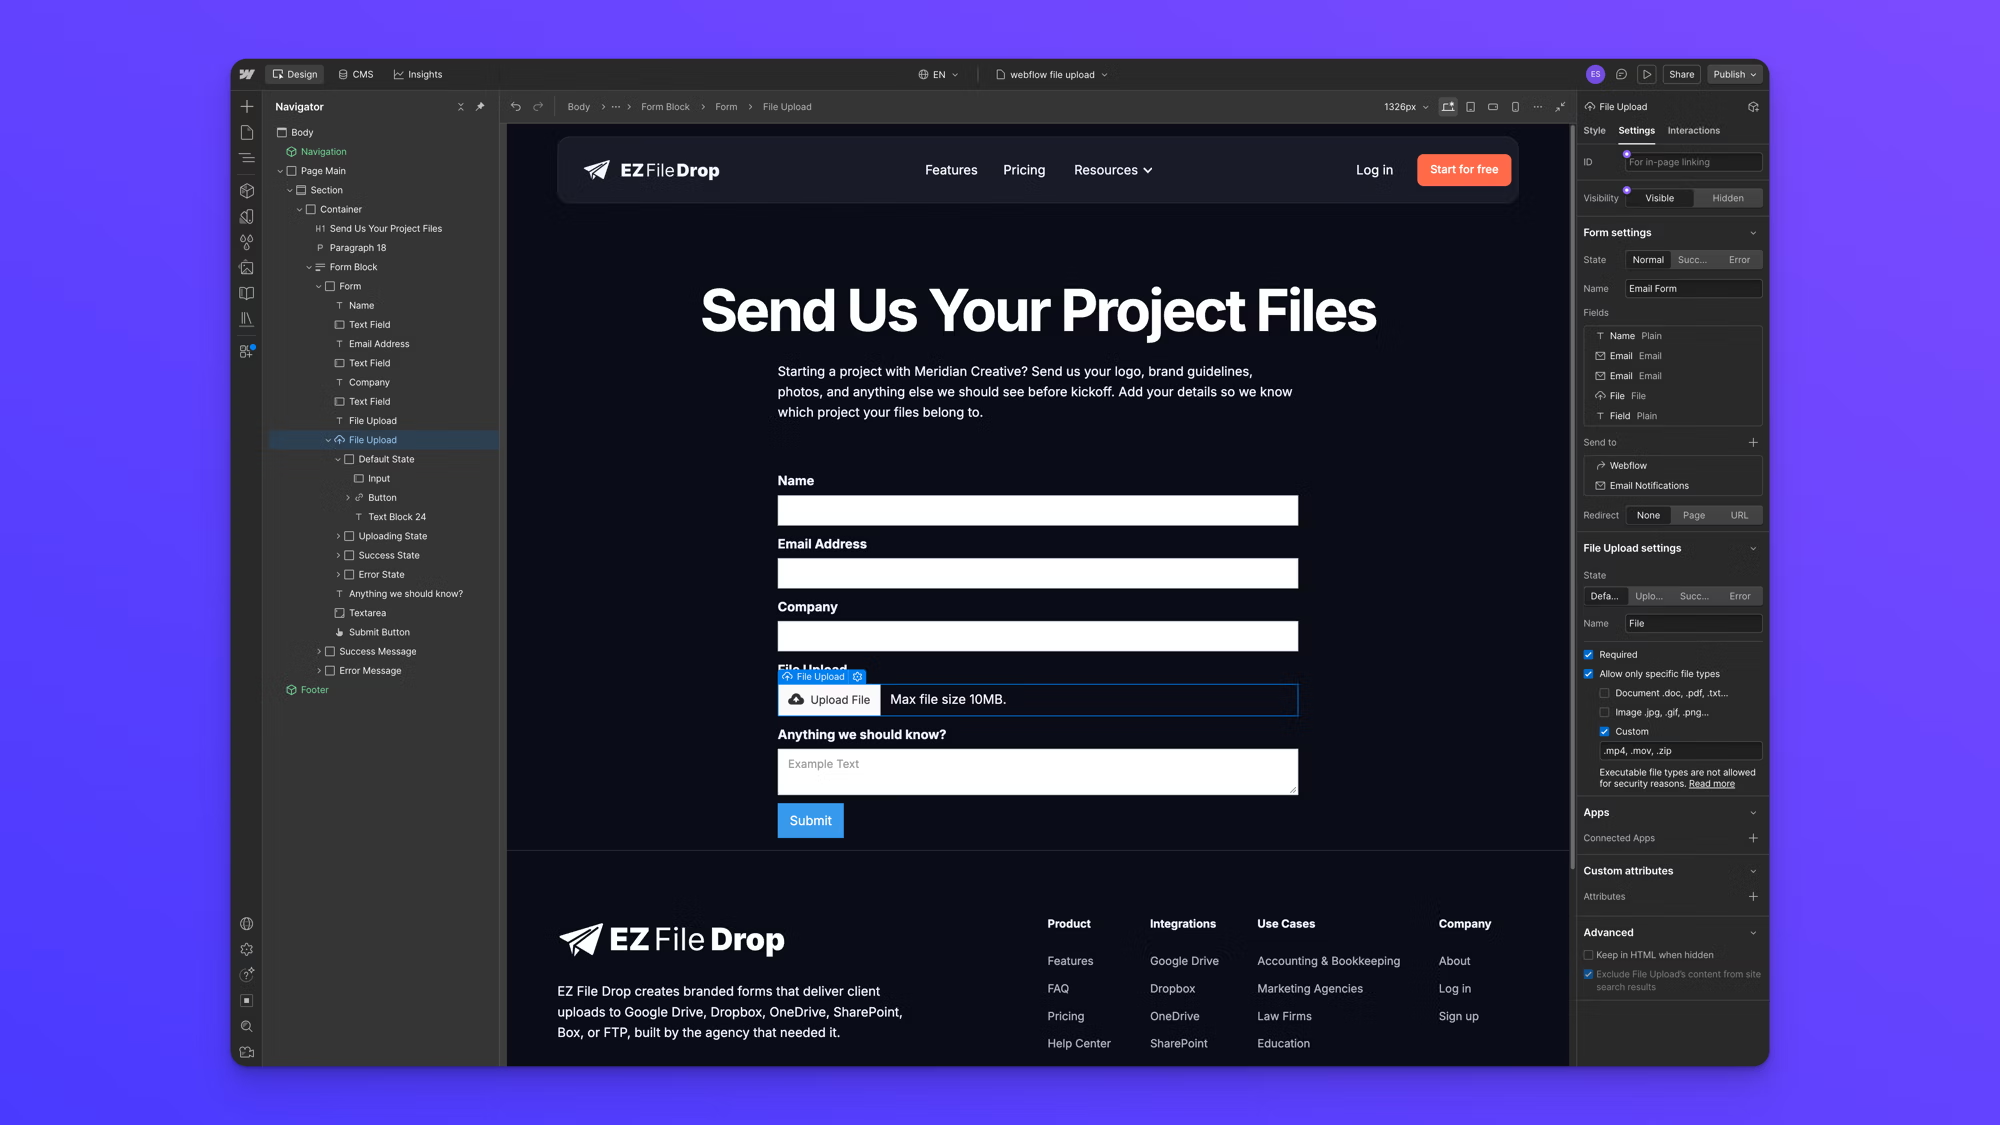
Where Webflow form file upload falls short
The button works. The walls are the plan it needs, the size it accepts, and where the files end up.
File upload only works on Premium and upper Ecommerce plans
Webflow's Help Center lists the plans that include it: the Premium Site plan, the legacy Business Site plan, Ecommerce Plus, and Ecommerce Advanced. The free Starter plan and the Basic Site plan don't include file upload, and neither does the entry Ecommerce plan.
That's the source of most "Webflow file upload free" searches. A site on Basic runs fine until a client asks for one upload field, and the only native answer is a plan upgrade.
One file per button, 10 MB maximum
Each button accepts a single file of up to 10 MB. Anything larger shows Webflow's default error: "Upload failed. Max size for files is 10MB."
Ten megabytes covers a résumé or a few photos. It doesn't cover a one-minute phone video, a batch of high-resolution images, or a design file. Someone with five files needs five buttons, so a form that takes "all your project files" turns into a stack of upload buttons.
Files stay in Webflow, behind a Webflow login
Uploaded files live in Webflow's form storage. You reach them through the link in the notification email or in Site settings > Forms, and by default only people logged into Webflow can open them. Anyone on your team without a Webflow login can't open the files, even with the link.
There's also no setting to sort uploads into folders or rename them by who sent them. Each file is attached to its submission, and getting it into your project folders is a manual download and re-upload.
Sending files to Google Drive or Dropbox means opening them up
Webflow doesn't deliver form uploads to other cloud storage. Its own help article says that to send files elsewhere with Zapier or another integration, you first turn off Restrict uploaded file access. That makes every uploaded file viewable by anyone who has its link. So the native path to Google Drive is a separate automation tool plus a looser privacy setting.
A 100 GB ceiling that stops submissions
Form file storage is free up to 10 GB and billed per GB after that. At 100 GB, Webflow stops collecting submissions entirely, and the limit can't be raised. The fix is deleting old submissions, which is fine for a contact form and a real problem for a form that collects client files all year.
Why a Webflow file upload isn't working
Most failures trace back to the plan, the file, or the storage. Match what you're seeing to its likely cause:
How to add a file upload form to any paid Webflow plan
EZ File Drop builds the upload form outside Webflow, so it doesn't depend on your Webflow plan. You paste one embed code into your page, and every file is delivered to the cloud storage you already use.
1. Connect your cloud storage
In the left sidebar, click Cloud Connections and connect the storage your team uses. Files will arrive in the folders you already work from. See connect Google Drive for a walkthrough.
2. Build the upload form
Click Upload Forms, then Create upload form. Add the fields you want, such as name, email, and company, and a File Upload field. See create your first upload form.
3. Set the limits and where files go
In the File Upload field's Upload Field Settings, set Allowed extensions, Max files, and Max file size. Leave Max files empty to accept any number of files in one submission. Then set the field's Upload Destination to the folder files should land in, and add a subfolder layer from a form answer, like the company name, so each sender gets their own folder.
Submissions can run up to 25 GB on the Business and Premium plans, and 5 GB on Starter. That covers self-recorded phone video from a whole group of people, not just a résumé. Subfolders and file naming are on Business and Premium. See restrict file types and set upload limits and dynamic file organization.
4. Publish and copy the embed code
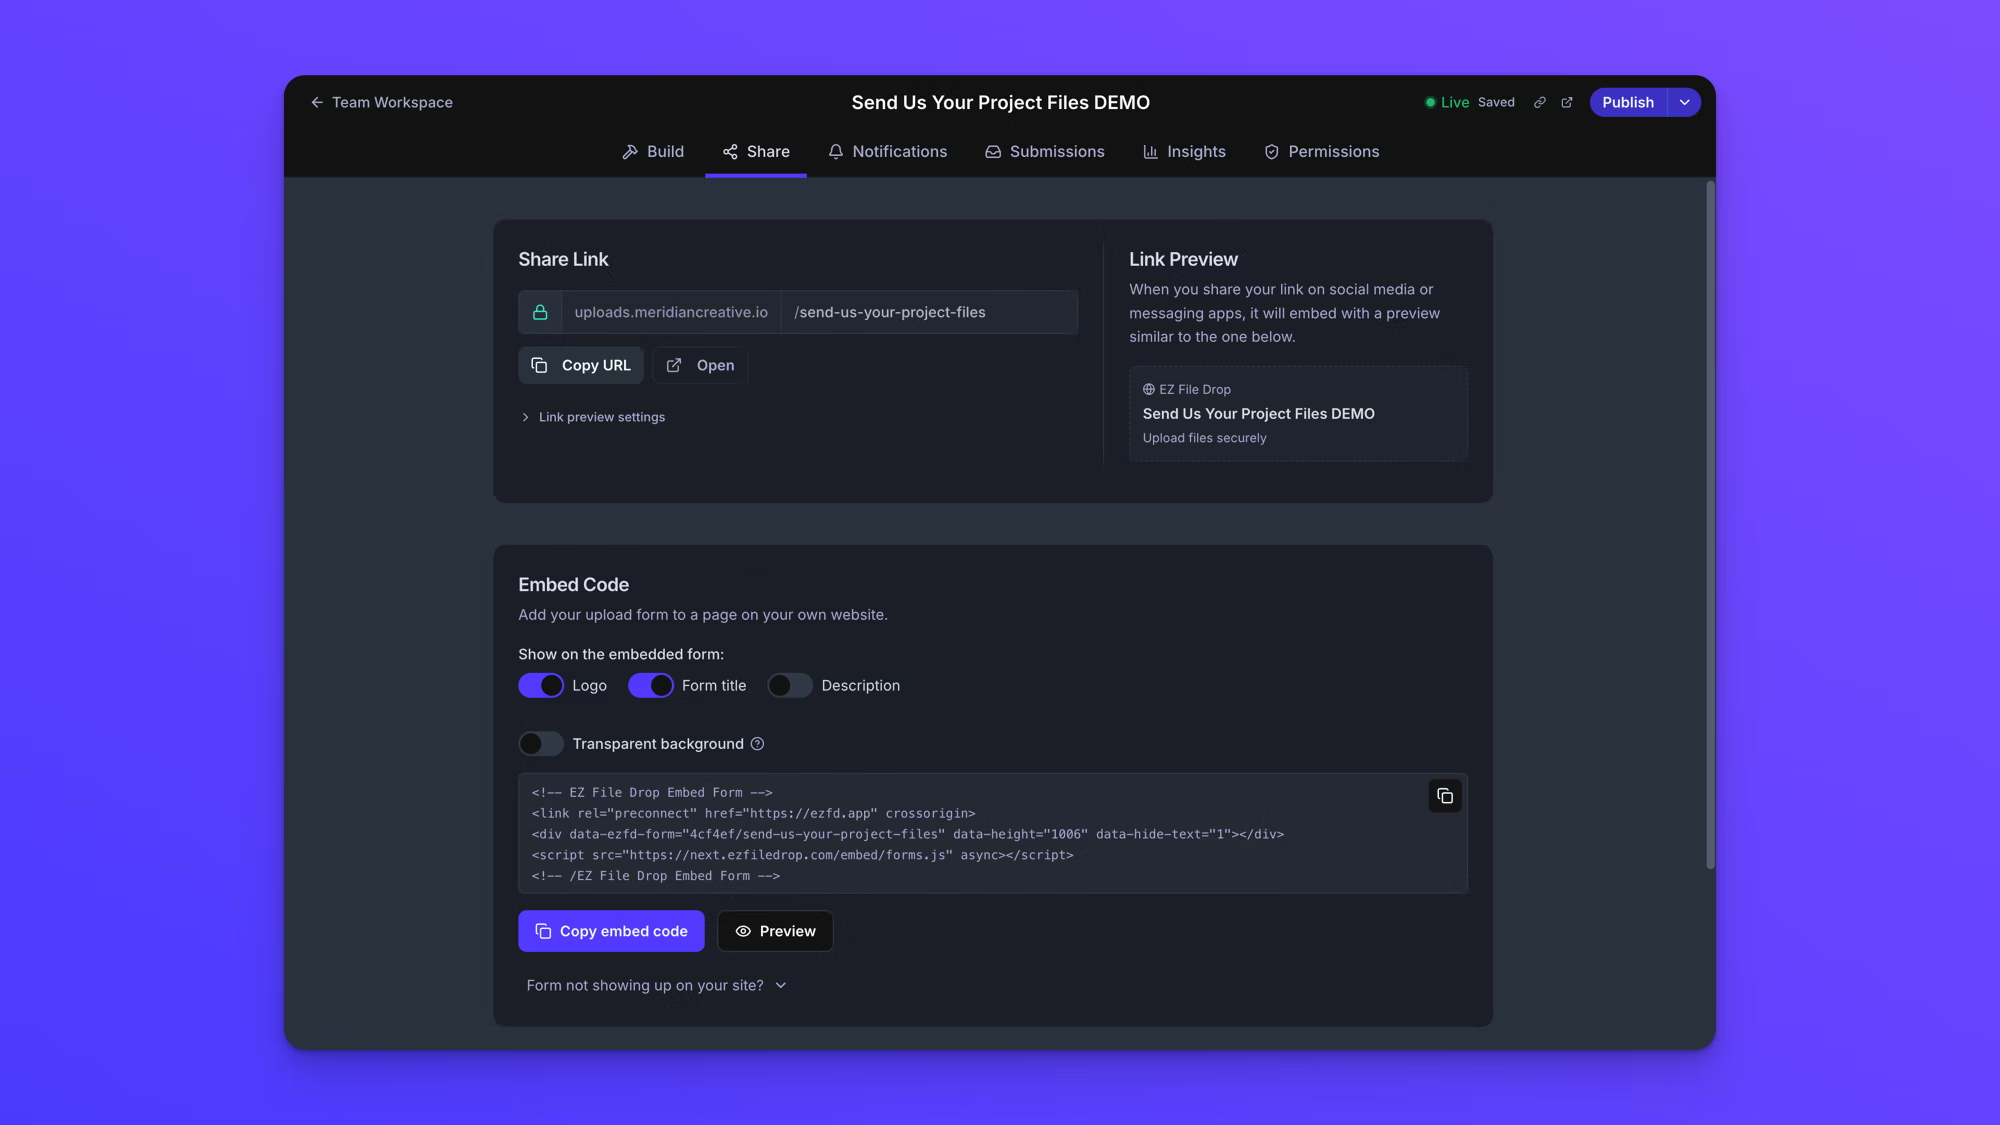
Click Publish, open the Share tab, and scroll to Embed Code. Use the switches above the code to choose what appears on the embedded form, such as your logo, the form title, and the description, then click Copy embed code. Embed codes are available on the Business and Premium plans. See embed a form on your website.
5. Paste it into a Code Embed element
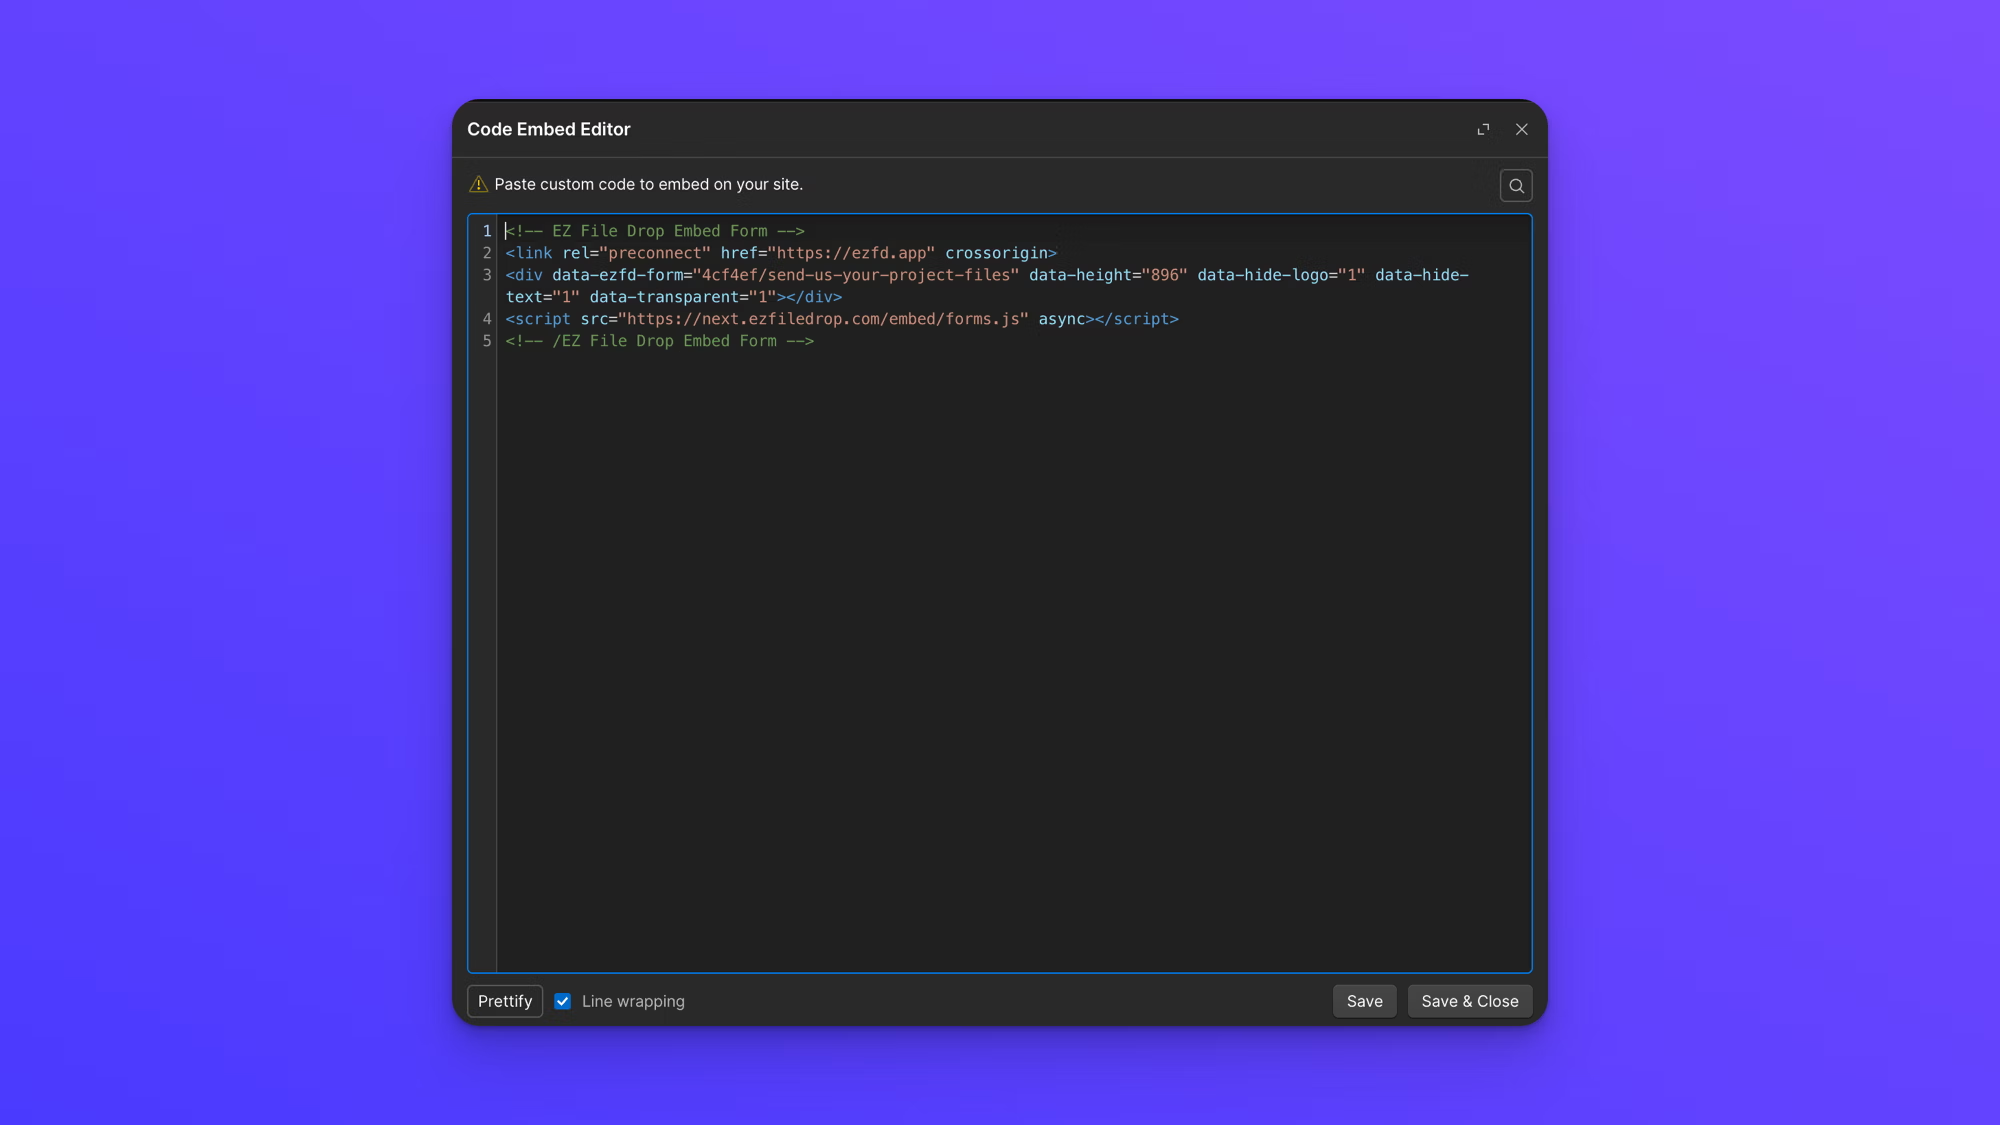
In the Webflow Designer, open the Add panel and drag a Code Embed element onto the page where the form should appear. Paste the code, click Save & Close, and publish the site. Place the Code Embed outside any Webflow Form block, since the upload form handles its own submission. Webflow's Code Embed element needs a paid Site plan or a paid Workspace plan.
6. Test it on the published site
Scripts in a Code Embed run on the published site, so test there rather than on the Designer canvas. Submit a few files and check that they arrive in the destination folder. The embedded form resizes itself as files are added. If it looks cut off, the resize script didn't survive the paste, so copy the code again.
Try the sample form
Webflow file upload vs. EZ File Drop
EZ File Drop embed codes are on our Business and Premium plans, so the cost moves from your Webflow plan to ours. If you collect more than small single files, or you need them in your own storage, it's usually the better trade.
When Webflow's native upload is the right choice
Stick with the built-in button when:
- Your site is already on Premium or Ecommerce Plus, so file upload costs nothing extra.
- Each person sends one or two small files, like a résumé and a cover letter.
- You want the upload button styled in the Designer like every other field on the page.
- The files can live in Webflow, and the people who need them have Webflow logins.
A careers page or a support form with a screenshot field fits all four. Reach for an embedded form when the files are big, when there are many of them, or when they need to land in your own storage.
Frequently asked questions
Does Webflow have a file upload field?
Yes. Webflow forms have a native File upload button, but it only works on the Premium Site plan, the legacy Business Site plan, and the Ecommerce Plus and Advanced plans. Each button takes one file of up to 10 MB, and a form can hold up to 20 buttons.
Which Webflow plan do I need for form file uploads?
The Premium Site plan, the legacy Business Site plan, Ecommerce Plus, or Ecommerce Advanced. Starter, Basic, and the entry Ecommerce plan don't include it. To add file upload on another paid plan, embed a third-party upload form in a Code Embed element.
What is the file size limit for Webflow form uploads?
10 MB per file, one file per upload button. Uploaded files count toward form storage, which is free up to 10 GB and billed per GB after that, with a hard limit of 100 GB. At 100 GB, Webflow stops collecting submissions until you delete old ones.
Can I add a file upload to a Webflow form on the Basic plan?
Not with Webflow's own File upload button. You can embed an upload form from another service in a Code Embed element, which works on any paid Site plan. EZ File Drop forms embed this way on our Business and Premium plans, and files go to your own cloud storage.
Where are files uploaded through a Webflow form stored?
In Webflow. Each file appears as a link in the form's notification email and in Site settings > Forms. By default, only people logged into Webflow can open those links, a setting called Restrict uploaded file access.
Can Webflow form uploads be sent to Google Drive or Dropbox?
Not natively. Webflow says to turn off Restrict uploaded file access and use Zapier or another integration, which makes each file viewable by anyone with its link. An embedded EZ File Drop form delivers files to Google Drive, Dropbox, OneDrive, SharePoint, Box, or FTP without an automation in between.
The short version
Webflow form file upload works, within limits: Premium or upper Ecommerce plans only, one 10 MB file per button, and files that stay in Webflow. For a single résumé on a site already on Premium, that's fine. For anything bigger, for many files at once, or for files that belong in your own Google Drive or Dropbox, embed an upload form instead.
We run ezfiledrop.com on Webflow ourselves, and the sample form above sits on this very page. Try the sample form to see it from the uploader's side, and try EZ File Drop for free with no credit card required.
Written by Eric Stracke