How to Make a Branded Upload Portal for Dropbox
When a client needs to send you files, the upload page they see is a touchpoint in your customer experience. If that page shows Dropbox's logo and branding, it's a moment where your brand disappears — and the uploader is quietly reminded they're working with a tool, not with you.
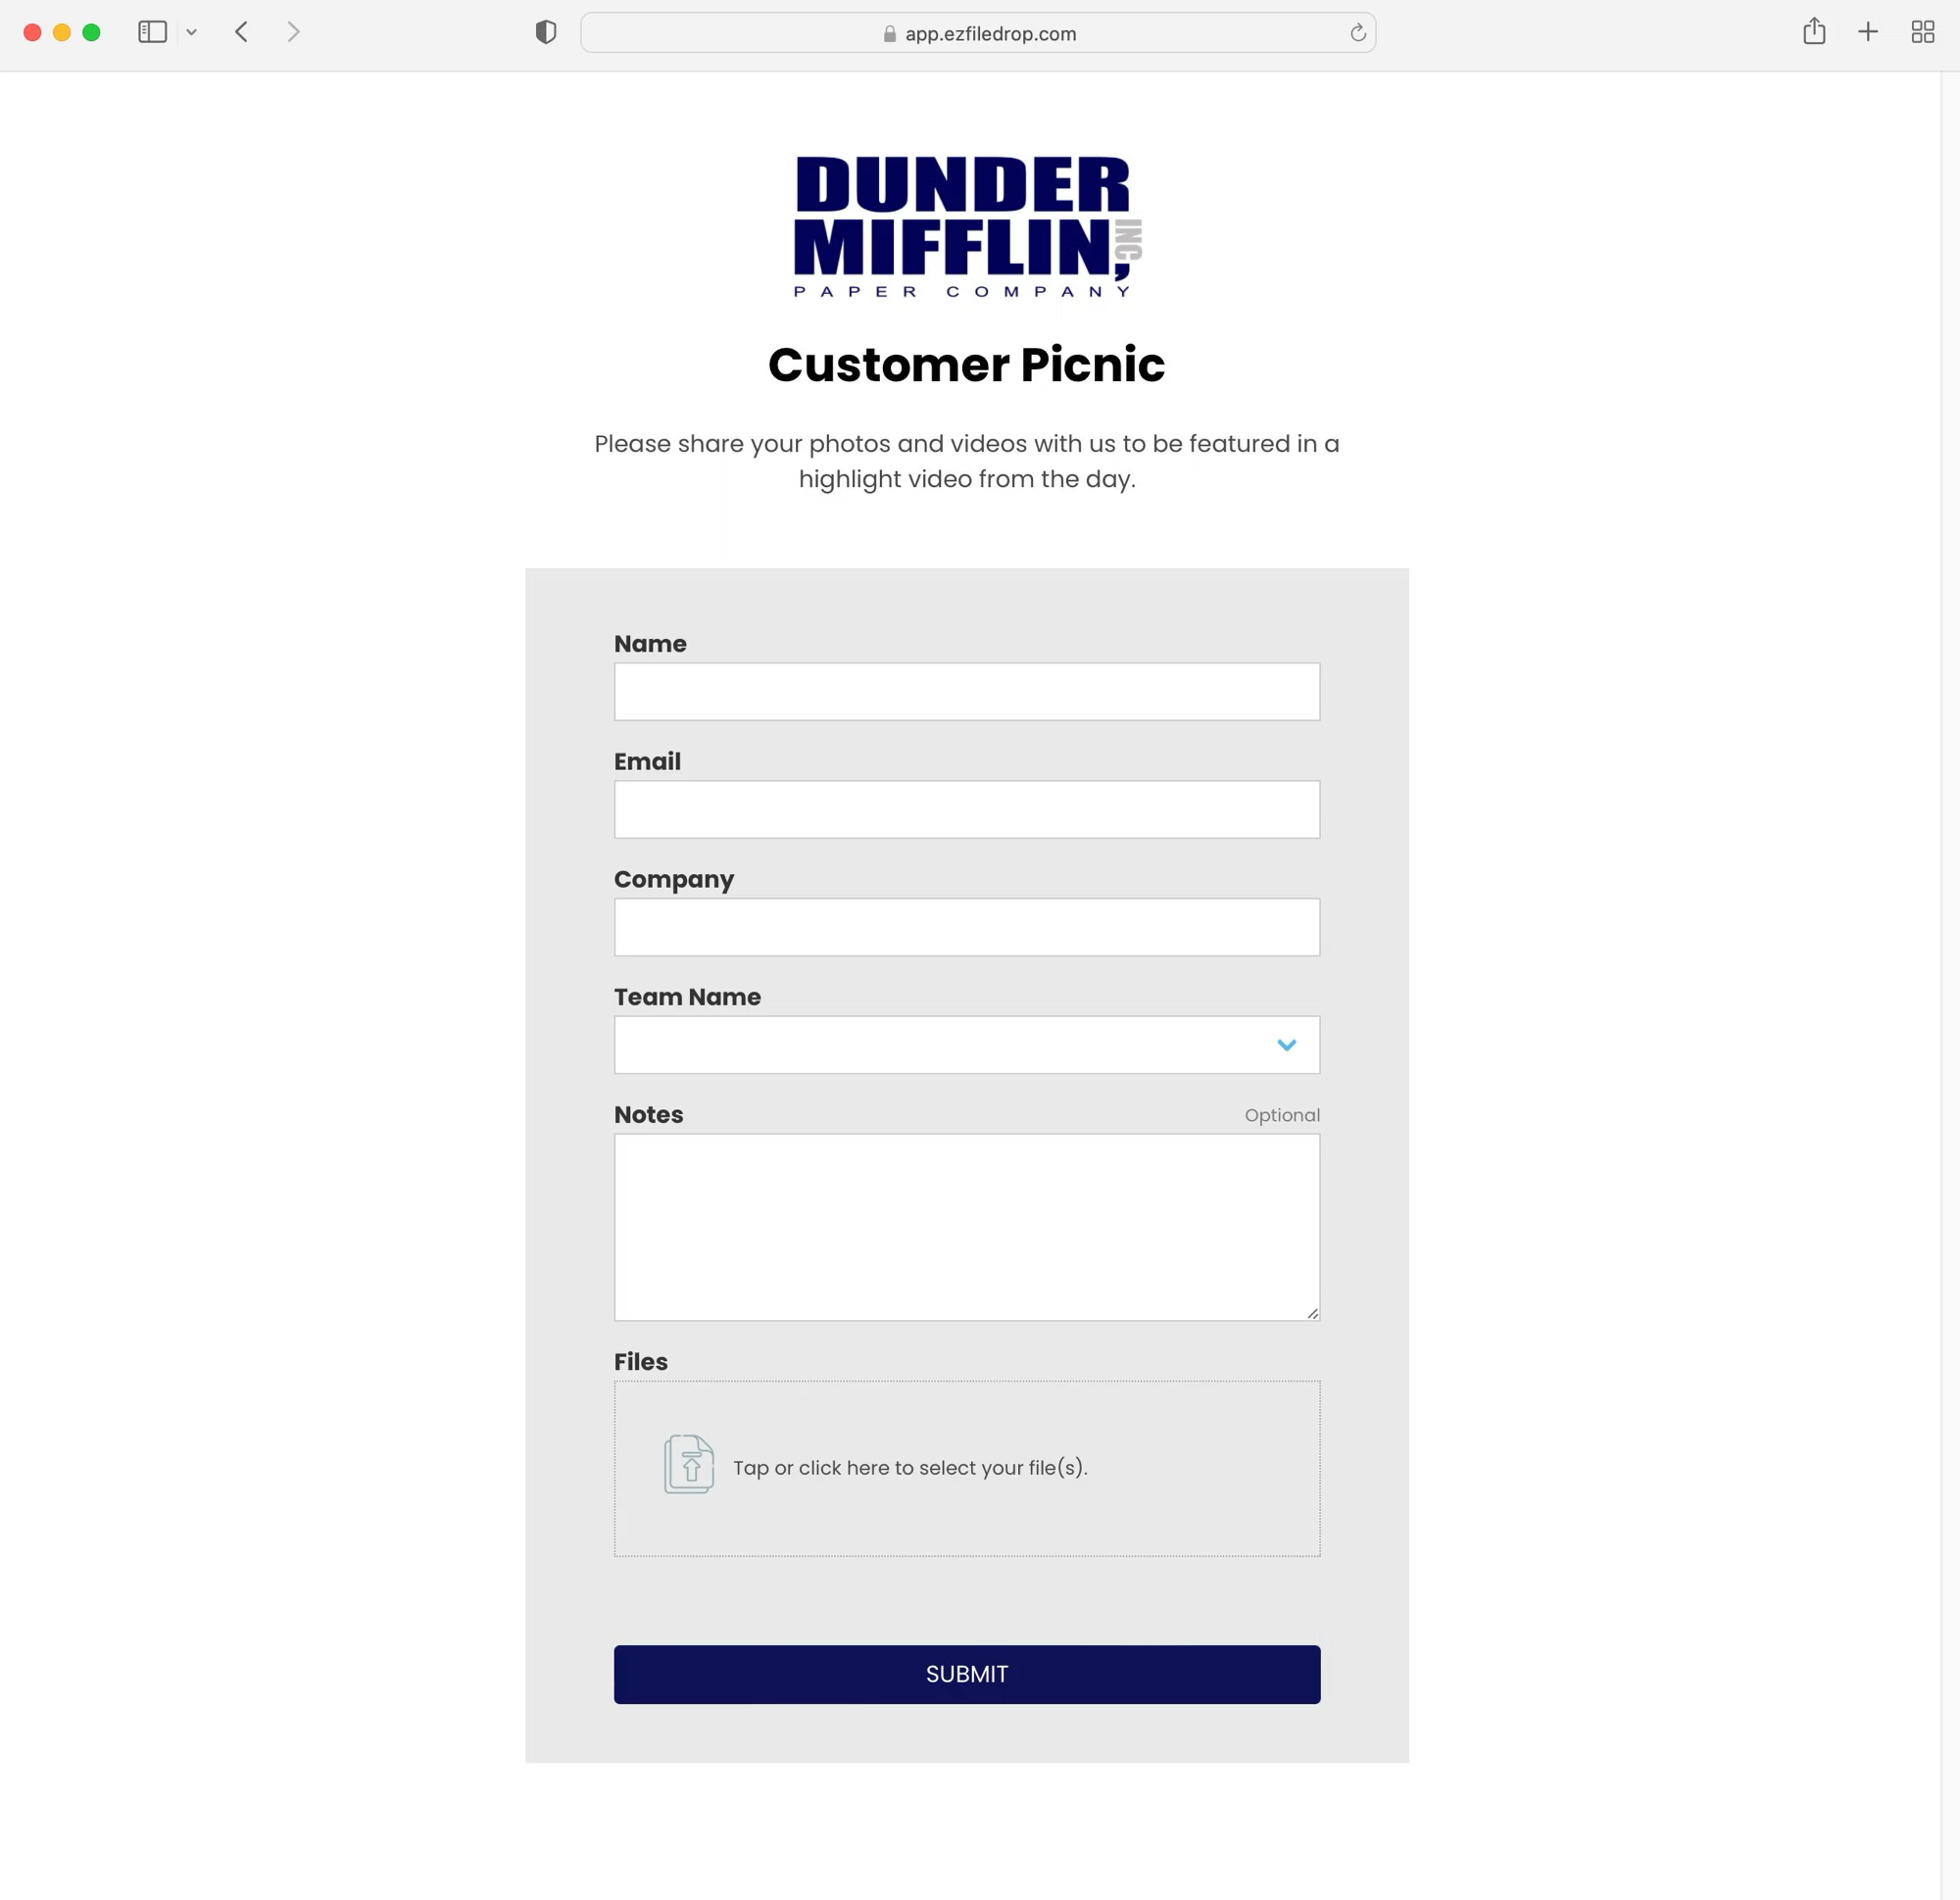
A branded upload portal solves that. It's a custom upload page that carries your logo, your colors, your fonts, and your voice, while still sending files into your existing Dropbox account. The uploader has no idea there's a third-party tool involved. They just see your brand, upload their files, and get a branded confirmation.
This guide walks through how to build one using EZ File Drop, a purpose-built tool that connects your Dropbox to a fully brandable upload experience. No coding, no hosting, no design team required.
Why a Branded Upload Portal Matters
Dropbox File Request is the native Dropbox feature for receiving files from outside your account. It works, but every File Request page shows Dropbox's logo and a Dropbox-branded confirmation screen that prompts uploaders to sign up for a Dropbox account after they submit.
For an internal file swap, that's fine. For client-facing work, it costs you something:
- Your brand goes missing at a key touchpoint. Clients sending you assets or documents see Dropbox branding instead of yours. That's a small thing, but across hundreds of touchpoints it adds up.
- The upload experience doesn't match your website. A client comes from your polished site and lands on a generic Dropbox form. The contrast reads as unprofessional.
- Your logo doesn't appear in upload notifications. The confirmation email the uploader gets is plain Dropbox.
- There's no way to add your own copy. No instructions, no context, no brand voice. Just Dropbox's default page copy.
A branded upload portal fixes all of this while keeping the files exactly where you want them: in your Dropbox.
What a Branded Upload Portal Gives You
EZ File Drop's branded upload portals for Dropbox include:
- Your logo on the upload page, in email notifications, and on the success screen
- Custom colors, fonts, and page layout to match your website
- Custom page copy (headline, welcome message, drop zone text, success message) so the portal speaks in your voice
- Custom form fields for collecting context alongside the files (client name, project ID, email, categories, etc.)
- Automatic file organization in Dropbox using form field data
- White-labeling on Business and Premium plans (no EZ File Drop branding anywhere)
- Embeddable on any website (WordPress, Webflow, Squarespace, Wix, or any page that supports HTML embeds)
Files still land directly in your Dropbox account, in the folders you choose, using your existing Dropbox storage. EZ File Drop is the branded front door. Dropbox is still the storage.
Step 1: Connect EZ File Drop to Dropbox
Sign up at ezfiledrop.com/join. Every new account starts on a 7-day Business plan trial with 1 GB of upload bandwidth, no credit card required.
From the main dashboard, open Cloud Settings and click Connect to Dropbox. EZ File Drop uses OAuth2 to link to your account, so your Dropbox password never leaves Dropbox. Approve the connection in the Dropbox authorization window and you'll be returned to EZ File Drop with Dropbox connected.

For a detailed walkthrough, see the Dropbox connection tutorial.
Step 2: Upload Your Logo and Brand Assets
From the main menu, click Upload Forms, then Create New Form. In the form editor, give your portal a name and upload your logo.
A few things worth knowing about the logo:
- It appears at the top of the standalone upload portal page
- It appears in email notifications (upload confirmation, team notification, third-party notification)
- It appears on the upload success screen after a file is submitted
- If you plan to embed the portal on your website without a logo above the form, the logo is still used in emails, so upload one even if you plan to hide it in the embed
Then add a page header and welcome message. This is your voice. Write copy that matches your brand: formal if you're working with law firms, warm and conversational if you're working with creatives, whatever fits.

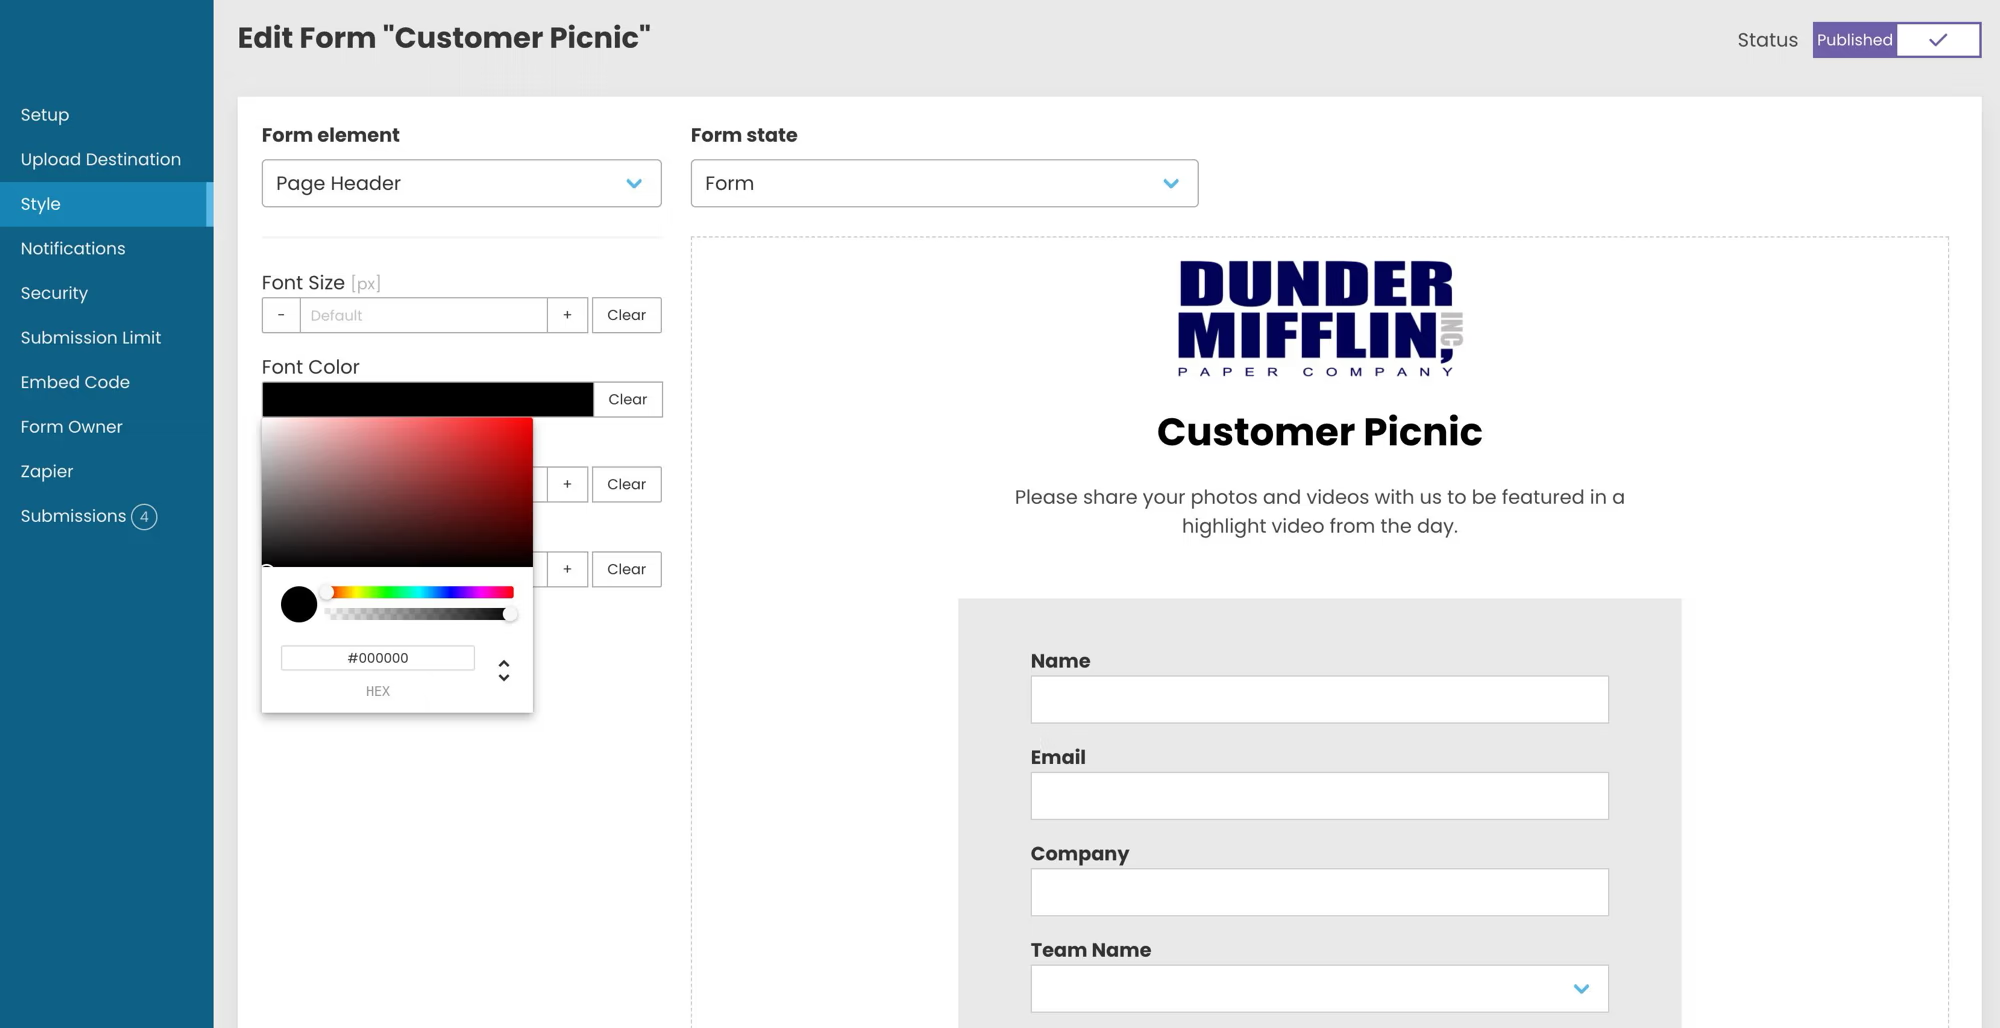
Step 3: Customize Colors, Fonts, and Layout
Open the Style editor to make the portal match the look and feel of your brand. The Form Element dropdown lets you toggle between every part of the portal and edit its styling individually:
- Logo area
- Page header
- Welcome message and body text
- Form field labels and inputs
- Drop zone and upload button
- Submit button
- Success message
- Background color and page padding
You can match your website's typography, color palette, spacing, and visual tone. On Business and Premium plans, the portal is fully white-labeled with no "Powered by EZ File Drop" footer and no EZ File Drop branding anywhere on the page or in the emails.
Step 4: Add Custom Form Fields
Form fields let your portal collect context alongside the files. EZ File Drop supports text fields, dropdown menus, checkboxes, and radio buttons. Any field can be marked required or optional.
Common fields for a branded upload portal include:
- Client or uploader name (used to organize incoming files)
- Email address (used to send upload confirmations)
- Project name or ID (used to route files into the right subfolder)
- Category or file type (dropdown for submission type)
- Notes or message (long-text field for context)
Field values can also be used to automatically organize incoming files in Dropbox. More on that in the next step.

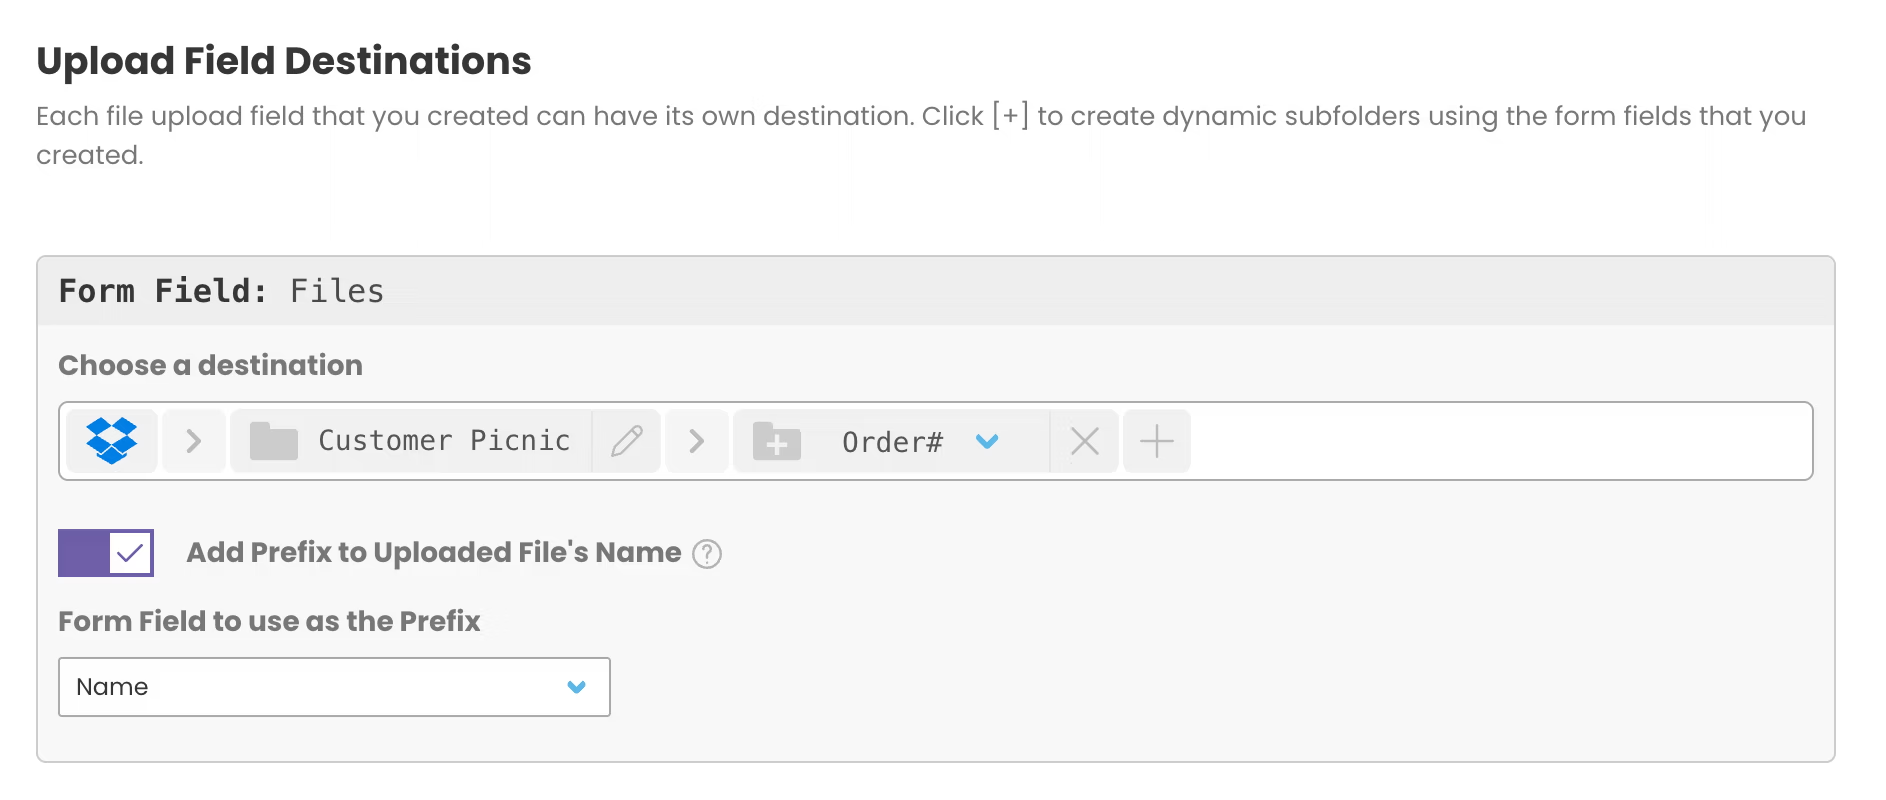
Step 5: Point the Portal at Dropbox and Set Up File Organization
In the Cloud Destination section, select the Dropbox folder where uploaded files should land. Then use the dynamic file organization settings to automatically create subfolders and prepend file names based on form field data.
For example, a portal that collects a project name and an uploader name could route each file into a subfolder named after the project, with filenames prepended by the uploader. So a photo from Sarah Johnson for the Website Redesign project arrives in your Dropbox as "Sarah Johnson - headshot.jpg" inside a "Website Redesign" folder. No manual sorting, no lost files.
For the full walkthrough, see the Dynamic File Organization tutorial.
Step 6: Publish and Share the Portal
Click Save and Publish. Your branded upload portal is live immediately.
Share as a Standalone Page
Every portal has a unique URL at ezfiledrop.com/yourteam/portal-name. The URL slug is editable. Share the link directly over email, in a proposal, or in a contract. No hosting, no configuration.
Embed on Your Website
Copy the embed code and paste it into your site. The embedded portal carries all your branding and fits seamlessly into your page design. Toggles let you show or hide the logo, header, and page text so the embedded version matches its surrounding page. Works on WordPress, Webflow, Squarespace, Wix, or any HTML-supporting site.

See the embedding tutorial for platform-specific setup.
Branded Portal vs. Dropbox File Request
If you're considering Dropbox File Request as an alternative, here's how the two compare on the branding dimensions that matter.
For a deeper breakdown of the differences, see How Is EZ File Drop Different from Using Dropbox Alone? and Can a Dropbox File Request Be Used to Collect Files From People?.
Start Collecting Files Through a Branded Dropbox Portal
Setting up a branded upload portal for Dropbox takes about five minutes. The files still live in your Dropbox, organized exactly how you want, using your existing Dropbox storage. The only thing that changes is the experience your clients, vendors, and collaborators see when they send files to you — now, it's yours.
Start a free trial with no credit card required. For more detail on how the Dropbox integration works, see the Dropbox integration page.
Written by Matt Townley
Try EZ File Drop Today!
Start Free TrialIntegrations
EZ File Drop + Google DriveEZ File Drop + DropboxEZ File Drop + OneDriveEZ File Drop + BoxStay in Touch


