How to upload files on a Squarespace website
Squarespace is one of the most popular website builders for small businesses, creatives, and portfolio sites. Clean templates, straightforward drag-and-drop editing, all-in-one hosting. What it doesn't have is a native way to let visitors upload files through a form. The built-in Form block collects text fields and basic data, but there's no file upload field, and there isn't a Squarespace-made plugin or extension that adds one.
So if you need to accept photos, videos, contracts, resumes, or creative briefs from visitors to your Squarespace site, you have three real options: a workaround with a third-party service like Google Forms or Dropbox File Request, a dedicated file collection tool embedded with code, or a form builder like Jotform that handles files through their own storage.
This guide walks through the embed approach using EZ File Drop, which routes files directly into your existing cloud storage without a Squarespace plugin. We'll use a running example throughout: a Customer Picnic photo collection form, letting event attendees upload photos and videos to be featured in a highlight video from the day.
Why Squarespace Doesn't Have a Native File Upload Form
A few quick things worth knowing before you start.
Squarespace's Form block has no file upload field. It supports text, checkboxes, radio buttons, dropdowns, email, and phone fields. That's it. You can't add a file upload field through the block editor, through CSS, or through the Squarespace extensions marketplace. This is a long-standing platform gap.
Workarounds exist but all have trade-offs. The common ones:
- Link to a Dropbox File Request. Paste a Dropbox File Request link into a Squarespace button or form field. Works, but the uploader leaves your Squarespace site to complete the upload on Dropbox's page. No branding, no custom form fields alongside the files, and you're locked into Dropbox as the destination.
- Embed a Google Form. Google Forms has a file upload field and can be embedded on Squarespace. The catch: Google Forms requires uploaders to sign in with a Google account before they can submit files, which is a deal-breaker for most client-facing or customer-facing workflows.
- Embed a Jotform. Jotform's file upload fields work well but files are held on Jotform's servers (their free tier includes 100 MB of storage; higher tiers cost extra) until you sync them to your cloud. File size limits also get restrictive quickly.
- Use EZ File Drop's embed code. Files route from the uploader's browser to your existing Google Drive, Dropbox, OneDrive, Box, or FTP, with branded upload pages and custom form fields. This is the path below.
One important compatibility note: Squarespace Code Blocks and Embed Blocks support JavaScript and iframes only on paid plans (Core, Plus, Advanced, Business, Commerce Basic, and Commerce Advanced). If you're on the free trial or Personal plan, custom JavaScript embeds won't run. EZ File Drop's embed code uses a <script> tag, so you'll need to be on the Core plan or higher for the embed to render properly.
Step 1: Set Up a Free EZ File Drop Trial
Sign up at ezfiledrop.com/join. Every new account starts on a 7-day Business plan trial with 1 GB of upload bandwidth. No credit card required.
Once you're in, connect EZ File Drop to your cloud storage destination of choice (Google Drive, Dropbox, OneDrive, Box, or FTP) through the Cloud Settings menu. This is a standard OAuth connection, so your cloud storage password never leaves that provider.
Step 2: Create Your Upload Form
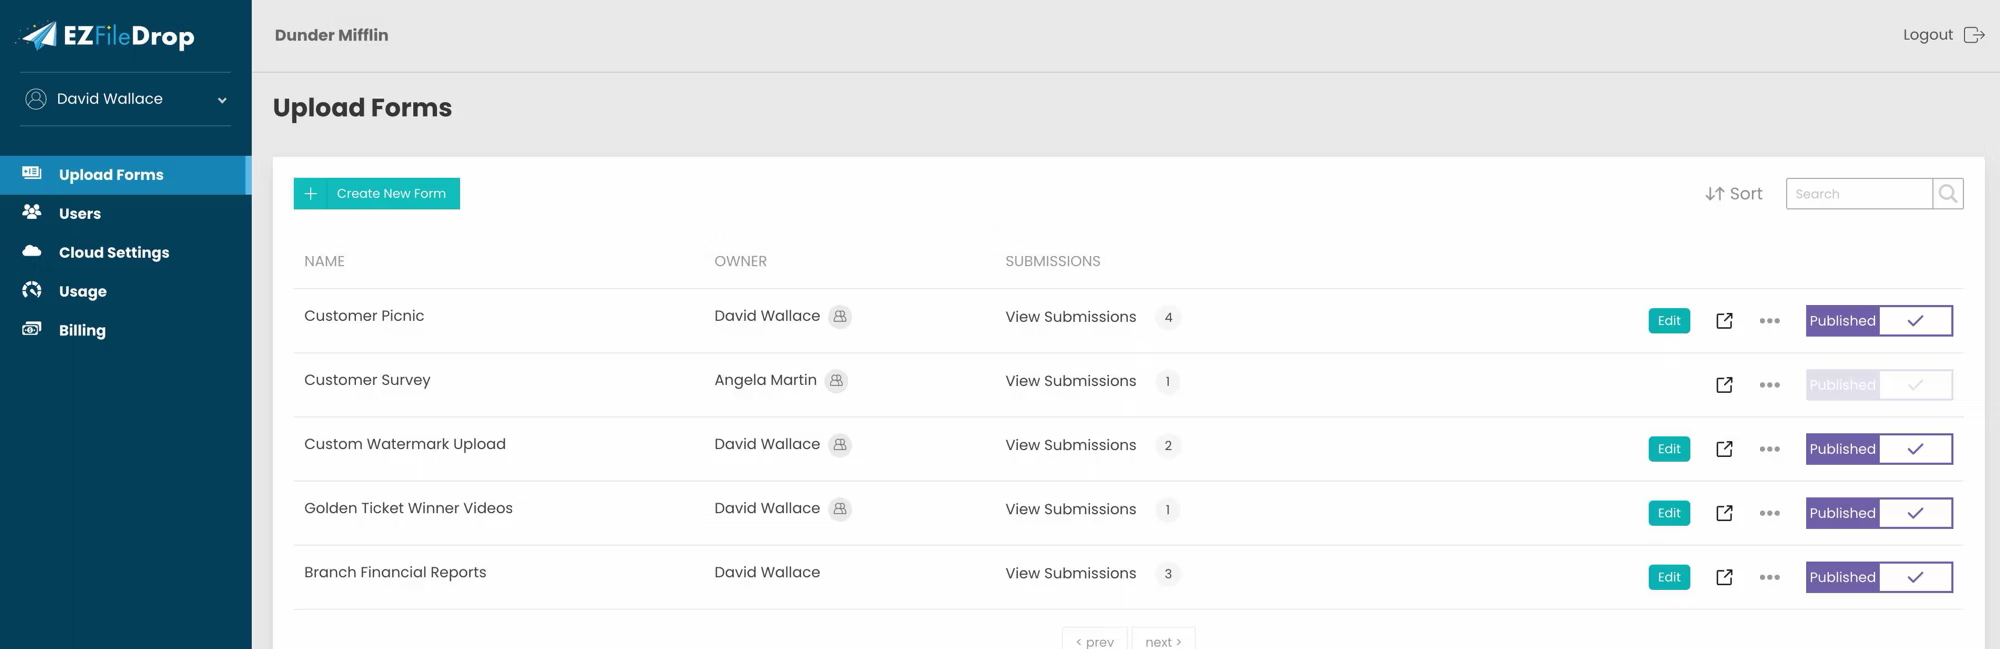
From the main menu, click Upload Forms, then Create New Form to launch the form editor.
Set a form name, page URL slug, and upload your logo. For our example, we're calling the form "Customer Picnic" and adding the event brand's logo so the form matches the host's identity.

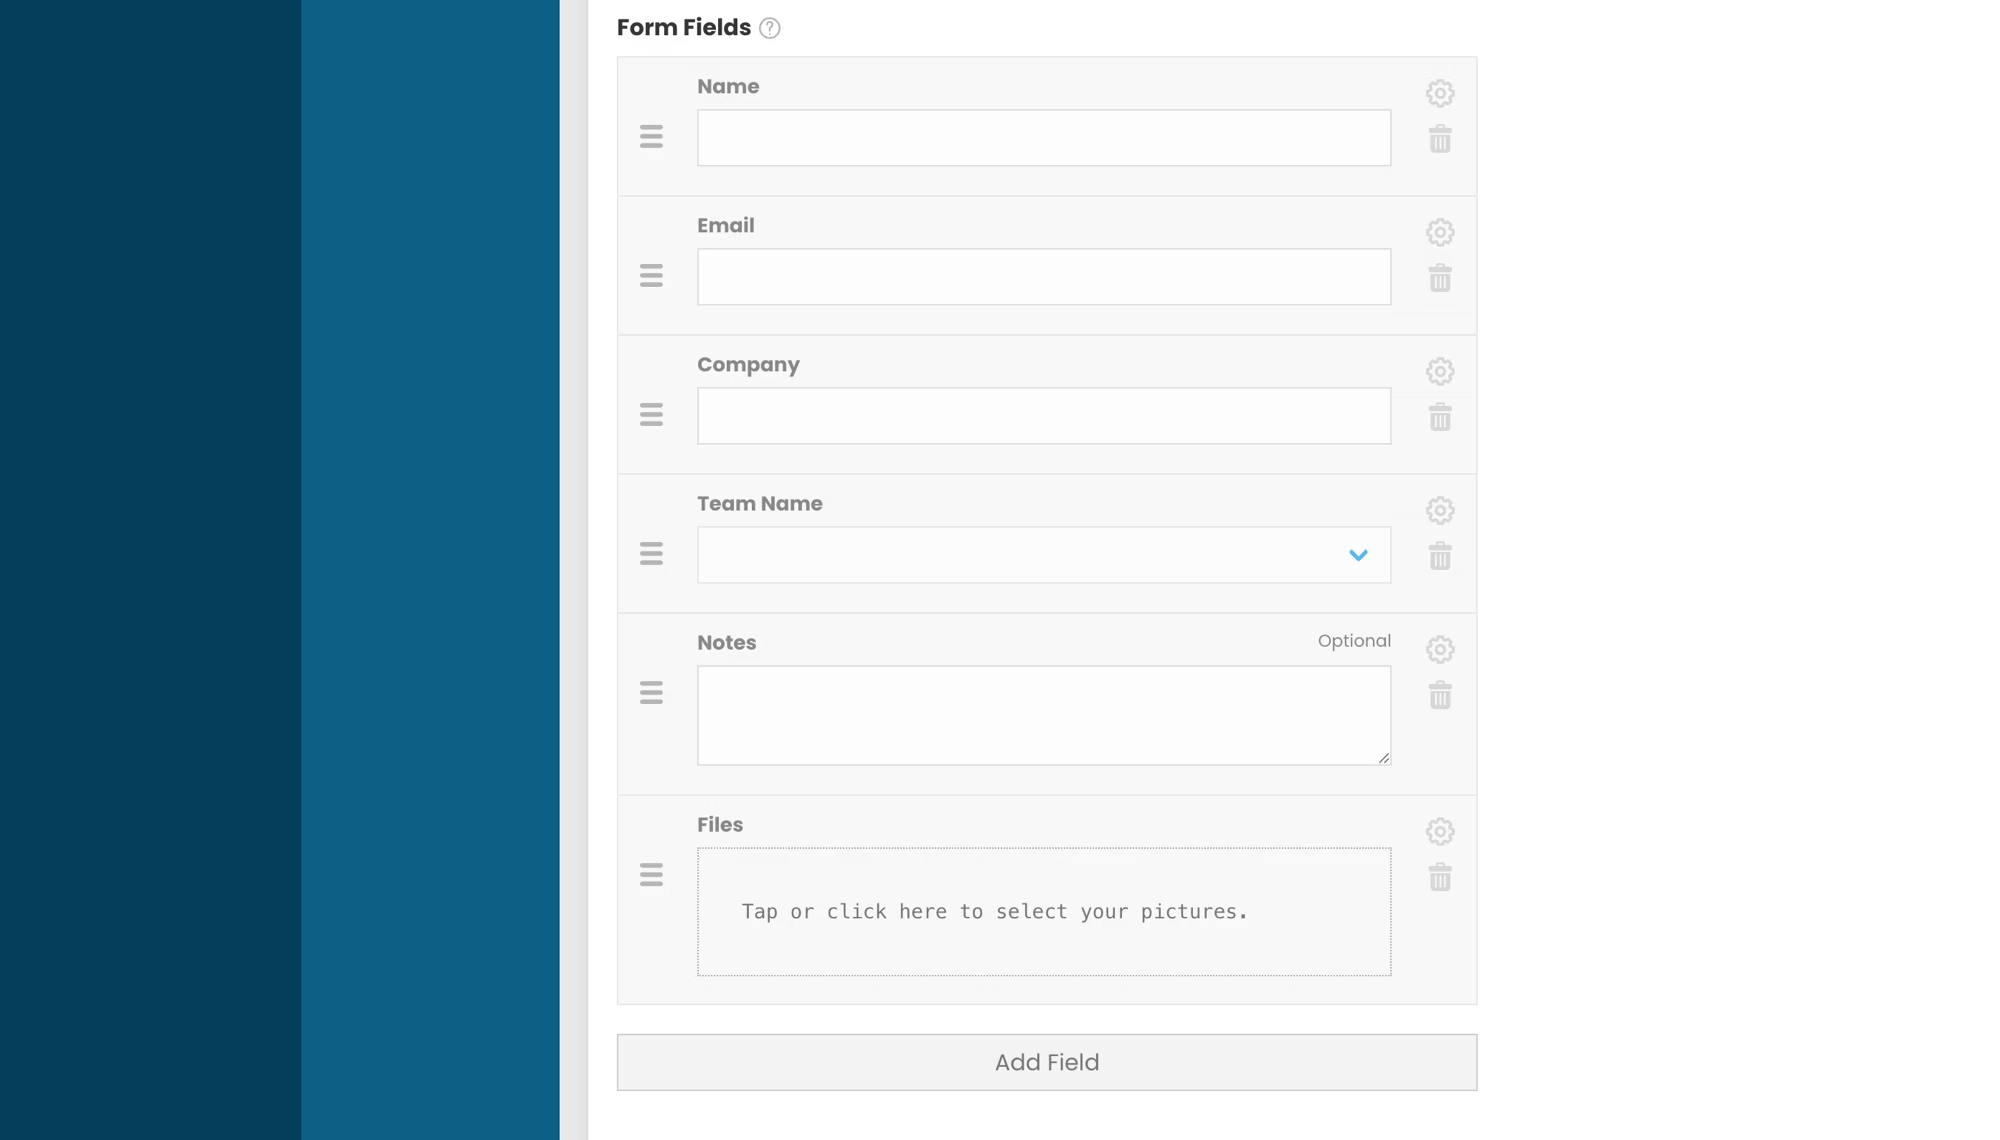
Next, think through what information you actually need alongside the files. For a customer event photo collection, common fields include name, email, company, team name, and optional notes. Keep it to a handful of fields so the experience stays fast.
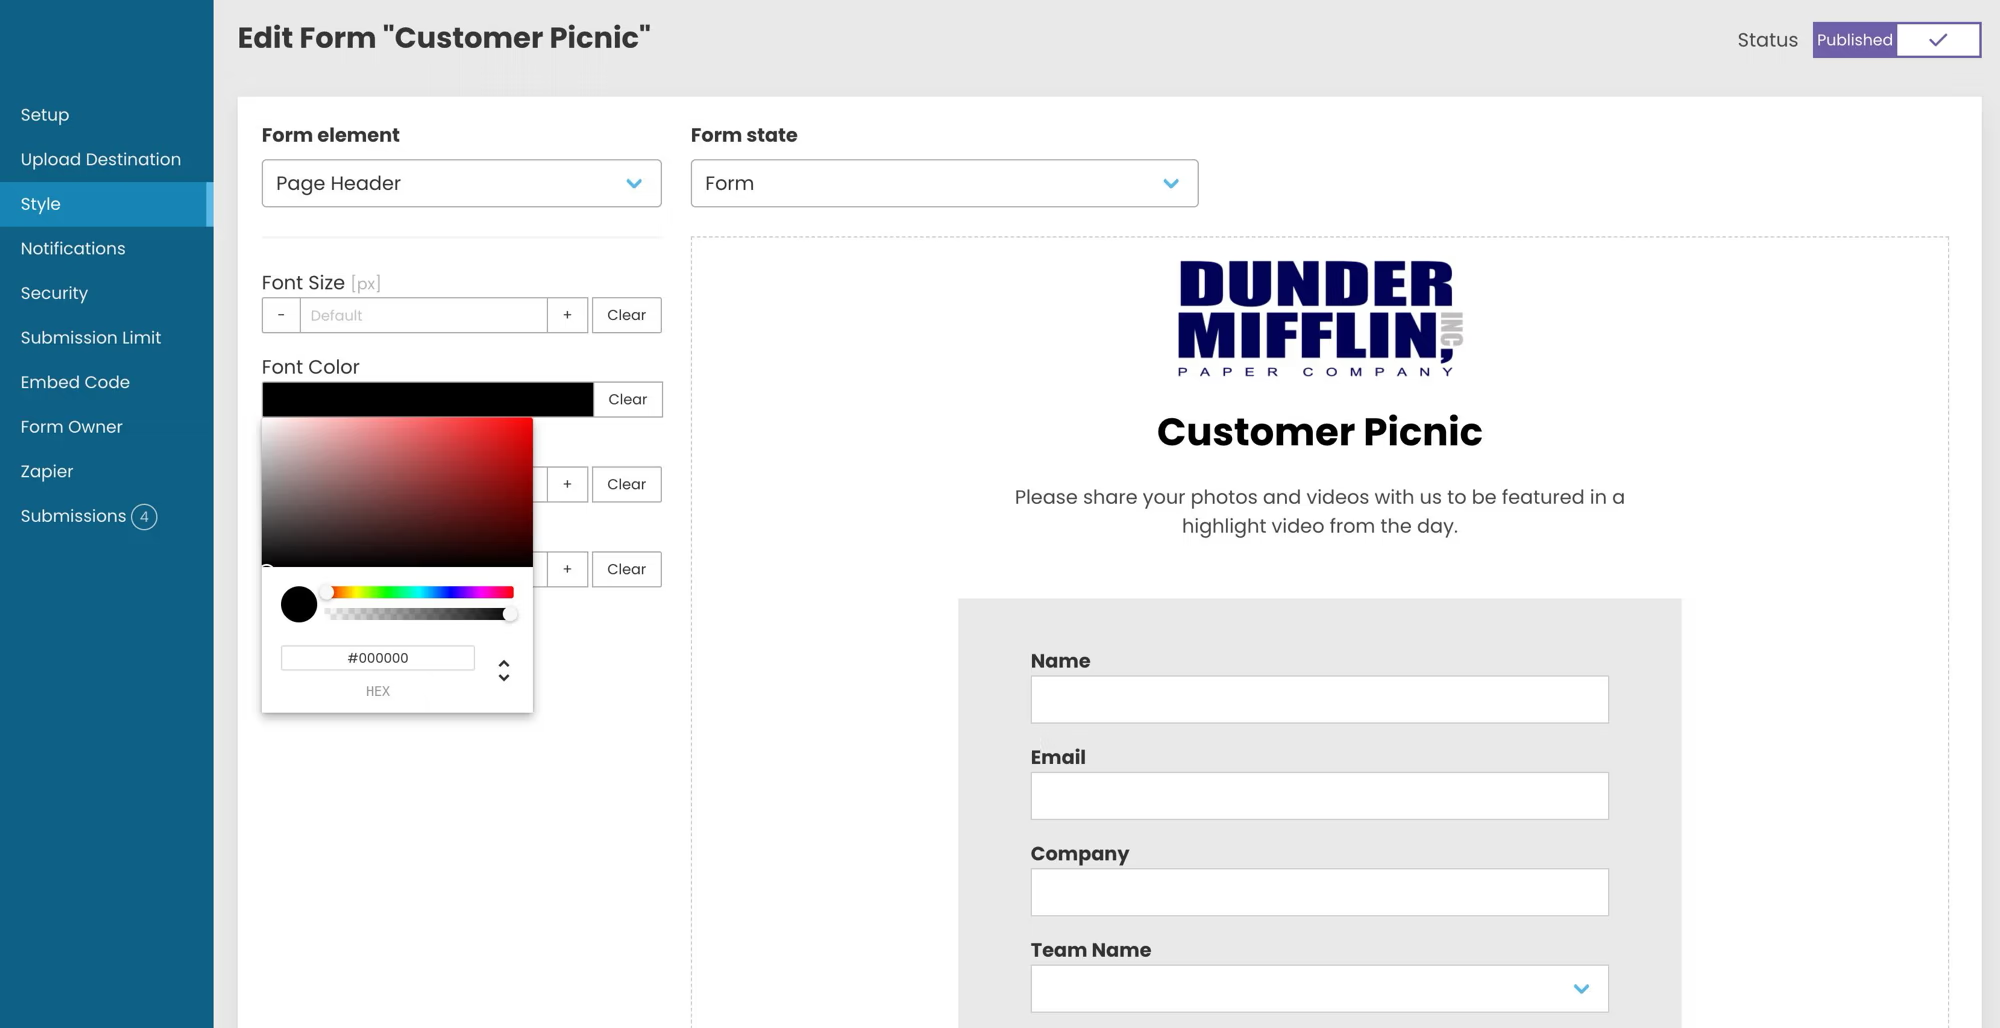
Then customize the style to match your Squarespace site. Colors, fonts, button style, background, and spacing are all editable. If you're on the EZ File Drop Business or Premium plan, the form is fully white-labeled with no EZ File Drop branding anywhere on the page or in notification emails.
Step 3: Publish and Test the Form
Once the form is configured, toggle the Status to Published. Visit the Page URL to see how the form looks to uploaders, and submit a test entry to confirm everything routes correctly to your cloud storage destination.
Check the form on both desktop and mobile before embedding. Squarespace sites are responsive by default and the embedded form should scale cleanly, but it's worth verifying.
Step 4: Embed the Form on Your Squarespace Site
Now the fun part. In EZ File Drop, click Edit on your form, then select Embed Code and copy the code snippet.

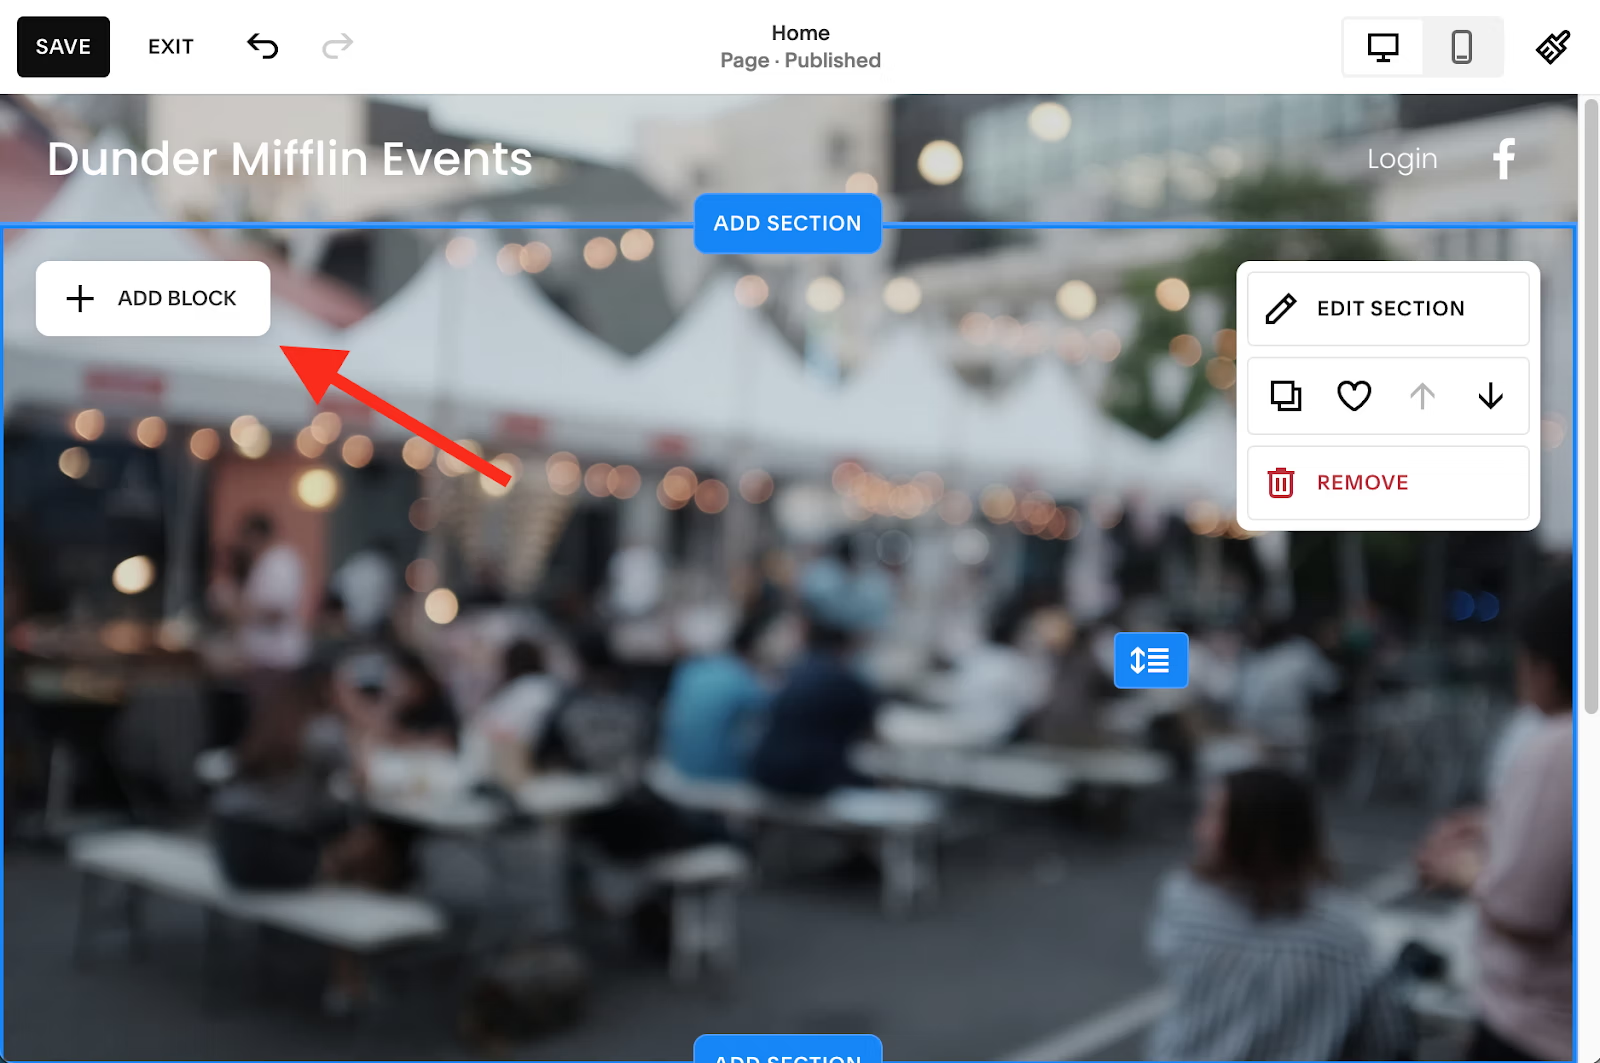
Head over to your Squarespace site and navigate to the page where you want the form to appear. Click Edit to enter the page editor, then find the section where the form should go and click + ADD BLOCK.
In the block picker that appears, scroll down to the Basic category and select Embed.
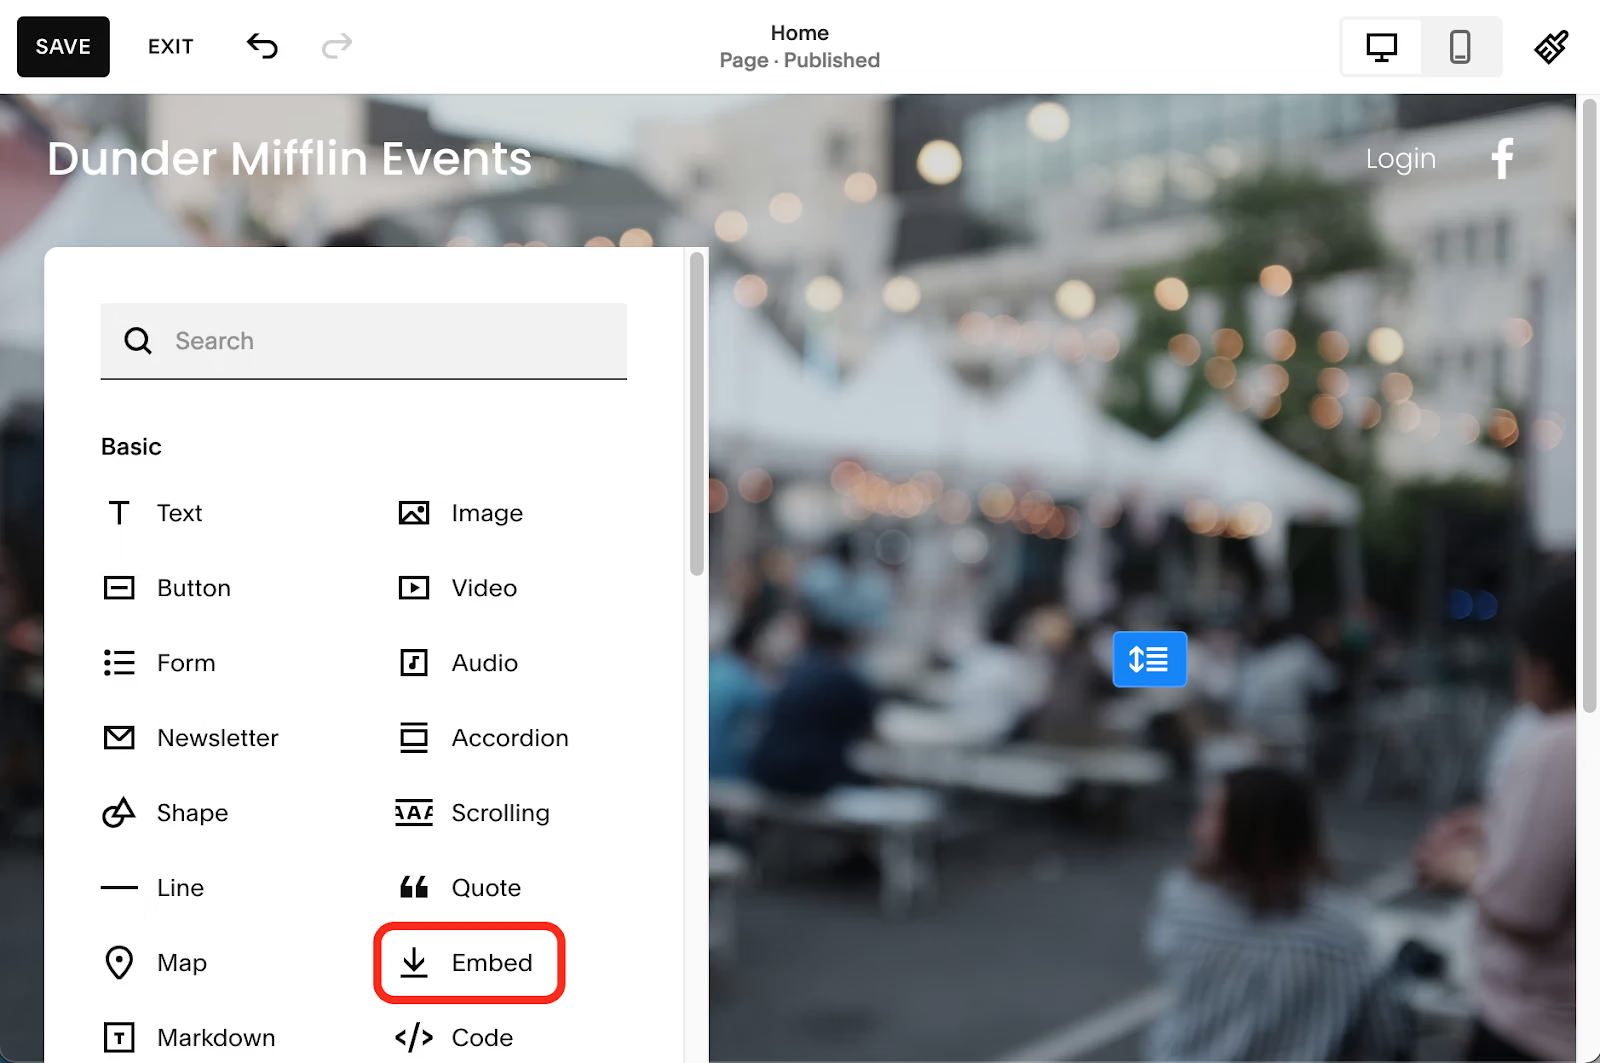
An Embed Block will appear on the page. Click into the block, then click the small code icon or "Add code..." prompt to open the embed code editor.
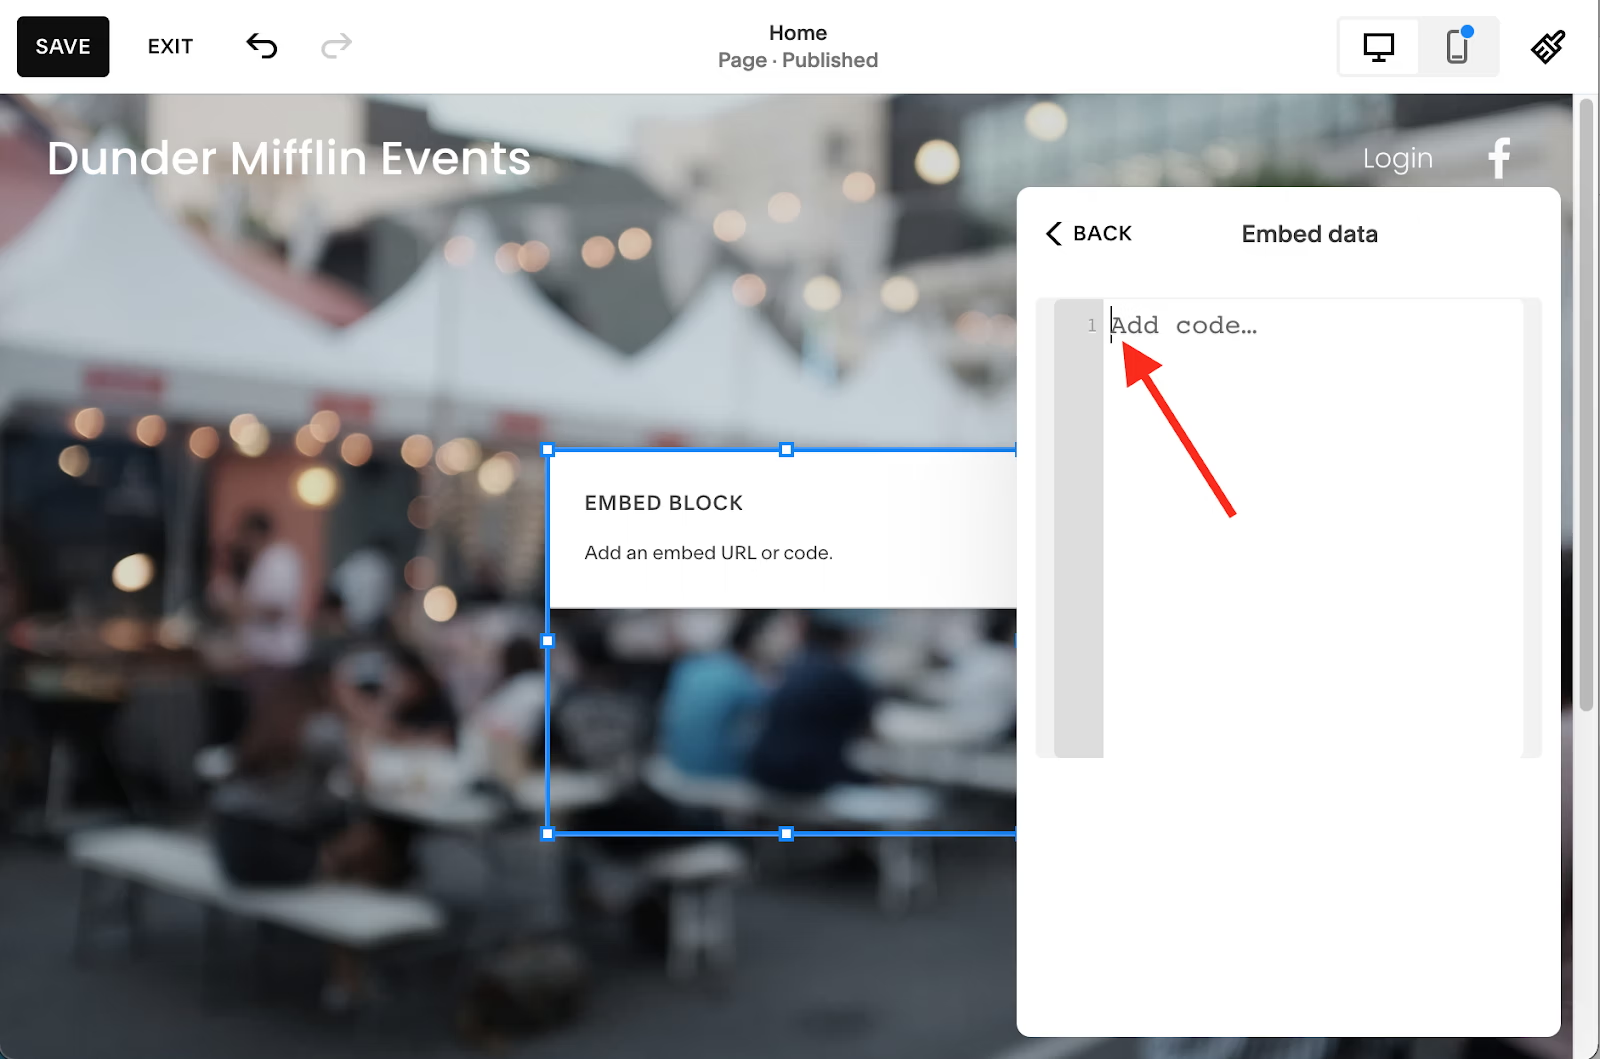
Paste the EZ File Drop embed code into the code field, then click outside the block to apply. Save the page, then preview or publish to see the form render. Here's what the Customer Picnic form looks like live on the site:

That's it. The form is live on your Squarespace site, matching your brand, and routing every submission directly to your cloud storage.
Note for Classic Editor users: If your Squarespace site is still on version 7.0 with the Classic Editor rather than Fluid Engine, the process is the same except you'll add a Code Block (instead of an Embed Block) from the block picker and paste the embed code there. The visual experience of adding and editing blocks looks slightly different but the end result is identical.
Tips for Optimizing Your Upload Form
A few things that make the difference between a form people use and a form people abandon:
Keep it short. Every extra field is a reason to bounce. For something like event photo collection, name and email are often enough; company and team name are bonuses, not requirements.
Be specific about what you want. "Upload your photos" is vague. "Share your photos and videos from today's picnic — we'll feature the best in our highlight video" gives context and motivation. The form's description field handles this.
Set file size and type limits. EZ File Drop lets you restrict uploads to specific formats (JPG, MP4, PDF, etc.) and cap the file size. This prevents someone from accidentally uploading a 20 GB raw video file that eats your storage quota, and it filters out irrelevant formats before they hit your cloud.
Test on mobile. Most uploaders will come from phones, especially for event photo collection. Walk through the whole experience on your phone before promoting the form.
Other Things Worth Knowing About EZ File Drop on Squarespace
A few capabilities that come in handy once the basic form is live:
- Dynamic file organization. Use form field values to automatically create named folders in your cloud storage. For the Customer Picnic example, uploads could sort into subfolders by Team Name, so files from each team end up organized without manual work. Learn more about dynamic file organization.
- Unlimited forms per account. Run one form per event, campaign, or project. Each form has its own destination folder, style, fields, and notifications.
- Multiple team members. The Business plan includes up to 20 users with two role types (team owners and team members), so collaborators can access submissions without sharing a single login. Learn more about users and team collaboration.
- Standalone page option. If you ever need to collect files without the Squarespace embed (say, for a one-off campaign or a link shared by email), every form also lives at its own URL that you can share directly.
Frequently Asked Questions
Does Squarespace have a native file upload form?
No. Squarespace's built-in Form block collects text fields, checkboxes, radio buttons, dropdowns, email, and phone data, but it does not include a file upload field. There's no Squarespace-made plugin or extension that adds one either. To accept file uploads on a Squarespace site, you need to embed a third-party tool like EZ File Drop using a Squarespace Embed Block or Code Block.
What Squarespace plan do I need to embed a file upload form?
Squarespace Code Blocks and Embed Blocks support JavaScript and iframes only on paid plans: Core, Plus, Advanced, Business, Commerce Basic, and Commerce Advanced. JavaScript-based embeds like EZ File Drop will not run on the free trial or any pre-Core plan. If you're on the Core plan or higher, the embed will work correctly.
Can I use Dropbox File Request on Squarespace instead?
You can paste a Dropbox File Request link into a Squarespace button or form field, but the uploader will leave your Squarespace site to complete the upload on Dropbox's page. There's no branding, no custom form fields alongside the files, and the destination is locked to Dropbox. For a branded in-page experience routing to Google Drive, Dropbox, OneDrive, Box, or FTP, an embedded tool like EZ File Drop is the better option.
Where do the files go when someone uploads through an EZ File Drop form on Squarespace?
Files route directly to whichever cloud storage destination you've connected in EZ File Drop: Google Drive, Dropbox, OneDrive, Box, or a custom FTP location. You can also organize uploads automatically into named folders based on form field values using dynamic file organization.
Will the EZ File Drop form match my Squarespace site's branding?
Yes. EZ File Drop lets you upload your logo, customize colors, fonts, button styles, and spacing to match your site. On the Business and Premium plans, the form is fully white-labeled with no EZ File Drop branding anywhere on the page or in notification emails.
Try EZ File Drop free for 7 days and see how quickly you can have a branded file upload form running on your Squarespace site.
Written by Matt Townley
Try EZ File Drop Today!
Start Free TrialIntegrations
EZ File Drop + Google DriveEZ File Drop + DropboxEZ File Drop + OneDriveEZ File Drop + BoxStay in Touch


