How to make a file upload form for Google Drive
If you need people to upload files directly to your Google Drive, you've probably discovered that Google doesn't make this easy. Shared folder links require uploaders to have Google accounts. Google Forms with file upload fields force respondents to sign in. And simply emailing files back and forth leads to inbox clutter, size limits, and zero organization.
What you actually need is a file upload form for Google Drive — a simple, branded page where anyone can submit files that land directly in your Drive folder, organized exactly how you want them. No login required on their end. No app downloads. No permission headaches.
This guide walks through how to build one using EZ File Drop, a tool purpose-built for exactly this. We'll cover the full setup: connecting Google Drive, building your form, customizing the branding, organizing incoming files automatically, and sharing the form with uploaders.
Why Google Drive Alone Falls Short for File Collection
Google Drive is excellent for storing and collaborating on files. But when it comes to collecting files from other people like clients, vendors, students, and team members, it has some real gaps.
Sharing a Google Drive folder means the uploader needs a Google account and must navigate your folder structure. They can also see other people's uploads, which may be a privacy issue. There's no way to collect information alongside the files, like a project name or contact details. And there's no automatic organization. Every file lands in the same folder with whatever name the uploader gave it.
Google Forms can accept file uploads, but the uploader must be signed into a Google account. If you enable file uploads, the form can't be embedded on a website. You also can't customize the branding or control how files are named and organized in Drive.
These limitations are why tools like EZ File Drop exist. It sits on top of Google Drive and adds a file intake layer with form fields, branding, dynamic file organization, and zero friction for the person uploading.
What You'll Need Before You Start
Setting up a file upload form for Google Drive takes about five minutes. Here's what you need:
A Google account with Google Drive access (personal Gmail or Google Workspace both work, including Shared Drives). You'll also need an EZ File Drop account. You can start a free trial with no credit card required. The trial gives you 7 days on the Business plan with 1 GB of upload bandwidth, which is enough to build and test your form.
That's it. No coding, no plugins, no server configuration.
Step 1: Create Your EZ File Drop Account
Head to ezfiledrop.com/join and sign up. Every new account starts on a Business plan trial, so you'll have access to all the features covered in this guide. You can evaluate everything before deciding on a paid plan.
Step 2: Connect Google Drive
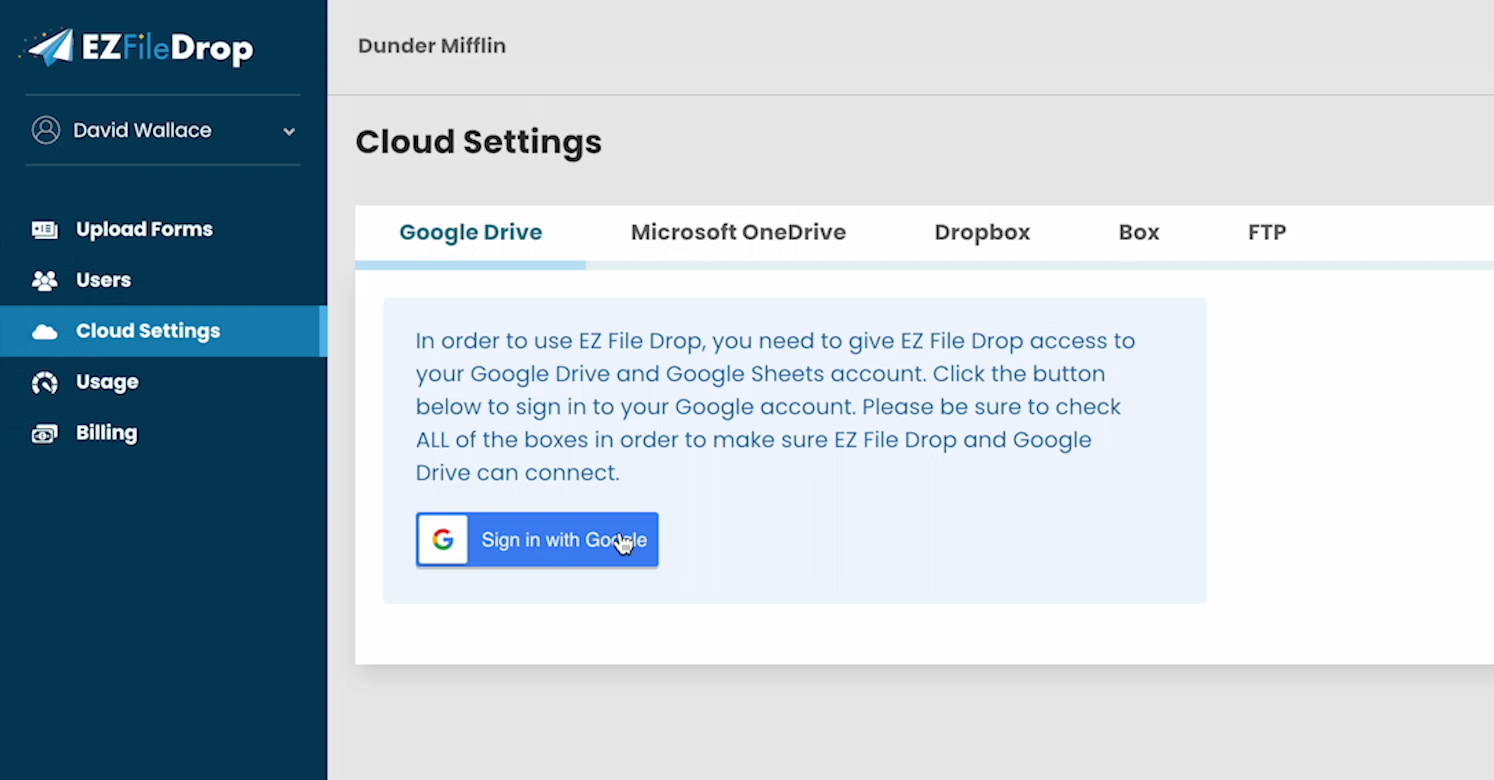
Once you're logged in, you'll need to connect your Google Drive account. EZ File Drop uses OAuth2 for authentication, which means you authorize access through Google's own login screen. EZ File Drop never sees your Google password.
You can connect to your personal Google Drive (My Drive) or a Google Workspace Shared Drive. Each upload form can have its own destination folder, so you can route files from different forms to different locations in Drive.
For a detailed walkthrough of the connection process, see the Google Drive connection tutorial.
Step 3: Build Your Upload Form
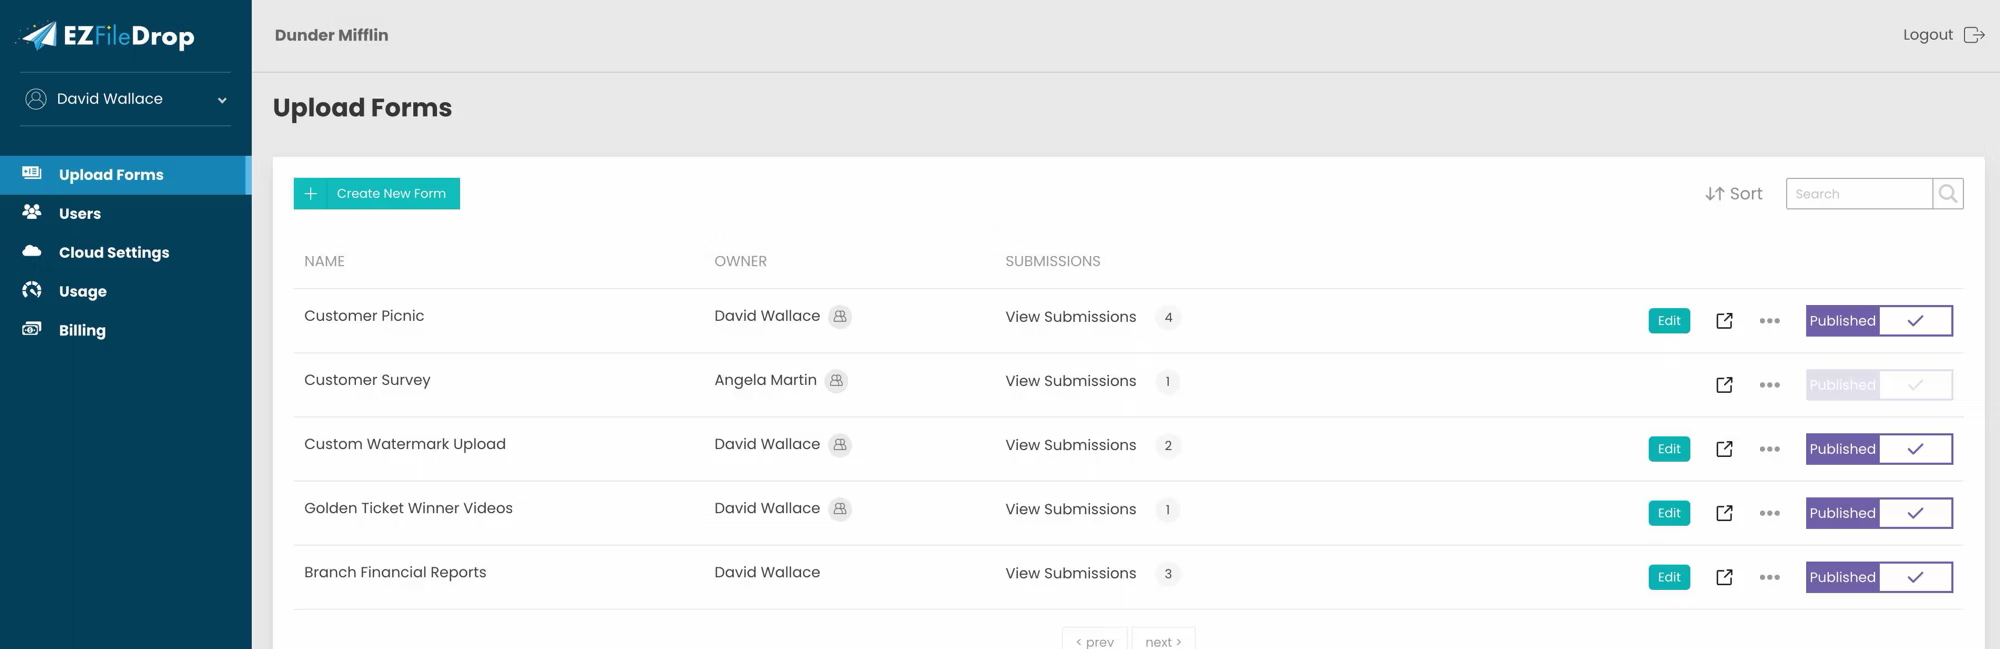
Click "Upload Forms" in the main menu, then "Create New Form." The Upload Form editor opens, and this is where you'll configure everything.
Name and URL
Start by giving your form a name. This is an internal label that helps you identify the form in your dashboard. The name auto-populates the Page URL, which you can customize. For example, if you name the form "Client File Upload," the URL might become ezfiledrop.com/your-team/client-file-upload.
Page Header and Welcome Message
Add a logo, a custom page header, and a welcome message. Even if you plan to embed the form on your own website later, it's worth uploading a logo here. The logo appears in the email notifications that EZ File Drop sends to uploaders and your team.

Custom Form Fields
This is one of the biggest advantages of using a dedicated file upload form for Google Drive instead of sharing a folder link. You can collect information alongside the uploaded files.
EZ File Drop supports several field types: text fields, email fields, phone number fields, comment boxes, dropdown menus, radio buttons, and checkboxes. Set each field as required or optional.
Common examples include collecting the uploader's name and email, a project name or ID, a dropdown for department or file category, and a checkbox confirming agreement to terms. These fields aren't just for data collection. As you'll see in the next section, they can also be used to automatically organize files in Google Drive.
File Drop Zones
The file drop zone is where uploaders drag and drop files or click to browse. On Business and Premium plans, you can add multiple file drop zones per form. This is useful if you need to collect different types of files separately (e.g., "Upload your headshot" and "Upload your resume").
You can also set file type restrictions (only allow PDFs, for example) and file size limits per form.

Step 4: Set Up Dynamic File Organization
This is the feature that makes EZ File Drop especially powerful as a Google Drive file upload form. Instead of every file landing in a single folder, you can use form field data to automatically create subfolders and rename files.
For example, if your form collects the uploader's name, you can configure EZ File Drop to create a subfolder in Google Drive using that name. Every file from "Sarah Johnson" goes into a folder called "Sarah Johnson." Files from "Mike Chen" go into "Mike Chen." You can even create nested subfolders using multiple fields.
You can also prepend form field data to file names. If Sarah uploads "invoice.pdf," it arrives in your Google Drive as "Sarah Johnson - invoice.pdf."
For a deeper dive, check out the Dynamic File Organization tutorial.
Step 5: Customize the Branding and Style
EZ File Drop gives you full control over how your file upload form looks. On the Business and Premium plans, forms are white-labeled, so no EZ File Drop branding appears.
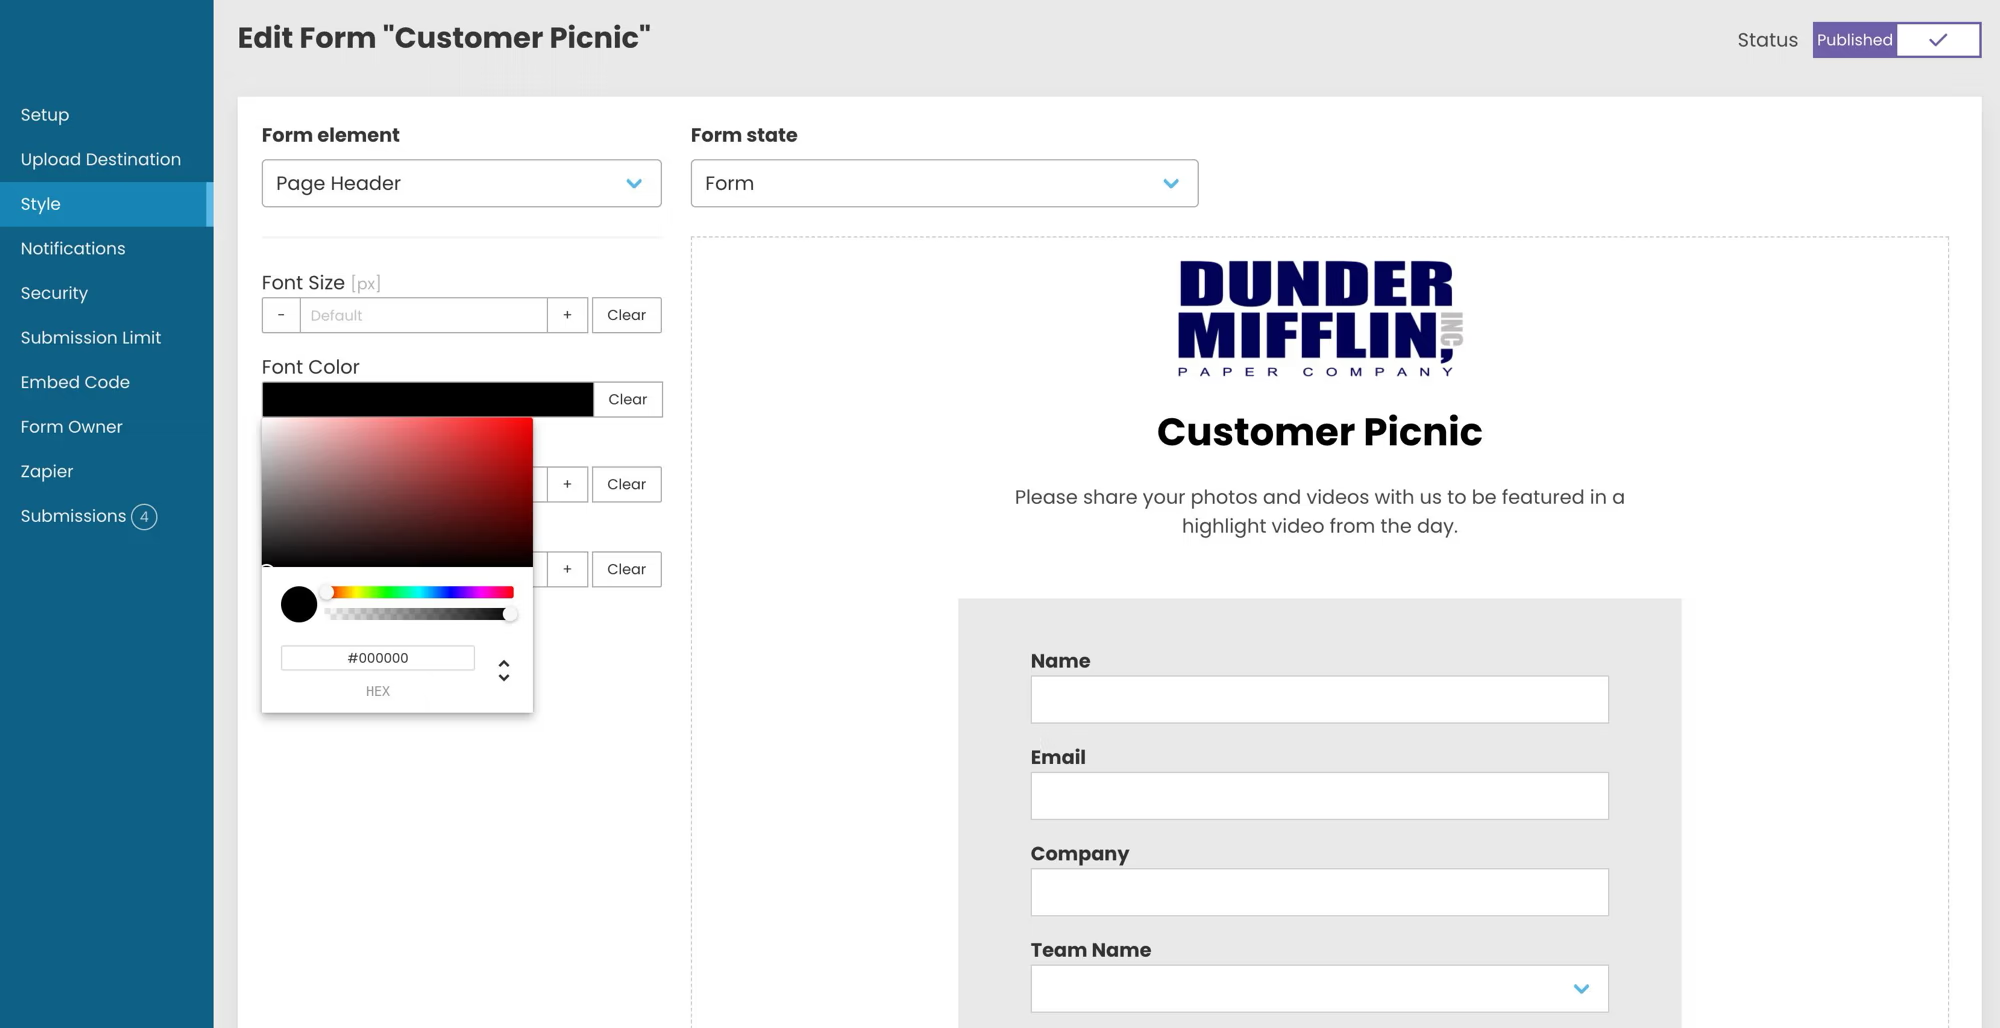
The Style editor lets you customize colors, fonts, button styles, backgrounds, and more for every element of the form. You can match the form to your company's brand guidelines so it looks like a native part of your website or workflow.
For a full walkthrough of the styling options, see the customization and styling tutorial.
Step 6: Configure Notifications
EZ File Drop sends email notifications to three separate groups: the uploader (confirming their submission), your team (alerting you that files have arrived), and any third-party recipients you specify.
You can use the default notification templates or paste custom HTML for fully branded emails. Notification variables let you include the upload file count, form field data, and direct links to the uploaded files.
For setup details, see the Email Notifications tutorial.
Step 7: Publish and Share Your Form
Click "Save and Publish," and your file upload form for Google Drive is live. You have two ways to share it.
Standalone Web Page
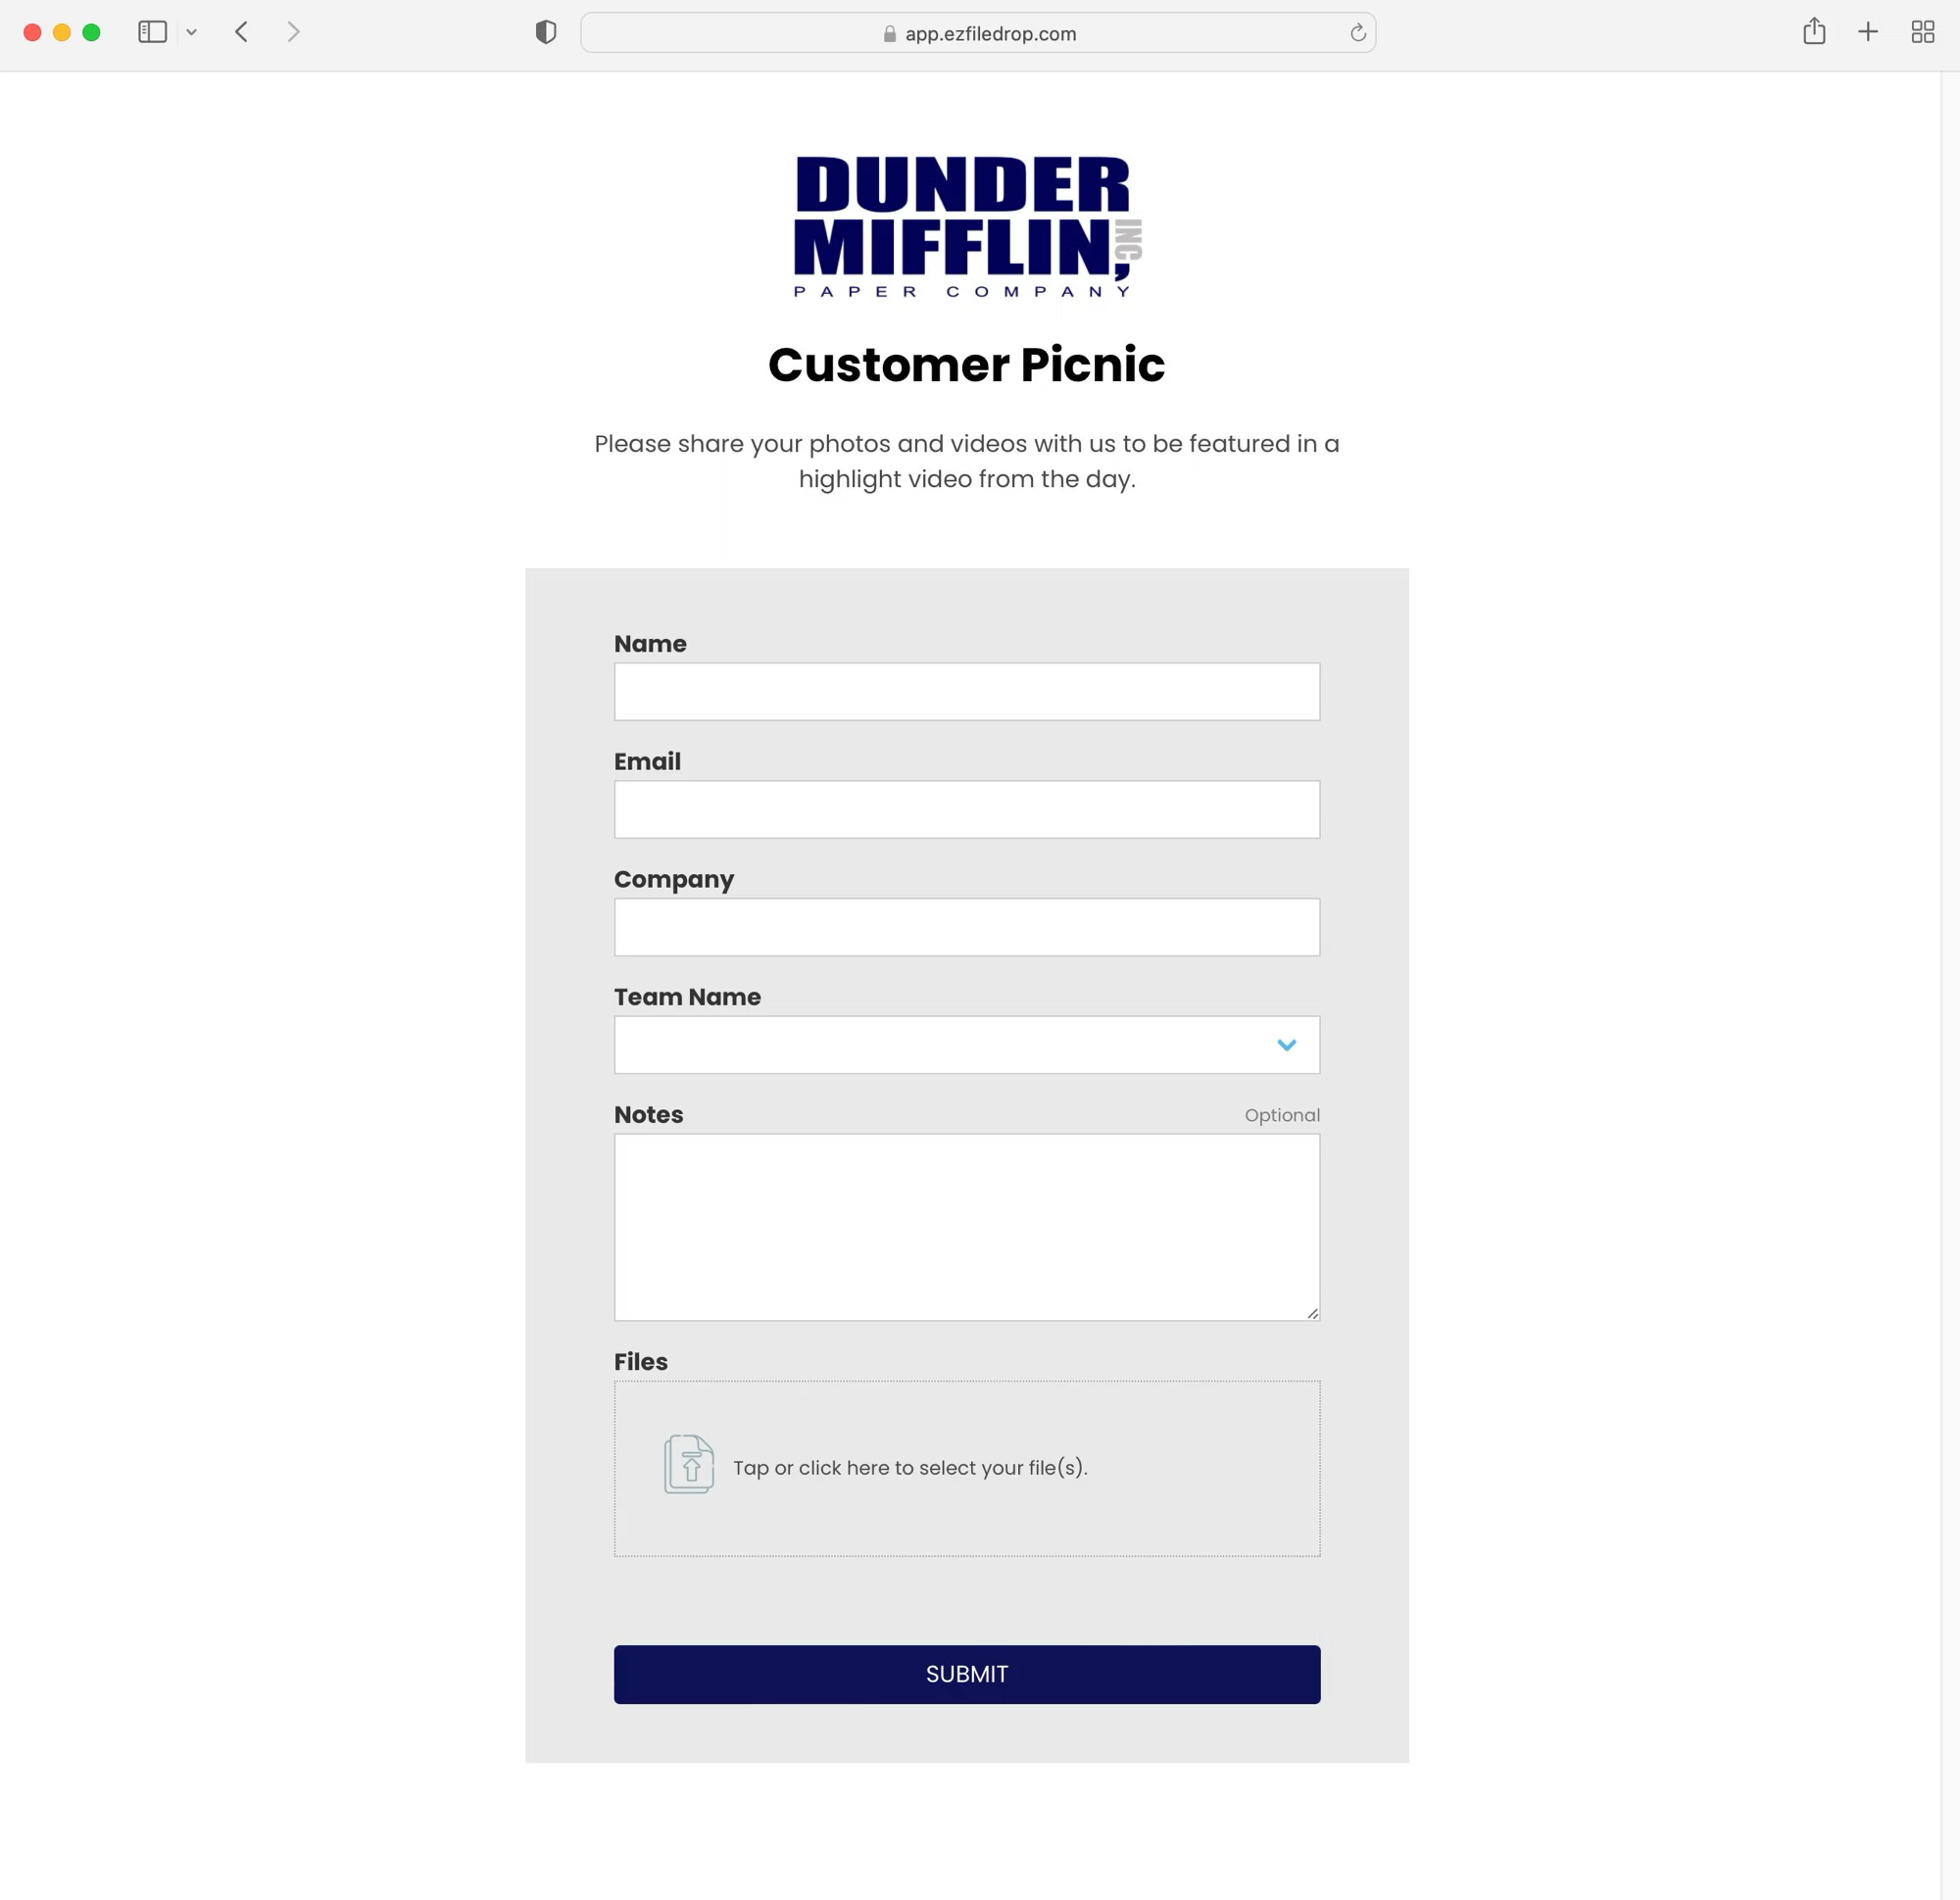
Every Upload Form gets its own custom URL that works as a standalone page. No hosting or configuration required. Just share the link via email, text, or anywhere else, and anyone can start uploading files to your Google Drive immediately.
Embed on Your Website
You can also embed the form on your own website. EZ File Drop generates an embed code that you copy and paste into any website platform: WordPress, Webflow, Wix, Squarespace, or any site that supports HTML embeds. No coding or plugin required. The embed code includes toggles to show or hide the logo, header, and page text so the form integrates cleanly with your site's design.
For step-by-step embed instructions, see the embedding tutorial.

Tips for Getting the Most Out of Your Google Drive Upload Form
Use URL Query Parameters for Pre-Filled Forms
If you're sending the form link to someone whose name or project you already know, you can pre-fill form fields using URL query parameters. This saves the uploader time and ensures consistent data entry.
Sync Form Data to Google Sheets
EZ File Drop can sync all form submission data to a Google Sheet in real time. This gives you a running log of every upload, including who submitted, what they entered in the form fields, when they uploaded, and how many files. No need to check the submission manager manually.
Set Up Submission Limits or Expiration Dates
If your form is for a specific event or project, you can set a submission limit (e.g., only accept 50 submissions) or an expiration date (disable the form after a certain date and time). A custom message displays to anyone who tries to upload after the limit is reached.
Frequently Asked Questions
Do uploaders need a Google account to use the form?
No. That's the whole point. Anyone can upload files to your Google Drive through an EZ File Drop form without logging in, creating an account, or downloading an app.
Can I accept uploads from mobile devices?
Yes. The upload form is fully mobile-friendly. Uploaders can submit files from any iOS or Android device at full resolution with no compression or quality loss.
Is there a file size limit?
The platform maximum is 150 GB per file. You can set a lower per-file limit on each form if needed. Monthly upload bandwidth limits depend on your plan: 5 GB on Starter, 100 GB on Business, and 1 TB on Premium.
Can I restrict which file types are accepted?
Yes. You can restrict uploads to specific file extensions on a per-form basis. For example, you could limit a form to only accept PDFs, or only image files.
What happens to the files after they're uploaded?
Files are temporarily staged on encrypted Amazon S3 servers, then transferred directly to your Google Drive. Once the transfer completes, the temporary copy is deleted. EZ File Drop does not store your files long-term.
Can I use this with Google Workspace (formerly G Suite)?
Yes. EZ File Drop works with both personal Gmail accounts and Google Workspace accounts, including Shared Drives.
Start Collecting Files in Google Drive Today
Building a file upload form for Google Drive doesn't need to be complicated. With EZ File Drop, you can have a branded, organized file collection system connected to your Google Drive in under five minutes.
→ See how EZ File Drop works with Google Drive
Written by Matt Townley
Try EZ File Drop Today!
Start Free TrialIntegrations
EZ File Drop + Google DriveEZ File Drop + DropboxEZ File Drop + OneDriveEZ File Drop + BoxStay in Touch


